Blog
Installing a Pine Tongue and Groove Ceiling On Our Skoolie

Making a skoolie a comfortable, useful living area calls for careful design and construction. Our most significant improvement was putting in a pine tongue and groove ceiling. This project improved the look of our skoolie as well as provided durability and an insulating layer. We will walk you through the procedure, difficulties, and pointers for obtaining a professional-looking finish below.
Why Choose Pine Tongue and Groove for a Skoolie Ceiling?
Because of its natural beauty, reasonable cost, and simplicity of installation, pine tongue and groove boards are a common choice for ceilings. The tight fit guaranteed by the interlocking construction helps to minimise gaps and produce a flawless look. Pine also is light, which makes it perfect for mobile environments like skoolies where weight distribution is vital.
Materials and Tools Needed
We organised all the tools and supplies before beginning. Among these included:
- Boards for Pine Tongues and Grooves
- Measuring a pencil and a tape
- circular saw, sometimes known as the mitre saw
- Brads or nail gun nails
- glue made of wood
- Sandpaper—also known as sander
- stain or sealant (optional)
- Ladder, scaffolding
Having everything handy reduced distractions and streamlined the process.
Preparing the Skoolie Ceiling
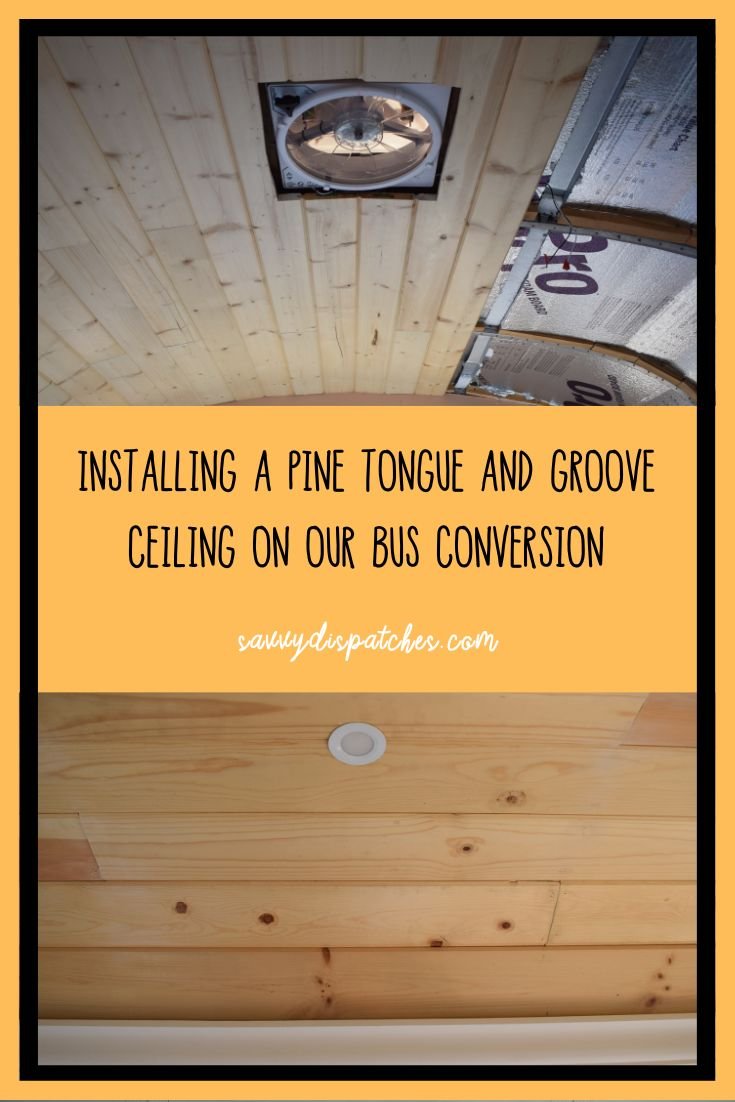
A good installation depends on preparation. We first eliminated any current ceiling coverings and looked over the metal structure for deterioration or rust. Then, I meticulously cleaned the surface to get trash and dust off. We laid firm foam boards between the metal ribs, adhesively attaching them to increase insulation. This stage produced a level surface for the pine boards and thermal insulation.
Measuring and Cutting the Pine Boards
A professional finish depends critically on accurate measurements. We considered any curves or abnormalities and measured the ceiling’s width and length. Cut the wood tongue and groove boards to the proper lengths with a circular saw. We adjusted slightly as necessary to provide a tight fit. Edge sanding each board guaranteed a nice surface and helped to eliminate splinters.
Installing the Pine Tongue and Groove Ceiling
Working our way from one end of the skoolie, we started the installation. Extra stability came from lightly applying wood glue to the grooves. We anchored every board to the metal ribs with a nail gun, making sure the nails were equally spaced. Every board could lock into place easily because of the tongue and groove design, therefore producing a snug fit.
We checked for alignment often as we developed and corrected as needed. We cut the boards at exact angles using a mitre saw for corners and edges, therefore guaranteeing a neat and finished appearance.
Addressing Challenges
Working around the sloped roof of the school became one of our toughest obstacles. Before installation, we slightly curved the wood boards to fit the curvature. We also held the boards in place throughout the glue’s drying using clamps. Using spacers during installation helped us to guarantee constant spacing between the boards, which presented still another difficulty.
Finishing Touches
We sanded the entire ceiling to eliminate any flaws once every board was in place. We put a clear finish on the pine to accentuate its inherent beauty and shield the wood from moisture and deterioration. Staining the wood is a great way for people who want a different appearance to fit the interior style of the schoolie.
Benefits of a Pine Tongue and Groove Ceiling
The pine tongue and groove ceiling changed the inside of our schoolie. The pine’s natural, warm tones produced a friendly and inviting environment. Furthermore, the better insulation the ceiling offered helped to make the room more pleasant in different temperatures. Pine’s strength guarantees the ceiling will resist the demands of road life.
Tips for a Successful Installation
- Before beginning, ahead of time compile all tools and supplies.
- Before cutting, double-check and record exact measurements.
- For even fit and extra stability, use wood glue.
- Work methodically, working from one end and then to the other.
- For an even finish, sand the boards both before and after installation.
- To preserve and accentuate the wood, think about using a stain or sealant.
One satisfying undertaking that greatly enhanced the operation and appearance of our school was building a pine tongue and groove ceiling. We produced a professional-looking finish we’re happy with by methodically approaching problems as they emerged. With the correct materials and preparation, this project is doable regardless of experience level concerning do-it-yourself interests.