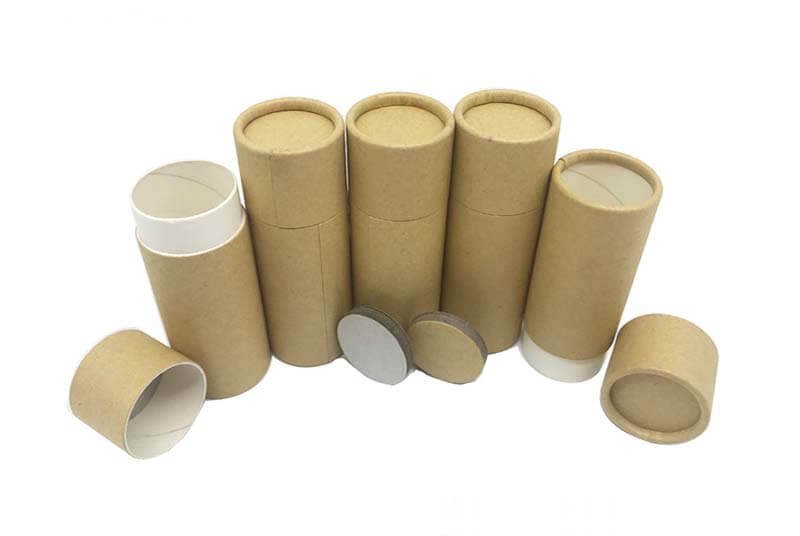
In an age where sustainability meets innovation, packaging solutions are evolving fast—and Push Up Paper Tubes are leading the charge, especially in the lip balm industry. These clever, eco-friendly containers are perfect for handmade lip balms and solid cosmetics. But what materials do you actually need to make the most of these paper tubes? Let’s dive in and explore everything you need to get started.
What Are Push-up Lip Balm Paper Tubes?
Before jumping into the materials list, it’s essential to understand what these tubes are. Push-up Paper Tubes are cylindrical containers made mostly from biodegradable cardboard or kraft paper. Unlike traditional plastic twist-up tubes, these are pushed from the bottom to dispense the product.
You’ll also come across Twist Up Paper Tubes, which have a similar look but use a built-in rotating base to raise the product. Both serve the same purpose but offer slightly different user experiences.
These tubes are perfect for:
- Lip balms
- Solid perfumes
- Lotion sticks
- Deodorant bars
Why Choose Push-up Over Traditional Tubes?
Here’s the short version: eco-friendliness. Push-up Paper Tubes are biodegradable, compostable, and recyclable, making them a top choice for anyone wanting to ditch plastic.
Plus, they offer:
- A rustic, natural aesthetic
- Easy labeling and branding
- A user-friendly design with zero plastic waste
- Strong market appeal for conscious consumers
Now, let’s talk about what you’ll need to make your own lip balms using these tubes.
Essential Materials for Using Push-up Paper Tubes
Creating your own lip balm or solid product in Push Up Paper Tubes requires a combination of basic ingredients and tools. Whether you’re a DIY enthusiast or a small business, here’s your go-to list.
- Push-up or Twist-up Paper Tubes
This is your primary packaging. You can choose between:
- Push-up tubes: Require manual pressure to dispense
- Twist-up tubes: Feature a rotating base, similar to traditional lip balm sticks
Available in kraft brown, white, or even custom-printed versions, most tubes range from 0.3 oz to 2 oz in capacity.
- Lip Balm Ingredients
A good lip balm starts with quality ingredients. Typical recipes include:
- Beeswax or candelilla wax (for a vegan option) – solidifies the balm
- Shea butter or cocoa butter – adds creaminess and nourishment
- Carrier oils like coconut oil, jojoba oil, or sweet almond oil – for smooth application
- Essential oils – for scent and added benefits (peppermint, lavender, orange)
- Vitamin E oil – extends shelf life and adds skin nourishment
- Double Boiler or Melting Pot
You’ll need a safe and controlled way to melt your oils and wax. A double boiler is ideal, but a small melting pot also works well.
- Pipettes or Pouring Pitcher
Precision is key. Use pipettes or a spouted pitcher to pour your liquid balm into the tubes without making a mess.
- Stirring Tools
Use a wooden stir stick or stainless steel spoon to mix the melted ingredients thoroughly before pouring.
- Measuring Spoons or Digital Scale
Consistency matters, especially if you’re making batches. Accurate measurements ensure each tube has the same quality.
- Labels and Branding Supplies
Whether you’re selling or gifting, presentation matters. You can use:
- Pre-cut labels
- Printed kraft stickers
- Custom wraps or sleeves
Branding your Twist Up Paper Tubes or Push Up Paper Tubes adds a professional touch.
- Storage Container or Cooling Tray
After filling your tubes, you’ll need a stable area for them to cool and set. Use a tray or box to keep them upright during this process.
Final Thoughts
Crafting lip balm using Push Up Paper Tubes or Twist Up Paper Tubes is more than just a DIY hobby—it’s a step towards a more sustainable and intentional lifestyle. With just a few natural ingredients and some basic tools, you can create a product that’s good for both your lips and the planet.
These tubes aren’t just containers—they’re part of a movement. So why not make your next balm a greener one?