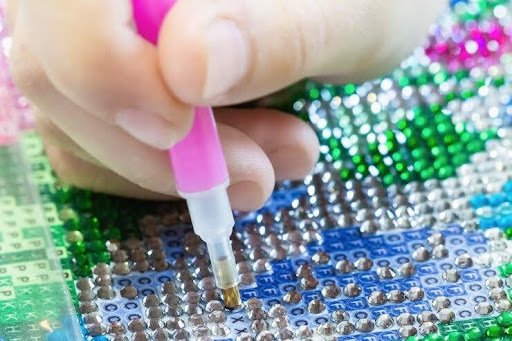
Ever spend hours placing those tiny drills, only to realize later that the colors look off or you missed some spots? It is not always about poor eyesight it is often about poor lighting. The truth is, no matter how skilled you are, your final masterpiece can suffer if your lighting is not right.
Using the right light setup is the secret weapon for every Paint with Diamonds fan. With proper brightness and positioning, you can reduce eye strain, catch subtle color differences, and place each diamond exactly where it belongs. That is where smart choices in lighting come in.
In this blog, we are sharing paint with diamonds lighting tips that will make your projects clearer, cleaner, and a lot more fun. From desk lamps to portable lights, you will learn exactly what to use and where. We will also touch on diamond painting lighting ideas and how to build the perfect lighting for a diamond painting setup in your craft space.
Natural vs. Artificial Light | What Works Best?
Lighting is not just about brightness it affects your eyes, your colors, and how long you can enjoy your diamond painting. Let us break down the two most common types of lighting you will use in your project setup.
Natural Light | Great, but Limited
Natural sunlight is often praised for its soft, even tone and accurate color reflection. It is especially helpful when working with subtle shades that look almost identical.
- It shows true colors on your canvas.
- It reduces eye fatigue during the day.
- It works best in open, bright spaces near windows.
But here is the problem: it is inconsistent. On cloudy days, your light fades. And once the sun sets? You are out of luck. That is why relying on sunlight alone is risky if you are serious about finishing your project cleanly.
If you are looking into sunlight vs. lamp for diamond painting, sunlight wins for color but loses in control.
Artificial Light | Consistent and Customizable
This is where paint with diamond lighting tips comes into playing, artificial lighting. Think LED desk lamps, clip-ones, or floor lights that let you control every angle.
- Full control over brightness and direction.
- A consistent glow, no matter the time of day.
- Easy setup for late-night or low-light painting.
The best lighting for crafts is typically an adjustable LED with cool white light. These lamps reduce shadows, prevent yellow tinting, and help you see each diamond.
For serious painters, combining both sources sunlight in the day, LED lighting for the diamond painting setup at night is the sweet spot.
Overhead Lighting| What Works and What to Avoid?
If you are working on a large canvas or have a dedicated craft area, overhead lighting might seem like the obvious solution. But not all ceiling lights are created equal some will help you shine; others will cast shadows and strain your eyes.
What Works in Overhead Lighting?
The best kind of overhead lights for diamond painting are LED panel lights or track lights with adjustable angles. These give off bright, even lighting across your entire workspace without harsh shadows.
- Mount cool white LED panels for true color visibility.
- Use directional spotlights to reduce glare.
- Install dimmable features to control brightness as needed.
These setups are especially useful if your painting table is fixed or part of a larger studio. They offer a clean and clutter-free lighting solution.
What to Avoid with Ceiling Lights?
Avoid warm, yellow bulbs or single-point lights. These create uneven brightness and cause eye fatigue. Another issue? Shadows from your hand or tools falling across the canvas when the light source is not well-placed.
With smart paint with diamond lighting tips, just reposition your overhead light or add a desk lamp, and those annoying shadows are gone.
Some crafters also add ceiling-mounted adjustable arms to reposition their lighting over time, keeping everything clear and visible.
Desk Lamps for Diamond Painting |What to Look For?
Not everyone has a full craft room, but a good desk lamp can turn a small corner into the perfect workspace. When it comes to painting with diamond lighting tips, even the smallest choices can dramatically improve your setup.
So, what makes a desk lamp ideal for diamond painting?
- Brightness control – Look for lamps with adjustable light levels. You need enough light to clearly see each symbol without it being blinding.
- Flexible neck or arm – Positioning matters. You should be able to tilt and rotate the lamp so the light falls exactly where you need it, avoiding harsh shadows.
- Cool white LEDs – These bulbs offer true color visibility. Warm yellow lights can make similar diamond shades blend together, which leads to misplaced drills.
- No flicker – Some cheaper desk lamps flicker, and while you may not notice it at first, your eyes will feel the strain later.
Many crafters also love using a diamond painting magnifying lamp, which combines lighting with magnification, making it easier to work on fine details without eye fatigue.
If your workspace is compact, a flexible light arm attached to your table is a space-saver that still delivers the visibility you need.
Investing in a quality desk lamp is one of the most important pieces with diamond lighting tips we can share it will improve both your accuracy and your comfort.
Ring Lights and Clamp Lights
If you’re exploring paint with diamond lighting tips, you have probably come across ring lights and clamp-on lights in your search. Originally designed for photography and video streaming, these lighting options are becoming favorites in the crafting world and for good reason.
Why Crafters Love Ring Lights?
Ring lights provide a wide, even glow that minimizes shadows and enhances detail. The circular shape distributes light uniformly across your canvas, making it easier to see the symbols and colors.
- Ideal for overhead shots if you like to record your painting process.
- Many include dimmable features and color temperature controls.
- Easy to mount on tripods or clamp stands for flexibility.
They might be bulky, but if you’re serious about your craft, a ring light can offer that studio-quality lighting edge.
The Case for Clamp Lights
Short on space? Clamp lights are a diamond art lighting tool that offers precision in a compact form. You can attach them to your table, shelf, or easel. The best part? You can move them easily depending on where you are painting.
- Clamp-on LED light options come with gooseneck arms for adjustability.
- Great for travel setups or small home corners.
- Rechargeable models are now widely available.
With either light, the key takeaway from these paint with diamond lighting tips is flexibility. You want your light to follow your hand, not fight it.
Portable Lighting for Paint With Diamonds On-the-Go
Need to take your diamond painting project beyond your usual spot? Whether you’re on vacation, moving between rooms, or crafting at night without waking others, portable lighting can keep your work sharp and stress-free.
One of the best custom paint with diamond lighting tips is this: always have a backup light you can move around. Do not depend on fixed lighting alone.
Use Travel Lighting Kits
A travel lighting kit is compact, foldable, and light enough to fit in your bag. It is great for road trips, workshops, or just painting from the couch instead of your table. Some even come with adjustable brightness levels and USB charging.
Rechargeable LED Lights Work Anywhere
A rechargeable LED light for painting is ideal for flexibility. Clip it on your clipboard or stand it on the table, it gives off focused, clear light even in dim rooms.
Choose models with:
- Long battery life
- Adjustable arms
- Cool white light to show true diamond colors
These paint with diamond lighting tips make sure you are never stuck waiting for daylight or dragging heavy lamps around. Just grab your light and get back to the fun part—placing those sparkling drills.
Light Pads | The Game-Changer for Precision Work
If there is one tool every serious diamond painter should try, it is the LED light pad. Among all the paint with diamond lighting tips, this one stands out—because it does not just light your space, it lights through your canvas.
What Makes a Light Pad Special?
Unlike desk or overhead lights, a light pad sits under your canvas. It illuminates the symbols from behind, making them crystal clear—even the tiny, hard-to-read ones.
With an LED light pad for diamond painting, you get:
- Sharp symbol visibility
- No glare or reflection from above
- Reduced eye strain during long sessions
This is especially useful for darker canvases or detailed sections where similar colors blend. A light pad removes the guesswork.
Choose the Right Light Pad
Look for models with:
- Adjustable brightness
- Even light distribution
- USB-powered convenience
Some even come with magnetic clips to hold your canvas in place. If you’re working on a large piece, consider a bigger size pad to cover more area without moving it around.
Once you try this, you will see why so many crafters call it their favorite diamond painting lighting tool. It is not just a tip, it is a total upgrade. These paints with diamond lighting tips are not complete without it.
Room Setup Tips for Better Paint With Diamonds Lighting
Lighting is not just about the lamp you use, it is also about where you place it. Many overlook the importance of room setup, but small tweaks in your space can have a big impact. This section will guide you through painting with diamond lighting tips that focus on your room layout.
Position Your Light at the Right Angle
Avoid placing lights directly behind you; they will cast shadows over your canvas. Instead, place your light slightly above and to the side of your dominant hand. This keeps the symbols fully visible and reduces glare.
- Left-handed? Position the light on your right side.
- Right-handed? Keep it on your left.
These little adjustments prevent your hand or arm from blocking the light as you work.
Declutter Your Workspace
A messy workspace scatters light unevenly. Clear off your table and use a craft room lighting idea like a matte white surface or light-colored backdrop to reflect light more effectively. You will be surprised how much brighter your space feels.
Choose a Stable Painting Station
Whether you are using a desk, tray table, or easel, make sure your diamond painting station setup is steady and does not wobble under pressure. Shaky tables can affect both placement and lighting focus.
With just a few changes, these paintings with diamond lighting tips can turn any ordinary corner into a perfect diamond painting zone.
Common Lighting Mistakes to Avoid in Diamond Painting
Even with the best setup, small lighting errors can ruin your progress or make your sessions more tiring than they need to be. So before you invest, read these paint with diamond lighting tips on what not to do—they can save you hours of frustration.
Mistake 1| Using Warm or Yellow Bulbs
Many beginners use old desk lamps with yellowish tones. These distort the actual colors of your diamonds, making it hard to differentiate between similar shades. Always choose cool white LED bulbs to maintain accurate color perception.
Mistake 2 | Direct Light That Causes Glare
Placing a lamp too close or at a steep angle can cause glare across your canvas or your eyes. Not only is it annoying—it is exhausting. Try diffused lighting instead, or adjust the angle until shadows and reflections disappear.
Mistake 3 | Inconsistent Lighting
Do not mix dim natural light with a bright desk lamp; it creates uneven lighting zones that confuse your eyes. This is one of the most overlooked lighting errors in diamond painting.
Mistake 4 | Ignoring Glare Problems
If your canvas has a glossy surface, overhead lights might bounce off and make symbols unreadable. Combat this by tilting your canvas or switching to side lighting to reduce diamond art glare problems.
Fix these common issues, and your diamond painting sessions will feel smoother, brighter, and way more enjoyable. Just follow the right paint with diamond lighting tips.
Budget vs. Premium Lighting | What Should You Choose?
Not every crafter wants to spend big on tools, and you do not have to. But when it comes to smart paint with diamond lighting tips, knowing where to save and where to spend makes a real difference in your experience.
Affordable Craft Lights | Do They Work?
Yes many budget-friendly options can get the job done. A basic adjustable desk lamp or clip-on light with an LED bulb is often enough for casual painters. These lights usually cost between AED 30–70 and can be found online or at local craft stores.
Pros:
- Low cost
- Easy to find
- Works well in small spaces
Cons:
- May lack brightness control
- Limited durability
- No magnifier or extra features
Premium Options | Are They Worth It?
If you paint often, investing in a professional diamond painting lamp or light pad is a smart move. These options range from AED 100–300 and offer dimmable settings, wide light coverage, USB charging, and magnifying features.
Pros:
- Long lifespan
- Eye strain reduction
- Precise color accuracy
Cons:
- Higher price point
Think about how often you paint and how long your sessions last. These paint with diamond lighting tips help you match your lighting investment with your painting habits—no overbuying, no under-prepping.
Ready to Upgrade Your Paint With Diamond Lighting?
By now, it is clear: good lighting is not a luxury it is a necessity. Whether you are painting on the couch, in your studio, or during a quiet night, following the right paint with diamond lighting tips will transform the way you work. You will see clearer symbols, reduce eye fatigue, and enjoy the process even more.
From LED light pads to portable clamp lights, we have covered everything you need to light up your canvas the right way. The trick is choosing tools that match your space, your habits, and your goals.
Looking to improve your setup? Our online store offers the best options to upgrade your lighting for diamond painting setup, from budget tools to premium gear. It is time to stop struggling and start sparkling.
Shop now and experience the difference with our carefully selected diamond painting lighting tools. Your eyes (and your artwork) will thank you.