.
Connect with us

Travel

Perhentian Islands: How to Get There, What to Expect, & More

Published

on

Located on the northeast coast of peninsular Malaysia is a pair of islands known as the Perhentians. The name Perhentian translates roughly to “stopping place,” as it was a frequent stop for Malay traders heading north to Bangkok. The two islands are straightforwardly dubbed Perhentian Kecil and Perhentian Besar – meaning Little Perhentian and Big Perhentian respectively. In mid-March, Emmett and I decided to head to these islands ourselves to see what the fuss was about. You see, we’d heard that the coral reefs were stunning and that we were pretty much guaranteed to see a sea turtle. We tried not to get our hopes up too high, though it turned out we had nothing to worry about. All the rumors were true and we were ultimately blown away by the natural beauty of the two Perhentians.

Visiting the Perhentian Islands

Before our trip, I found that a good amount of the information available online about traveling to the Perhentians was either outdated, incomplete, or both. Thus, while I was there, I soaked up as much info as possible to be able to provide the guide I wish I’d had. Fair warning: this will be a longer post, so I have broken it up into a table of contents. Feel free to skip ahead to whatever information applies to you & your potential Perhentian questions.

1. Packing for the Perhentians
2. How to Get There
3. Where to Stay
4. Where to Snorkel
5. More Things to Do


1.

What to Pack

Beyond your standard clothes or other items you normally have with you, be sure to bring the following beach essentials:

+ Sunscreen
+ Sunglasses
+ Swimsuit
+ Snorkel & Mask & Fins
+ Mosquito/bug repellant
+ Hat
+ Quick-dry Towel
+ Dry Bag or other Waterproof Bag
+ Waterproof Camera – if you’ve got one

Beyond those essentials, I highly recommend that you also bring at least one book or playing cards or some other item with which to entertain yourself. WiFi is spotty at best and most often non-existent. Also, if your accommodation is of the budget variety (as ours was), you will probably want a mosquito net. The mosquitoes are everywhere (even in March!) and budget cabins don’t have mosquito nets. Make sure your camera, other devices, and any spare batteries are all charged up before you go. Most budget accommodation runs on generators and will often not even have an outlet for charging. If you’re a budget traveler who likes to cook their own food and avoid eating out: bring food with you. There are a few general stores selling things like ramen but at highly inflated prices. Even just a handful of granola bars can save you from having to eat every meal of the day out at the cafes.

Lastly: there are no ATMS available, so be sure to bring plenty of cash. Resorts and larger establishments will take cards but really: cash is king.

How to Get to the Perhentians

From Kuala Lumpur:

There is one bus a day, managed by Bus NKS, leaving Kuala Lumpur Sentral with a connection in Jerantut bound for Kuala Besut (port city for Perhentians). The journey will take at least 9 hours.
Other transportation possibilities from KL include a rental car, train to bus transfers, or short domestic flights.

From Penang/Langkawi:

You can take a bus from Butterworth (port city for Penang & Langkawi) to Kuala Besut (port city for Perhentians). Be warned though, since you’re going to the literal opposite side of the country, the bumpy bus ride will take 8 or 9 hours. We did this ride overnight when leaving the Perhentians to get to Penang.

From Cameron Highlands/Taman Negara:

Take a private shuttle. This is something I would recommend that you book a few days ahead of time at your accommodation in Taman Negara or the Cameron Highlands. That’s what we did – our hostel in the Highlands put us on a shuttle bus called “Golden Highlands.” The price of the ticket for the two of us was 250 MYR ($65 USD) and included not only the 6 hour shuttle ride but also the cost of the ferry transfer to Perhentian Kecil.
Ferrying to the islands from Kuala Besut:

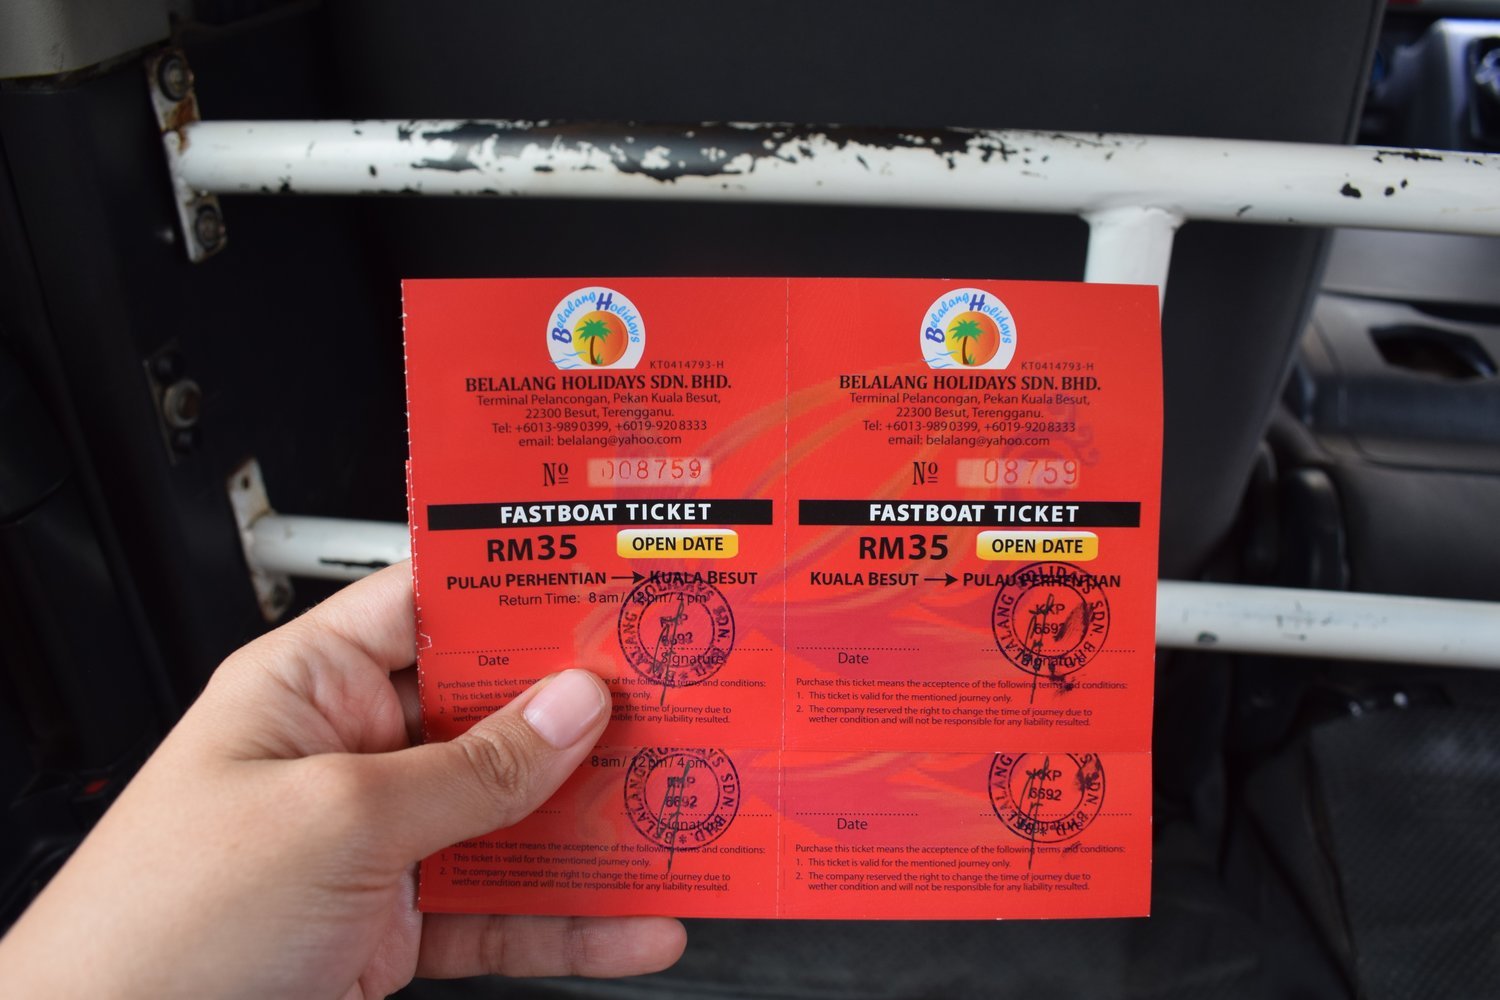
As of our visit in March 2018, you needed to not only have paid for your ferry ticket (approx 35 MYR or $8 USD per person for open return tickets) BUT also pay a fee to enter the Pulau Redang Marine National Park. This fee was 30 MYR per person (about $7.50) at the docks prior to boarding and supposedly goes towards conservation initiatives on and around the islands.

A quick note about the fastboat “ferries” taking you to the Perhentian islands:

Make sure all of your stuff is secured in your bag and anything valuable is in a dry bag or plastic bag. The speedboats are so fast over the surprisingly choppy seas. Loads of spray will come in the boat onto you and your bag. Not to mention that the boat catches so much air that a) your butt will hurt from slamming into the seats and b) two backpacks nearly flew out into the ocean when our boat jumped a particularly huge wave. Luckily, those of us sitting in the front were alert and grabbed them by the straps just as they launched. The pack owners were very grateful. I’d hope someone would do the same for me but you never know – better to prepare for the worst.
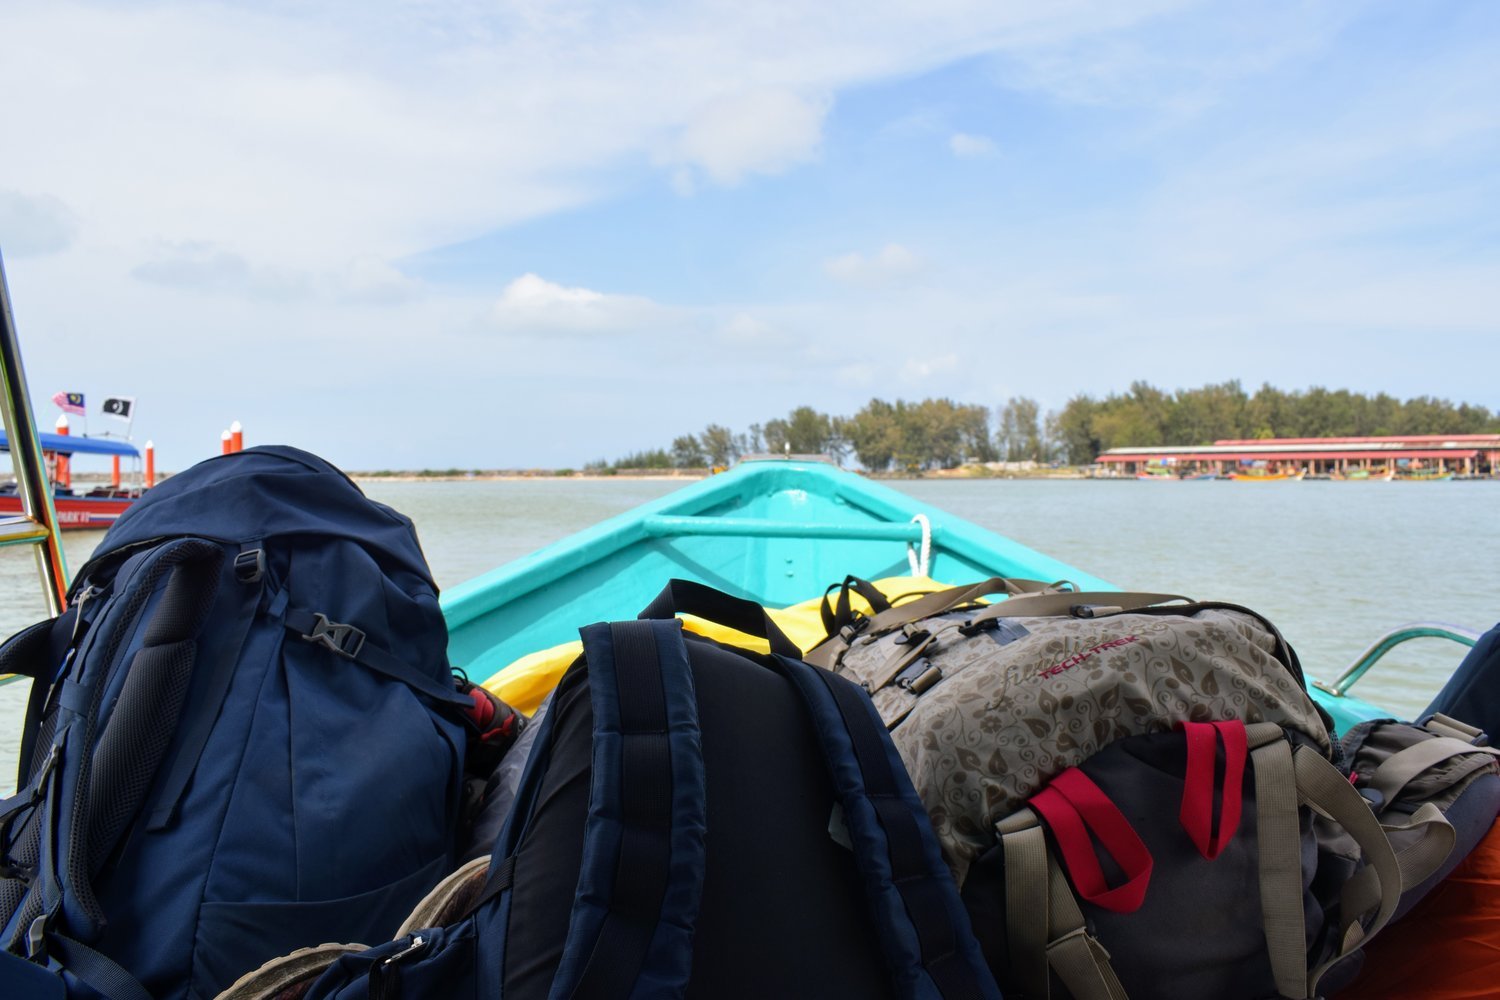
Moments before some of these bags nearly flew off into the water.

3.

Finding Accommodation

Budget

If you’re on a budget, your best bet is to just show up. Preferably mid-week before the weekend travelers arrive. Perhentian Kecil is the more backpacker-friendly island, so going there will be your best bet if you’re looking to save. Once you get off the fastboat, walk along Coral Bay or Long Beach and pop in a few locations to check availability and compare prices. Some of the places have dorms, others have private rooms with a fan, basically it’s worth an ask wherever you go. Try anywhere with the name “Chalet” (such as Fatimah Chalet, Amelia Chalet, Butterfly Chalet, etc.) for a cheaper option.

Quick side note: To get to Long Beach on Perhentian Kecil, get off the ferry at Coral Bay. There is a walkway that starts at Ombak Dive Resort and takes you fifteen minutes through the jungle in the center of the island. There are quite a few chalets along this path and even more once the path opens up onto the wide mouth of Long Beach.
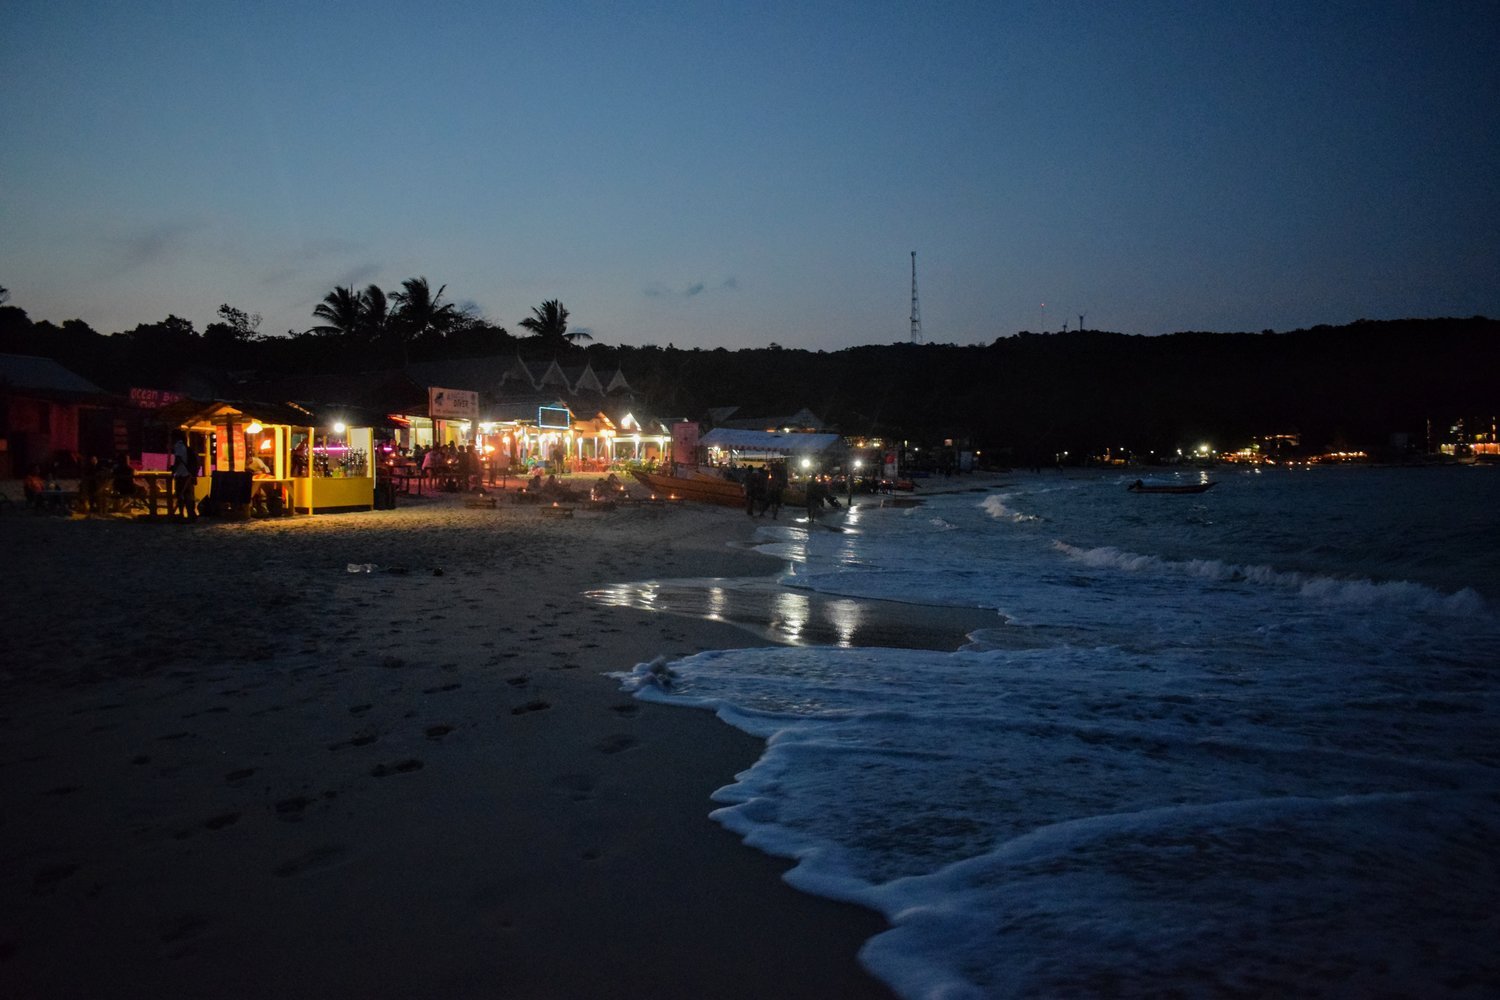
Long Beach on Perhentian Kecil, just before the beach parties began.

Mid-Range to Luxury

After a few budget nights in a buggy chalet, we spent one night at Ombak Dive Resort ($50 USD or 150 MYR a night for a twin room) on Perhentian Kecil. Ombak had very clean, comfortable western-style rooms with en suite bathrooms and a very tasty breakfast buffet. Another Kecil resort option would be Shari-La Resort, which has it’s own private beach and is located just off of the main dock at Coral Bay.

For more luxury options, go to Perhentian Besar instead. The accommodation – and the general atmosphere – there is less backpacker-oriented and more like the kind of place someone might honeymoon. Places like Tuna Bay Island Resort or Flora Bay Resort may be the perfect place to have a quiet and luxurious stay.

Accommodation For Divers

The Perhentians are known for their marine life and thus there are numerous dive resorts sprinkled across each island. Some resorts also offer a package for divers to stay and take a course. On Perhentian Kecil, the resort with the best reputation is Ombak Dive Resort. As I mentioned above, we spent a night there and the facilities were lovely. On Perhentian Besar, Bubbles Dive Resort has the best reputation for dive & accommodation packages.

4.

Snorkeling in the Perhentians

I really, really would like to become SCUBA certified some day – as would Emmett. However, the price wasn’t right for us in the Perhentians, so we opted to snorkel instead and had a FANTASTIC time. There are quite a few options for snorkeling around the Perhentians which I will outline below.

Snorkeling at Coral Bay

Whether you have your own snorkeling gear or you rent some from one of the many snorkel tour stands at Coral Bay, you’ll be delighted to find that you don’t need to hire a boat to see some beautiful underwater scenery. There are two places that are good for snorkeling just off of Coral Bay. The first one can be reached by getting in the water just off of the left of the dock when facing Shari-La Resort. The area is roped off with buoys for safe swimming away from boat traffic. The coral wasn’t too great there but there were quite a few anemones being guarded by cutely defensive clownfish. The second snorkeling spot is a bit further off and also buoy-roped off. Starting in front of Butterfly Chalet, swim towards the left over the shallow sand until the coast curves into a slight cove. Just around the bend, you will find lots of healthy purple coral (see above) as well as giant clams, parrot fish, and other tropical swimmers. Be forewarned: if the tide is going out, the currents can be a bit on the swifter side in this area.

If you’re on Long Beach, I do not recommend attempting to swim at all there – let alone snorkel. There is a lot of surf and the currents are strong. A friend of ours was nearly carried into some rocks and we watched another person get rescued after being swept out too far. Most tellingly, on the first day we visited, one of the cafes on Long Beach posted a sign near the waterfront that honestly said “No Swimming!! Danger!! Death!!”

Boat-Based Snorkel Tours

 full day snorkel tour around the islands. There are many little shed-based snorkel tour companies lining Coral Bay. We chose the one in front of Amelia’s Cafe & Chalet. I don’t believe that it was any better than the rest of the choices available on the beachfront. Honestly, each boat will take you to the same 6 locations (4 if it’s a half day) for about the same price. The full day tour will take you to massive coral heads with tons of colorful fish, bait a black-tipped reef shark over towards your group, scout out green sea turtles grazing on algae for you to swim near, take you to dock-based cafés at Fisherman’s Village, drop you next to a small reef lighthouse, and end your tour on a gorgeous white sand beach called “Romantik Beach.” If you’ve got the time for a 6 hour tour… GO! It was about 50 MYR ($15 USD) per person.

That being said, if you have more than just a few days: take more than just one boat tour. Emmett and I were seriously considering chartering a boat out to Redang Island just to see if there was even better coral further out. I’m sure there is. There are other snorkeling spots in the Marine Park besides Redang as well – I’ll bet that there are so many wonders of the sea just waiting to be seen.

An Important Note About Snorkel Tours & Conservation

Emmett and I were disappointed to find that there was little education or discussion about reef health before or during our snorkel boat tour. We saw people from our own tour and others standing or sitting on live coral. Do not touch the coral or any other marine life. Touching the coral and especially STANDING on it will kill the coral. Coral reefs are already struggling to survive due to climate change, so don’t quicken the process by handling any marine life. Also, I heard a guide tell one of his clients that they could grab onto a sea turtle. Please do not touch sea turtles. Do not grab sea turtles. Swim a polite distance away from the turtles. They are wild animals who do not need the stress of being grabbed by a human.

Honestly, I recommend that you bring up these important points if you see fellow snorkelers misbehaving. In most cases, I think people genuinely don’t know they’re acting harmfully.

5.

Beyond Snorkeling/Diving: Things to Do in the Perhentian Islands

1. Stroll the beach while looking at seashells and other beach treasures. ..Always one of my favorite relaxing beach activities!

2. Get a fresh fruit smoothie from one of the many cafés on a hot afternoon. Our favorites were at Daneila’s on Long Beach.

3. Watch an evening movie at Ombak Resort’s outdoor theater/restaurant on Kecil.

4. Go to Long Beach after dark for one of the many beach parties/bonfires held by local bars.

5. Walk Kecil or Besar’s jungle trails.

6. Keep an eye out for the resident water monitor lizards who proudly creep all over these islands.

7. Try the “best roti canai” from the stand outside of Fatimah’s at Coral Bay – you won’t be disappointed.

8. Buy a cheap beach read from Ewan Café’s stash of used books.

9. Relax after a long day of snorkeling by getting a massage at one of the many affordable massage parlors/mini spas on the islands.

10. Bliss out in the sunshine – just be sure to wear sunscreen.

There you have it: a guide to the Perhentian Islands. I hope that I covered any questions you might have. Let me know your thoughts in the comment section below!

Continue Reading

Things To Do

A Few Days In Singapore

Published

on

Traveler admiring Singapore's Marina Bay Sands and skyline at sunset during a few days in Singapore

Last month, after wrapping up a job that we didn’t really enjoy in Australia, Emmett and I had finally saved up enough money to reach our goal. That being to leave the expensive country-continent to launch ourselves back up into the Northern Hemisphere in order to bop around Asia for a few months. Stop one on our journey was the island state of Singapore. We were in the tiny country for just three nights and two days, but we like to think that was enough time to get a decent peek at what the nation had to offer.

Little India

Little India was probably our favorite of inner neighborhoods of Singapore that we visited and it also happened to be the first. The whole place was a riotous explosion of colors, incense smoke, and best of all – cheap vegetarian food. I’d love to paint my future abode some of these bold shades.

Marina Bay

Even while reading countless articles about how a visit to the top of Marina Bay Sands Resort was a “must do” (spoiler: we didn’t), I missed the boat (HA) that the resort was comprised of three skyscrapers topped by what resembles an ocean liner. As soon as it came into view, I was perplexed by this design choice. As we got closer and closer – and walked along the DNA-inspired helix bridge – it turned out that the whole of the Marina Bay was the epicenter of modern, futuristic architecture in Singapore. Basically Marina Bay = Future World.

Gardens By the Bay

Part 1 – The Cloud Forest

The Cloud Forest at afternoon misting time. I am proud of this photo.

Gardens by the Bay is a beautiful, futuristic nature park that has become a proud icon of Singaporean progress and environmental design. The whole place is well-kept, aesthetically pleasing, and just all-around a great place to spend half a day or so.

Our first stop at the Gardens was the Cloud Forest. The Cloud Forest is a 2 acre conservatory featuring 138 foot tall “cloud mountain” that is home to an array of gorgeous, lush tropical plants. You take an elevator to the top and then stroll along a multi-story walkway that encircles the whole hanging garden. Not only that, but the whole place is actually cooled to resemble the temperatures found at a mountaintop i.e. like in a real cloud forest. It was a very welcome escape from the all-encompassing tropical humidity of downtown Singapore.

We took a few hours to explore the conservatory, taking in all the orchids, epiphytes, pitcher plants and other species native to the forest that used to encompass much of Singapore.  I could go on and on about how lovely this place was, but hopefully our photos do it justice. Other than eating out, this was our one expense of the day – and at $30 SGD for both of us (about $23 USD), it was worth it.

Gardens By the Bay

Part 2 – Supertree Grove

The Supertrees are probably the Singaporean icon that I was most familiar with before arriving. Much like the Cloud Forest, they are a beautiful example of environmental design. They are even more impressive in person than all the photos I’d seen prior to being in Singapore. We stayed for the 7:45 PM Light Show (which was freeee!) and were treated to an oddly delightful time. The theme for the evening was “A World of Wonder” and the Supertrees were lit up – using their own solar-harnessed power, I might add –  in a myriad of colors in tune to a bizzare medley of Disney ballads, epic movie themes, and Super Mario soundtrack songs. The Supertrees had been impressive during the day, but at night was when they became super visually striking. Just look at ’em:

Chinatown

Our second day in Singapore was a rainy one. After staying in and watching the storm from our rad hotel room (see end of post), we decided to get out and take a look around Chinatown. Unfortunately, our hearts weren’t really in it. We enjoyed going to the very impressive Buddha Tooth Relic Temple and quietly observing a ceremony. We even went to one of the city’s famous hawker centers for lunch but then found next to nothing available for our veg-o selves… Alas, it seemed like a fun area to explore – the rain just made us give up easily. Well maybe that and the fact that we’d walked about 7 miles (11 km) in 95% humidity the day before.

Haw Par Villa

Haw Par Villa was a place that I’d read about online before we arrived in Singapore. I was very intrigued by the idea of an old theme park established by one of the creators of Tiger Balm and even more intrigued when I found out that it was free. We rode the wonderfully efficient metro from Chinatown to the eponymous Haw Par Villa stop. Once we entered, we were treated to a very strange and often downright confusing series of luridly painted statues. A lot of these bright figurines were carrying out scenes from Chinese mythology. Others were just odd and seemed to be at the whimsy of the original artist.

A Swanky Stay

My Mom travels a lot for business and has thus racked up quite a lot of hotel points. More specifically, she has racked up a lot of points with Marriott. For our trip to Singapore, she graciously donated some of her hard-earned and got us a room at the Courtyard Marriott Novena. It is one of the swankiest places we have ever stayed and we felt a little bit out of place walking into the posh lobby wearing our big beat-up backpacks.

The best parts of the stay (other than the super comfy bed and fast WiFi) were the AWESOME view of Singapore. The view from our room’s window/wall was pretty cool but the views from the hotel’s rooftop were even better. It was fun to live the high life for a little while, as it’s totally different from our usual budget-travel style of taking overnight buses or sleeping in our car. Thanks again, Mom!

A Singapore Sling at the Courtyard Marriott Rooftop Bar…. Because ‘when in Singapore,’ right?

Overall, Singapore was a great start to our Backpacking Asia 2018 trip. We had gone in expecting a somewhat boring, sanitized, futuristic city. What we got instead was a very lively, diverse, and fascinating futuristic city. If you get a chance to stop here, even just for a day, you definitely should explore this multicultural city-state.

Continue Reading

Things To Do

15 Unmissable Things to Do in Okinawa Japan (The Tropical Side Nobody Tells You About)

Published

on

Things to Do in Okinawa Japan

I have been to Japan four times. Each time, people asked me what my favourite part was. After the most recent trip — a two-week Okinawa road trip — I stopped answering “Tokyo” on autopilot and started telling the truth.

Nobody outside Japan really talks about Okinawa. That is the first and most important thing I want to fix. When people think about Japan things to do, they picture Senso-ji in Tokyo, Fushimi Inari in Kyoto, the bullet train between the two. What they do not picture is white sand beaches where the water is the kind of turquoise you associate with the Maldives, dense subtropical rainforest, waterfalls you wade through to reach, and an island food culture so different from mainland Japan that it sometimes feels like a different country.

Okinawa is a group of islands at the southern tip of Japan, roughly halfway between Tokyo and Taiwan. The main island is 106 kilometers long and 11 kilometers wide. A two-hour flight from Tokyo takes you somewhere that feels nothing like the Japan you thought you knew. If you have been to Japan before and want to go back, Okinawa is where to go next. If you are going for the first time and have time to spare, go south.

  1. Ferry to the Kerama Islands

The Kerama Islands sit 30-40 kilometers west of Okinawa’s main island, reachable by high-speed ferry from Tomari Port in Naha. The journey to Tokashiki (the largest island) takes 35 minutes on the Jetfoil, or 70 minutes on the slower car ferry. The Jetfoil costs around ¥3,130 (approximately £16) each way.

The beaches on the Kerama Islands are consistently ranked among the best in Japan — and among the best in East Asia. Tokashiku Beach on Tokashiki is the one that stopped me in my tracks: white sand, clear shallow water, palm trees, and almost nobody there on a Tuesday in April. Aharen Beach on Zamami Island is also excellent and has a small village behind it with guesthouse accommodation.

You can visit Tokashiki as a day trip from Naha — the first ferry leaves at 9am and returns around 4pm, giving you about 5 hours. A rental scooter on the island costs around ¥2,500 (£13) for the day and lets you find the beaches and viewpoints the day trippers never reach.

Snorkeling equipment rents for around ¥1,000-1,500 (£5-8) per set from shops near the ferry terminal on Tokashiki. The sea clarity here — 30-40 meters visibility on calm days — is on a level with the Great Barrier Reef.

Local tip: The first ferry from Naha on Saturdays fills up with day trippers. Take a Monday or Tuesday if you can — the islands are completely different with barely anyone else on the beach.

  1. Shuri Castle — The Ryukyu Kingdom’s Throne

Shuri Castle sits on a hill above Naha, the capital of Okinawa, and was the seat of the Ryukyu Kingdom from the 14th century until Japan’s annexation of the islands in 1879. It is unlike any castle in mainland Japan — the architecture blends Chinese palatial style with Okinawan construction, using local Ryukyu limestone and Chinese-influenced red lacquer on the main gate.

The main Seiden throne hall burned down in a devastating fire in 2019 and reconstruction is underway. As of 2026, some sections are closed, but the castle complex — including the Shuri Gate, the outer walls, and multiple secondary buildings — remains fully open. Admission to the main grounds costs ¥400 (£2) for the outer areas; the full castle complex tickets (when available) are around ¥1,000 (£5.50).

Shuri is also a neighbourhood worth exploring beyond the castle. The narrow streets of the old town area have ceramics shops selling traditional Ryukyu pottery (Tsuboya-yaki), weavers producing Bingata fabric prints, and small restaurants serving Ryukyuan cuisine that predates the Japanese occupation.

The castle is a 15-minute monorail ride from central Naha on the Yui Rail (¥270, £1.40). The monorail system runs the length of Naha — it is the only rail transit on the island.

Local tip: Arrive at Shuri Castle before 9am (it opens at 8:30am) for the extraordinary experience of watching the morning light hit the red-lacquered Seiden gate with nobody else in the courtyard.

  1. Drive the Katsuren Peninsula

The Katsuren Peninsula points east from the central section of Okinawa’s main island into the Pacific Ocean. It is one of the least-visited parts of the island and offers a completely different landscape from the white-sand west coast — the eastern shore is rockier, the ocean colour is deeper blue rather than turquoise, and the cape feels genuinely remote.

Katsuren Castle Ruins sit at the end of a short hill hike from the main road. The castle — another Ryukyu Kingdom site — dates from around the 12th century and the UNESCO-listed stone walls climb the hill in a series of geometric platforms. The view from the top covers both coasts of the peninsula simultaneously on clear days.

The most unexpected thing on the Katsuren Peninsula is Hamahiga Island, connected by a small bridge at the tip of the cape. The island has a sacred spring site (Ufu Gaa) connected to Ryukyuan creation mythology, and Agari Ufusuku Beach on the eastern side of Hamahiga — white sand, flat, facing directly east — is one of the best sunrise beaches in Okinawa.

Rental cars are available from Naha Airport from around ¥3,000-5,000 (£16-27) per day. You need an International Driving Permit (get it in your home country before arriving in Japan) to drive in Okinawa.

Local tip: The road along the eastern shore of the Katsuren Peninsula at sunset — heading south with the Pacific on your left — is one of the most beautiful drives on the island. Stop at any point and the view is extraordinary.

  1. Hike to Ta-Taki Waterfall in Yanbaru

The northern third of Okinawa’s main island is called Yanbaru — a word meaning “mountain forest” in the Okinawan dialect. Yanbaru is dramatically different from the resort areas of the south and centre: dense subtropical forest, no major beaches, narrow mountain roads, and hiking trails that see barely any foreign visitors.

The Ta-Taki waterfall hike is the best in Yanbaru. The trail follows the Hiji River upstream for about 40 minutes, but it is not a conventional trail — you wade through the river itself, climbing over rocks and stepping stone to stone. Water shoes or old trainers are essential. Bring a dry bag for your phone. The waterfall at the end is about 10 meters high and plunges into a clear green pool where you can swim.

Even more remarkable: in April, with Okinawa filling up with domestic Japanese tourists on Golden Week, we had the entire waterfall to ourselves. No queues, no people, just water and birds.

Yanbaru National Park covers much of the north and protects the Okinawan rail (Yanbaru kuina) — a flightless bird found nowhere else in the world. Birdwatchers come specifically for this species.

Local tip: The Hiji Falls area has an entry fee of around ¥500 (£2.70) — bring cash as the trailhead kiosk rarely accepts cards.

  1. Busena Marine Park Underwater Observatory

The Busena Marine Park underwater observatory is the kind of experience that only Okinawa offers — and hardly any visitors to the island know about it. You walk out along a pier over the ocean, descend a spiral staircase 5 meters below sea level, and find yourself looking through large windows directly into the ocean.

Fish swim past the glass from all directions. Parrotfish, triggerfish, sea bream, and occasional small sharks circle outside the windows in their natural habitat. The experience is completely different from an aquarium — these are not captive animals and there is no tank smell or artificial lighting. The ocean is just there, right in front of you, on the other side of the glass.

The full Busena experience includes a glass-bottomed boat over the reef (running from the pier above) and a small beach on the park grounds. Admission to the underwater observatory is ¥1,000 (£5.50) plus an optional ¥1,060 for the glass-bottom boat.

The park is in Nago, about 60 kilometers north of Naha (approximately 1 hour by car). Combining it with the Cape Hedo viewpoint (further north) makes a good full-day itinerary.

Local tip: Go in the morning when the light enters the water at a steeper angle and the fish are more active — midday tends to bring more tour groups and the water looks slightly less vivid in flat overhead light.

  1. Kouri Island and the Heart Rocks

Kouri Island is a small island connected to the main island by the Kouri Bridge — a 1.9-kilometer causeway over brilliantly clear water. The bridge itself is one of the most photographed spots in Okinawa, and from the top of the island’s central hill, you can look back at the bridge with the ocean spreading out on both sides.

The main draw on Kouri — beyond the beaches — is the Heart Rocks (Shirasaki Kaihin Koen). Two naturally formed rocks at the shoreline create a heart shape when viewed from a specific angle. This is Okinawa’s most aggressively Instagrammed feature, and the queue for the photo spot in high season (March-May) can be 20-30 minutes. Go at sunrise to have it to yourself.

The beaches around Kouri Bridge on the main island side are excellent for snorkeling in shallow, completely clear water. The village on the island has a few small restaurants serving local seafood — try the shrimp (lobster tempura is the local specialty on Kouri, around ¥1,500-2,500 / £8-14).

Kouri is about 65 kilometers north of Naha — around 1.5 hours drive. You can also reach Nago (the nearest town) by bus and take a local service to Kouri from there.

Local tip: The beaches directly under the Kouri Bridge on the Yagaji Island side have better snorkeling than the main Kouri Beach — fewer people and coral formations within 50 meters of the shore.

  1. Cape Hedo — The Northernmost Point

Cape Hedo is the northern tip of Okinawa’s main island, 130 kilometers from Naha at the end of a drive through Yanbaru forest. The cape is a rocky headland where the Pacific Ocean and the East China Sea collide — on clear days you can see the next island in the chain (Yoron Island) on the horizon.

The coastline around Cape Hedo is dramatic: limestone rock formations at the water’s edge, rugged cliffs with waves breaking at their base, and on windy days, sea spray visible from the road above. There is a small car park, a lookout structure, and almost no one there unless you visit on a weekend during Golden Week.

The drive to Cape Hedo is as good as the destination. Route 58 north from Nago follows the western coast before cutting inland through forest. The last 30 kilometers run through Yanbaru National Park with roadside signs warning of the Okinawan rail crossing. The forest here is genuinely dense subtropical — not the manicured parks of mainland Japan.

Cape Hedo is free to visit. The small café at the car park sells Okinawan soba (around ¥700 / £3.80) and awamori (Okinawan rice liquor, ¥500 / £2.70 per glass).

Local tip: The cape gets good waves on the Pacific side — experienced surfers sometimes set up on the rocky beach on the east side of the headland, particularly in typhoon season (July-September). Do not attempt to swim here; the currents are genuinely dangerous.

  1. Eat Okinawa Soba and Understand Ryukyuan Food Culture

Okinawan cuisine is distinct from mainland Japanese food in ways that go well beyond geography. The Ryukyu Kingdom had extensive trade with China, Southeast Asia, and Korea, and the food reflects all of those influences. Pork is central — the Okinawan saying is that everything is used “from the tip of the nose to the tail.”

Okinawa soba is the island’s signature dish and is nothing like the soba (buckwheat noodles) of mainland Japan. The noodles are thick wheat noodles in a clear pork-and-bonito broth, topped with slow-cooked pork belly (rafute) and pickled ginger. A bowl costs ¥600-1,000 (£3.30-5.50) in a local restaurant. The best are found in tiny family-run spots in the central towns — Mihama, Itoman, and Nago all have good soba streets.

Champuru is another essential dish — a stir-fry of tofu, egg, vegetables, and usually bitter melon (goya) or bean sprouts. The bitterness of goya champuru is an acquired taste worth acquiring. Taco rice (taco meat served on white rice, a legacy of the US military presence) is also an Okinawa-specific dish that appears on nearly every local menu.

Drink awamori — the local distilled rice spirit — rather than sake in Okinawa. It is stronger (typically 30% ABV), earthier, and better suited to the island’s food.

Local tip: The Makishi Public Market in Naha (a large covered food market) has second-floor restaurants where you can buy fresh fish from the stalls downstairs and have it cooked to order upstairs for around ¥500-800 (£2.70-4.30) cooking fee.

  1. Explore Okinawa’s American Influence in Mihama

Okinawa has a unique history that includes 27 years under US administration after World War II (1945-1972), and around 25,000 US military personnel still stationed on the island. This creates a cultural atmosphere unlike anywhere else in Japan.

Mihama American Village in Chatan is where this influence is most visible — a shopping and entertainment district built in an American boardwalk style, complete with a Ferris wheel, burger restaurants, and English-language signage mixed with Japanese. It sounds kitsch. In person it is actually a pleasant area for a few hours, particularly in the evening when the Ferris wheel lights and the shoreline create a good atmosphere.

More interestingly, the stretch of Route 58 around Chatan and Okinawa City (Koza) has vintage American music bars, live jazz venues, and record stores selling original 1960s and 70s American music that was introduced by military personnel. Koza Music Town and the surrounding streets have a genuine music scene rooted in that history.

The US military bases also mean that English is more widely spoken in Okinawa than almost anywhere else in Japan outside Tokyo — ordering food, asking directions, and navigating is significantly easier than in rural mainland Japan.

Local tip: Depot Island in Mihama has an Okinawan craft and souvenir market alongside the chain stores — the locally made Ryukyu glass (recycled glass in ocean-green and blue tones) makes the best gift from Okinawa.

  1. Watch the Sunset from Manzamo Cape

Manzamo Cape is a flat limestone promontory on the west coast of Okinawa, about 30 kilometers north of Naha. The name comes from the Okinawan word for “enough space for ten thousand people to sit.” The cape ends in an elephant-trunk shaped rock formation that juts into the East China Sea, and at sunset the rock turns amber against the darkening ocean.

The viewpoint is free to visit. There is a car park (¥200 / £1.10) and a small path along the cliff edge. The East China Sea sunsets here are among the best in Okinawa — the sun sets directly over open ocean with no land interruptions, and on clear evenings the sky goes through a full range from gold to pink to purple before dark.

The rocks and sea cave below the cape are part of a protected marine ecosystem. Glass-bottom boat tours leave from nearby Maeda Cape for the Maeda Flats reef — the best shore snorkeling site on the main island — where you enter the water from a staircase cut into the rocks and swim out over coral gardens.

Local tip: The angle of the evening light on the elephant-trunk rock formation is best in the 30 minutes before sunset — arrive by 5pm in winter (the sun sets early) and 6:30pm in summer.

  1. Miyagi Island — The Quiet One

Miyagi Island is connected to the main island by a series of bridges via the Kaichu Road causeway — a drive across shallow ocean that gives you an unusual sensation of floating above the water. The island itself is small (about 5 square kilometers), quiet, and overlooked by almost all visitors who focus on the more famous Kouri Island to the north.

The main attraction on Miyagi is Oura Beach on the southeastern coast — a long, shallow, east-facing beach with calm water, almost no facilities, and frequently nobody else there. The water clarity is comparable to the Kerama Islands. The best snorkeling is off the rocks at the north end of the beach.

Miyagi also has the Agari Ufelama viewpoint — a small hilltop with views across the string of bridge-connected islands and the mainland beyond. It appears on no tourism maps and requires finding a narrow unmarked road.

The drive to Miyagi from Naha takes about 45 minutes. Combining Miyagi with nearby Henza Island and the Katsuren Peninsula makes a full east-coast day trip.

Local tip: Early morning on Miyagi, before 8am, the Oura Beach is completely deserted and the water is glassy. The light at that hour on an east-facing beach is extraordinary — this is the hour to go.

  1. Sesoko Island and Snorkeling the North

Sesoko Island is the best snorkeling site on the northern coast of the main island — connected by a bridge about 15 kilometers north of Nago and about 70 kilometers from Naha. The eastern beach has calm, shallow water with coral and marine life visible from the surface without any fins.

The island is small (you can walk around it in about 45 minutes) and has a local feel — a handful of minshuku (family guesthouses) and a couple of cafés rather than resort hotels. The beach has a few snorkel rental shacks but they close early (by 5pm in shoulder season).

In late spring, the water temperature is around 22-24 degrees Celsius — cold for swimming but fine for snorkeling in a wetsuit. In summer (July-September) the water is 28-30 degrees and tropical fish density is at its highest, but jellyfish can be an issue in August.

The best time for visibility is April-June before the rainy season muddies the water. Sesoko is easy to reach from the Busena Marine Park (30 minutes) if you are already in the north for the day.

Local tip: The western shore of Sesoko (facing the main island) has rock pools at low tide where you can find sea urchins, starfish, and small tropical fish without entering the water at all — good for children or non-swimmers.

  1. Nago City and the Cherry Blossoms

Japan’s famous cherry blossom season (sakura) peaks in Okinawa at the end of January — earlier than anywhere else in Japan due to the subtropical climate. The Nago Cherry Blossom Festival is held at Nago Castle ruins in late January or early February, with thousands of Ryukyu cold climate cherry trees (lighter pink and more delicate than mainland varieties) in bloom.

Nago is about 65 kilometers north of Naha, the largest town in northern Okinawa, and a good base for exploring Yanbaru. The cherry blossom festival is largely a domestic Japanese tourism event — international tourists rarely know about it — which makes it feel considerably more authentic than the heavily photographed Shinjuku and Ueno Parks events in March.

The Nago Castle ruins are a short hike uphill from the main town — the stone walls and hilltop position give cherry blossom views that also include the ocean below. At night, the trees are lit with lanterns.

Even outside blossom season, Nago is worth a stop — the Orion Beer Factory (Okinawa’s local beer brand) offers tours and tastings.

Local tip: Book accommodation in Nago for the festival well in advance — the town has limited hotels and the good ones sell out months ahead for the blossom period.

  1. Morning Coffee in an Okinawa Cliffside Café

Okinawa has an extraordinary café culture, particularly among the independent cliff and ocean-view cafés that line the western coast. These are not franchise coffee shops — they are individually designed places, often in converted buildings or purpose-built wood-and-glass structures, with direct ocean views and a menu that runs to Okinawan sweet potato cakes, shikuwasa (local citrus) juice, and hand-drip single-origin coffee.

The Seaside Café Hanon in the central island area is frequently photographed — it sits directly above the ocean with sliding glass doors that open the entire front wall to the view. Fifi Parlour near Manzamo serves housemade gelato flavoured with locally grown ingredients. Tida’s Café in the north does a morning set (breakfast, coffee, shikuwasa juice) for around ¥1,200 (£6.50) that uses ingredients from local farms.

The best approach is to leave Naha early, drive the western coast road north, and stop at whichever café looks interesting. Okinawan café culture rewards wandering more than planning — the most memorable coffee stop we found was at an unmarked door with a handwritten sign.

Local tip: Shikuwasa juice is the flavour of Okinawa — a small citrus fruit grown only in the island’s north, tart and floral, somewhere between a lime and a yuzu. It appears in everything from ice cream to awamori cocktails. Order it wherever you see it.

  1. Watch the Stars from Cape Hedo on a Clear Night

This is not on any official list of things to do in Okinawa. But after two weeks on the island, it is the moment I keep returning to in my head.

Drive to Cape Hedo after sunset. Bring a blanket. The cape faces north, with no light pollution between you and the Pacific horizon. Okinawa sits at 26 degrees north latitude — low enough that on clear nights you can see significantly more of the southern sky than from mainland Japan or Europe. The summer Milky Way rises directly above the cape and extends from horizon to horizon.

Okinawa does not get the extreme dark skies of the outer islands (Ishigaki Island further south is considered one of the world’s best stargazing sites), but for the main island, Cape Hedo on a clear night after a good dinner in Nago is genuinely extraordinary.

There are no facilities and no entry fee. Bring a torch, warm layers (it gets cold at the north cape even in summer after midnight), and something to lie on.

Local tip: The light pollution from Nago to the south creates a faint glow that washes out the southern sky from Cape Hedo. Face north and northwest for the darkest sky and the best stars.

Okinawa Changed How I Think About Japan

Before Okinawa, I thought I knew Japan reasonably well — Tokyo food scenes, Kyoto temple politics, the rhythm of the bullet train. Okinawa disassembled that understanding and replaced it with something more interesting: a place with its own history, its own food, its own relationship with the sea, and a pace of life that has nothing to do with the organized efficiency of the mainland.

Things to do in Okinawa accumulate quickly once you start looking. Save this guide for your trip, save it again for the next trip — because if you are anything like me, one time in Okinawa will not be enough.

Continue Reading

Things To Do

15 Breathtaking Things to Do in Norway (2026 Travel Guide)

Published

on

Things to Do in Norway

I had seen a thousand photographs of Norwegian fjords before I ever went. I thought I was prepared but I was not. No photograph — and I have been to a lot of places — captures the scale of standing at the edge of a fjord when the water below you is so still it looks like glass and the mountains above are disappearing into low cloud. Norway does something to you that most travel destinations simply do not.

This list of things to do in Norway is not the standard one. Yes, Lofoten is on it — it has to be, because Lofoten is genuinely extraordinary. But so is a boat trip you can take for 40 Norwegian kroner, a road that gets regularly swallowed by Atlantic waves, and a city that gives you access to three fjords within a 20-minute drive. This is what Norway actually offers, from someone who spent three weeks there in 2024. Let’s get into it.

  1. Walk the Lofoten Islands

If you do one thing in Norway, make it Lofoten. The Lofoten archipelago sits inside the Arctic Circle, about 200 kilometers north of Bodø, and it is the closest thing to a landscape from a dream that I have encountered anywhere. Jagged mountain peaks rise directly from the sea, red and yellow fishing cabins (rorbu) cluster on rocky headlands above perfectly clear water, and on clear nights between September and April, the Northern Lights reflect in the fjords below.

Flying into Svolvær from Oslo takes about 1.5 hours and costs between £60-£150 return depending on booking date. Renting a car on arrival is essential — the E10 highway runs the length of the main islands and connects you to the smaller outer islands. Budget accommodation in a traditional rorbu cabin costs around £70-£120 per night for two people. Staying in a rorbu is not optional — it is the experience.

The best base is Svolvær for north Lofoten or Reine for south Lofoten. Reine is photographically superior (it was voted the most beautiful village in Norway) but gets very crowded in summer. Visit in September or October for a combination of autumn colours, Northern Lights probability, and reasonable crowd levels.

Local tip: The Reinebringen hike above Reine has steel steps that start before dawn is fully light — arriving at the top for sunrise at around 7am in October puts you above the clouds with the fjord lit below you, and the first few hikers of the day have it entirely to themselves.

  1. Drive the Atlantic Ocean Road

The Atlantic Ocean Road (Atlanterhavsveien) is an 8.3-kilometer stretch of road connecting the mainland to the island of Averøy, crossing a chain of small islands and skerries via eight bridges. In good weather it is spectacular. In a North Atlantic storm, it is one of the most dramatic things a car can legally drive through.

The Storseisundet Bridge — the most famous of the eight — curves and dips in a way that makes it look from certain angles as though the road ends in mid-air above the ocean. In winter storms, waves crash directly over the road surface. There are storm-watching platforms built into the seascape for people who want to get close to the spray without being on the road itself.

The road sits between Kristiansund and Molde and takes about 30 minutes to drive end to end at a normal pace. There is no toll on the road itself. The Atlantic Ocean Road Scenic Route (Nasjonale Turistveger) designation means the rest stops and viewing platforms are architecturally designed — some of the best public infrastructure design in Norway.

Go at high tide during rough weather for the full experience. But even in flat calm, the drive is worth it.

Local tip: There is a fishing platform built off the Askevågen bridge where local fishermen cast lines into the Atlantic — pull over and watch for 10 minutes and you will likely see something interesting.

  1. Take the Flåm Railway

The Flåmsbana is a 20-kilometer railway line that runs from Myrdal on the Bergen Line down through the Flåm valley to the Aurlandsfjord at sea level. It descends 865 meters in altitude. The gradient — up to 55 per mille — is one of the steepest in the world for a standard railway. The journey takes 1 hour each way.

The train passes through 20 tunnels, crosses mountain waterfalls, and at one point stops at the Kjosfossen waterfall (87 meters high) so passengers can get off and photograph it. The scenery changes completely every 10 minutes — from high mountain plateau covered in snow to deep river gorge to fjord waterfront.

A return ticket costs around £50 per person. Book in advance, especially for summer travel — this is one of the most visited railway journeys in Scandinavia and sells out weeks ahead. The best seats are on the left side of the train going down (heading from Myrdal to Flåm) for maximum waterfall views.

From Flåm you can take a Nærøyfjord cruise (from £20) — the Nærøyfjord is a UNESCO World Heritage site and one of the narrowest fjords in Europe.

Local tip: The return train from Flåm back to Myrdal in the late afternoon hits the valley light at a completely different angle — the shadows on the mountains are longer and the colours more dramatic than the morning descent.

  1. Hike Preikestolen (Pulpit Rock)

Preikestolen is a flat-topped cliff that rises 604 meters above the Lysefjord. The plateau at the top is about 25 by 25 meters square. Standing on the edge of it — there is no fence — looking down at the fjord is the kind of moment that rearranges your sense of scale.

The hike takes approximately 4 hours return (8 kilometers round trip) with an elevation gain of about 330 meters. It is classified as moderately challenging. The trailhead is at Preikestolen Fjellstue (a mountain lodge with a car park) and is accessible by ferry from Stavanger plus a connecting bus — the combination costs around £20 return. The ferry departs from Stavanger Strandkaien dock.

The hike is popular — very popular in summer. July and August see 300,000+ visitors per year at peak. Go in May or September for fewer people and better light. The summit is most dramatic in early morning or late afternoon when the sun is low enough to throw shadows across the fjord below.

There is no entry fee for the hike itself. The car park at Preikestolen Fjellstue costs about £15 per day.

Local tip: About 1 kilometer before the summit there is a small lake (Preikestolvatnet) that reflects Preikestolen perfectly on calm days — this shot appears on almost zero travel accounts because everyone rushes past it to get to the top.

  1. See the Northern Lights in Tromsø

Tromsø sits at 69 degrees north — well inside the Arctic Circle — and is consistently one of the best places in the world to see the Northern Lights. The aurora season runs from late September to late March, when the sky is dark enough. The peak probability period is November through February.

Seeing the Northern Lights requires darkness and clear skies. Tromsø averages 40-50 nights per winter when conditions are right. A guided tour (essential for first-timers who do not know the landscape or the weather patterns) costs around £80-£120 per person and usually runs from 8pm to midnight, driving you out of the city light pollution to the right conditions.

Tromsø itself is worth 2-3 days at minimum: the Arctic Cathedral (Ishavskatedralen) is a stunning piece of 1960s architecture with a 140-square-meter stained glass window on the east facade. The Polaria museum explains Arctic ecosystems. The Fjellheisen cable car takes 4 minutes to rise 421 meters above the city and gives a view over the snowy islands and fjords below.

Local tip: The Aurora Forecast website (spaceweather.com/aurora) rates Northern Lights probability on a scale of 0-9. Anything above 4 in Tromsø on a clear night is worth chasing.

  1. Explore Bergen and the Bryggen Wharf

Bergen is Norway’s second city and the gateway to the western fjords. The Bryggen wharf — a row of medieval Hanseatic trading houses built from the 13th century onward — is a UNESCO World Heritage site and the visual symbol of Bergen. The wooden buildings lean at various angles from centuries of settlement, and the alleyways between them are narrow enough that two people can barely pass each other.

Bryggen is also home to some of Bergen’s best small shops, art galleries, and cafés. A tunnel through the back of the wharf buildings leads to a courtyard most visitors never find. The Theta Museum inside Bryggen (£5 entry) is a tiny, single-room museum preserving a secret World War II radio room used by the Norwegian resistance.

Bergen itself is compact and walkable. The Fløibanen funicular (£12 return) takes you up to Mount Fløyen in 8 minutes for panoramic city and fjord views. The Bergen Fish Market on the waterfront (open 7am to 11pm daily) is the real thing — not a tourist market — and breakfast at the fish market costs around £8-£12 for smoked salmon and bread.

Bergen gets 240 days of rain per year. Pack accordingly. But the rain is often brief, and a wet Bergen in evening light is not a bad place to be.

Local tip: The wooden houses of Nordnes peninsula (a 15-minute walk from Bryggen) are largely unknown to visitors and show what the historic wooden city of Bergen looked like before the great fires of the 18th and 19th centuries.

  1. Cruise the Geirangerfjord

The Geirangerfjord is a UNESCO World Heritage site and one of the most photographed places in Norway. The fjord is 15 kilometers long and surrounded by snow-capped mountains, with waterfalls including the Seven Sisters (seven separate streams tumbling 250 meters down a vertical cliff face) visible from the water.

Ferry crossings between Geiranger and Hellesylt take 1 hour and cost around £30 per person (bikes and cars additional). This is a public ferry, not a tourist cruise — it runs on schedule regardless of weather and carries locals alongside visitors. The views from the ferry deck are essentially the same as on a dedicated sightseeing cruise at twice the price.

Geiranger village itself is worth a day: the viewpoint at Ørnesvingen (Eagle Road), a switchback road with 11 hairpin bends above the fjord, gives you the classic Geiranger photograph from above. Dalsnibba viewpoint (£10 toll) at 1476 meters altitude shows the fjord from directly above — a completely different and equally extraordinary perspective.

Local tip: The Seven Sisters waterfall is best seen in June when snowmelt is at its peak — the flow in July and August reduces significantly and the waterfall loses some of its drama.

  1. Witness the Midnight Sun Above the Arctic Circle

North of the Arctic Circle, from around mid-May to late July, the sun does not set. It dips toward the horizon, turns everything amber and gold, and then rises again without ever reaching dark. Experiencing the Midnight Sun for the first time is genuinely disorienting — your body insists it should be night and the sun insists otherwise.

The Arctic Circle crossing point on the E6 highway north of Bodø (the Arctic Circle Centre, Polarsirkelsenteret) is the landmark point, but for the best Midnight Sun experience you want to be further north. Mo i Rana (just south of the Arctic Circle) and Bodø are the most accessible southern options. Svolvær in Lofoten is better. Tromsø, Nordkapp, and Svalbard are extraordinary.

Bodø is a 1.5-hour flight from Oslo (around £40-£80 return). Midnight Sun cruises operate from Bodø at around £30 per person. The Saltstraumen Maelstrom near Bodø — one of the strongest tidal currents in the world — is best viewed during the Midnight Sun at maximum flow (check the tidal tables before going), which creates a genuinely strange sight.

Local tip: The Midnight Sun disrupts sleep badly for most people. Pack a proper sleep mask — the blackout curtains in most Norwegian hotels are good but rarely perfect.

  1. Hike in the Jotunheimen National Park

Jotunheimen means “Home of the Giants” in Norwegian and contains Norway’s two highest mountains — Galdhøpiggen (2469 meters) and Glittertind (2452 meters). But the national park also has accessible day hikes that do not require alpine experience or special equipment.

The Besseggen Ridge trail is considered one of the most spectacular ridge hikes in Europe. It runs 15 kilometers above Lake Bessvatnet (green) on one side and Lake Gjende (blue-green) on the other. The ridge is narrow enough in places that you walk with one foot on each side. The hike takes 5-8 hours. A morning boat from Gjendesheim to Memurubu (£20) starts the loop; you walk back along the ridge to the start.

Access to Jotunheimen is from Otta or Lillehammer by car (2-3 hours from Oslo). Accommodation inside the park ranges from staffed mountain huts (£60-£90 per person including dinner and breakfast) to camping. The staffed huts are the better option for a first Jotunheimen visit — the food is good and the staff know the trails.

Local tip: The boat on Gjende lake runs from early June to early October. Outside those dates Besseggen is only accessible to winter mountaineers — plan accordingly.

  1. Visit the Viking Ship Museum in Oslo

The Viking Ship Museum in Oslo houses three of the best-preserved Viking ships in the world — the Oseberg, Gokstad, and Tune ships, buried as grave ships between 800 and 900 AD and excavated from the Vestfold burial mounds south of Oslo in the 19th and early 20th centuries.

The Oseberg ship is the one that stops you in your tracks. It is 22 meters long, elaborately carved at bow and stern, and survived buried in a blue clay mound for over 1100 years. The burial goods found with it — including carved wooden sledges, textiles, kitchen equipment, and the skeletons of two women — are displayed around the ship and show the level of craftsmanship these people reached.

Admission costs £15 per adult. The museum is on the Bygdøy peninsula, a 10-minute bus ride from central Oslo (Bus 30 from Jernbanetorget, around £3). Allow 1.5 to 2 hours.

Note: the museum was undergoing expansion as of 2024. Check the current opening situation before visiting — some galleries may still be reconfigured.

Local tip: The museum café looks directly at the Oseberg ship through a glass wall — getting a coffee and sitting with the ship visible while you process what you have just seen is an underrated experience.

  1. Take the Hurtigruten Coastal Voyage

The Hurtigruten is Norway’s historic coastal express — a working mail and passenger ship that has connected Bergen to Kirkenes (near the Russian border) since 1893. The full round trip takes 12 days. But you can book individual legs as a cruise, starting from Bergen or Ålesund or Tromsø, and stay for as many nights as your budget allows.

What makes the Hurtigruten different from a standard cruise is that it is still a working ship. It stops at 34 ports — some of them so small the stop lasts 15 minutes — and carries everything from packages to hospital supplies to local passengers heading one village up the coast. You are not in a resort at sea. You are on a ship that matters to the communities it serves.

Prices vary enormously depending on the cabin and the season. A 4-night segment in an inner cabin in shoulder season costs around £400-£600 per person including meals. The Northern Lights are visible from the upper deck between September and March. Some segments cross the Arctic Circle, where the ship’s captain plays a traditional horn fanfare.

Local tip: Book a cabin with a window or balcony facing the port side (left side) if traveling south to north — that is where the fjord views are on the most dramatic section between Ålesund and Tromsø.

  1. Explore Sognefjord — Norway’s Longest Fjord

Sognefjord is the longest fjord in Norway at 204 kilometers, and the deepest at 1308 meters. That number — 1308 meters of water depth — is worth sitting with. The fjord extends so far inland that at its eastern end you are surrounded by snow-capped mountains with barely any salt smell remaining in the air.

The most popular access point is Flåm, at the end of the Aurlandsfjord (a branch of Sognefjord). But the broader Sognefjord experience requires either a Hurtigruten connection or a self-drive itinerary. The drive along the southern shore from Bergen to Flåm follows the E16 through tunnels and across mountain passes, taking about 3 hours.

The Borgund Stave Church — 45 minutes east of Flåm — is the best-preserved of Norway’s medieval stave churches, built in 1180. Entry costs around £12. The carved dragon-heads on the roof posts and the layered wooden construction make it look like something from a fantasy world. Inside, it smells of centuries-old pine tar preservation treatments.

Local tip: The Aurlandsfjord ferry from Flåm to Gudvangen (1.5 hours, £20) passes through the Nærøyfjord — the narrowest UNESCO-listed fjord in the world — and is the best value boat journey in Norway.

  1. Day Trip to Sommarøy Island from Tromsø

Sommarøy is a small island about 60 kilometers west of Tromsø, reached by a 1-hour drive along the FV862 coastal road. The name means “Summer Island” and the beaches here — white shell sand, turquoise water — look more Caribbean than Arctic. In July, under the Midnight Sun, the light on the water is unlike anything else in Norway.

The island has a local hotel, a few cafés, and a single main village. The population is around 300 people. The drive from Tromsø takes you across a series of mountain passes and over a bridge to the island. At the far end of the island, a short walk through low coastal vegetation leads to Hillesøy — a linked island with a small hiking trail to a summit viewpoint that covers the entire outer archipelago.

Sommarøy became briefly internet-famous in 2019 when residents proposed making it the world’s first “time-free zone” during the Midnight Sun period. The proposal was largely tongue-in-cheek, but the sentiment is real — time moves differently when the sun does not set.

Local tip: The island’s beaches face west. For the best light on the turquoise water and sand, go in the late afternoon when the sun is lower and the colour contrast is at its most vivid.

  1. See Puffins at Runde Island

Runde is a small island off the western coast of Norway, about 2 hours by car from Ålesund. It is home to over 500,000 nesting seabirds, including around 100,000 puffins — the largest puffin colony in Norway. The cliffs on the southern coast rise 300 meters from the sea.

The hike to the bird cliffs takes about 45 minutes from the main village, with an elevation gain of 200 meters. The trail is moderately challenging but manageable in good footwear. At the top, the birds circle at eye level and in some places the puffins — who are surprisingly unafraid of humans near their burrows — can be photographed from a meter away.

The best time to visit is May to July, when puffins are present (they leave in late July). Evening visits around 8-9pm are ideal because the birds return from the ocean to their cliff burrows as the light softens. Runde is reached from the mainland by a series of bridges from Ålesund — no ferry required.

Local tip: Bring a longer camera lens than you think you need. Even though the birds come close, you will want reach for shots of puffins on the cliff face — 200mm minimum, 300mm ideal.

  1. Watch the Sun Rise Over Preikestolen From the Water

Most people see Preikestolen from the top. Few people look up at it from the Lysefjord below. A small number see it at the exact moment the morning sun hits the cliff face from the water.

The Fjord Cruise Lysefjord departs from Forsand (near Stavanger) at various times, including an early morning departure. The boat takes you deep into the fjord until Preikestolen appears above you — 604 meters of vertical cliff, topped by the flat rock where dozens of tiny human figures are visible. From the boat, looking up, the scale is genuinely staggering in a way that the hike to the top does not fully convey.

The cruise costs around £30 per person and takes 2 hours return. The combination — cruise in the morning, hike in the afternoon — gives you both perspectives on the same day and uses a full light range as the fjord moves from morning shadow into afternoon sun.

Local tip: Sit on the upper deck at the front of the boat for the best unobstructed view of Preikestolen as you approach. The covered lower deck gets the photographs of other passengers, not the cliff.

Norway Will Surprise You Every Time

The things to do in Norway pile up quickly once you are there. Most first-time visitors underestimate the country and book five days. Most people who have been come back to do it differently — longer, slower, further north. The fjords, the midnight sun, the silence at 3am when it is still bright outside — these are not things you can fully prepare for.

Save this Norway travel guide for your trip. Share it with anyone who is on the fence about making the journey. Norway is worth every kr you spend there.

Continue Reading