Guides
The Greatest Aquariums in the World: Global Travel Guide

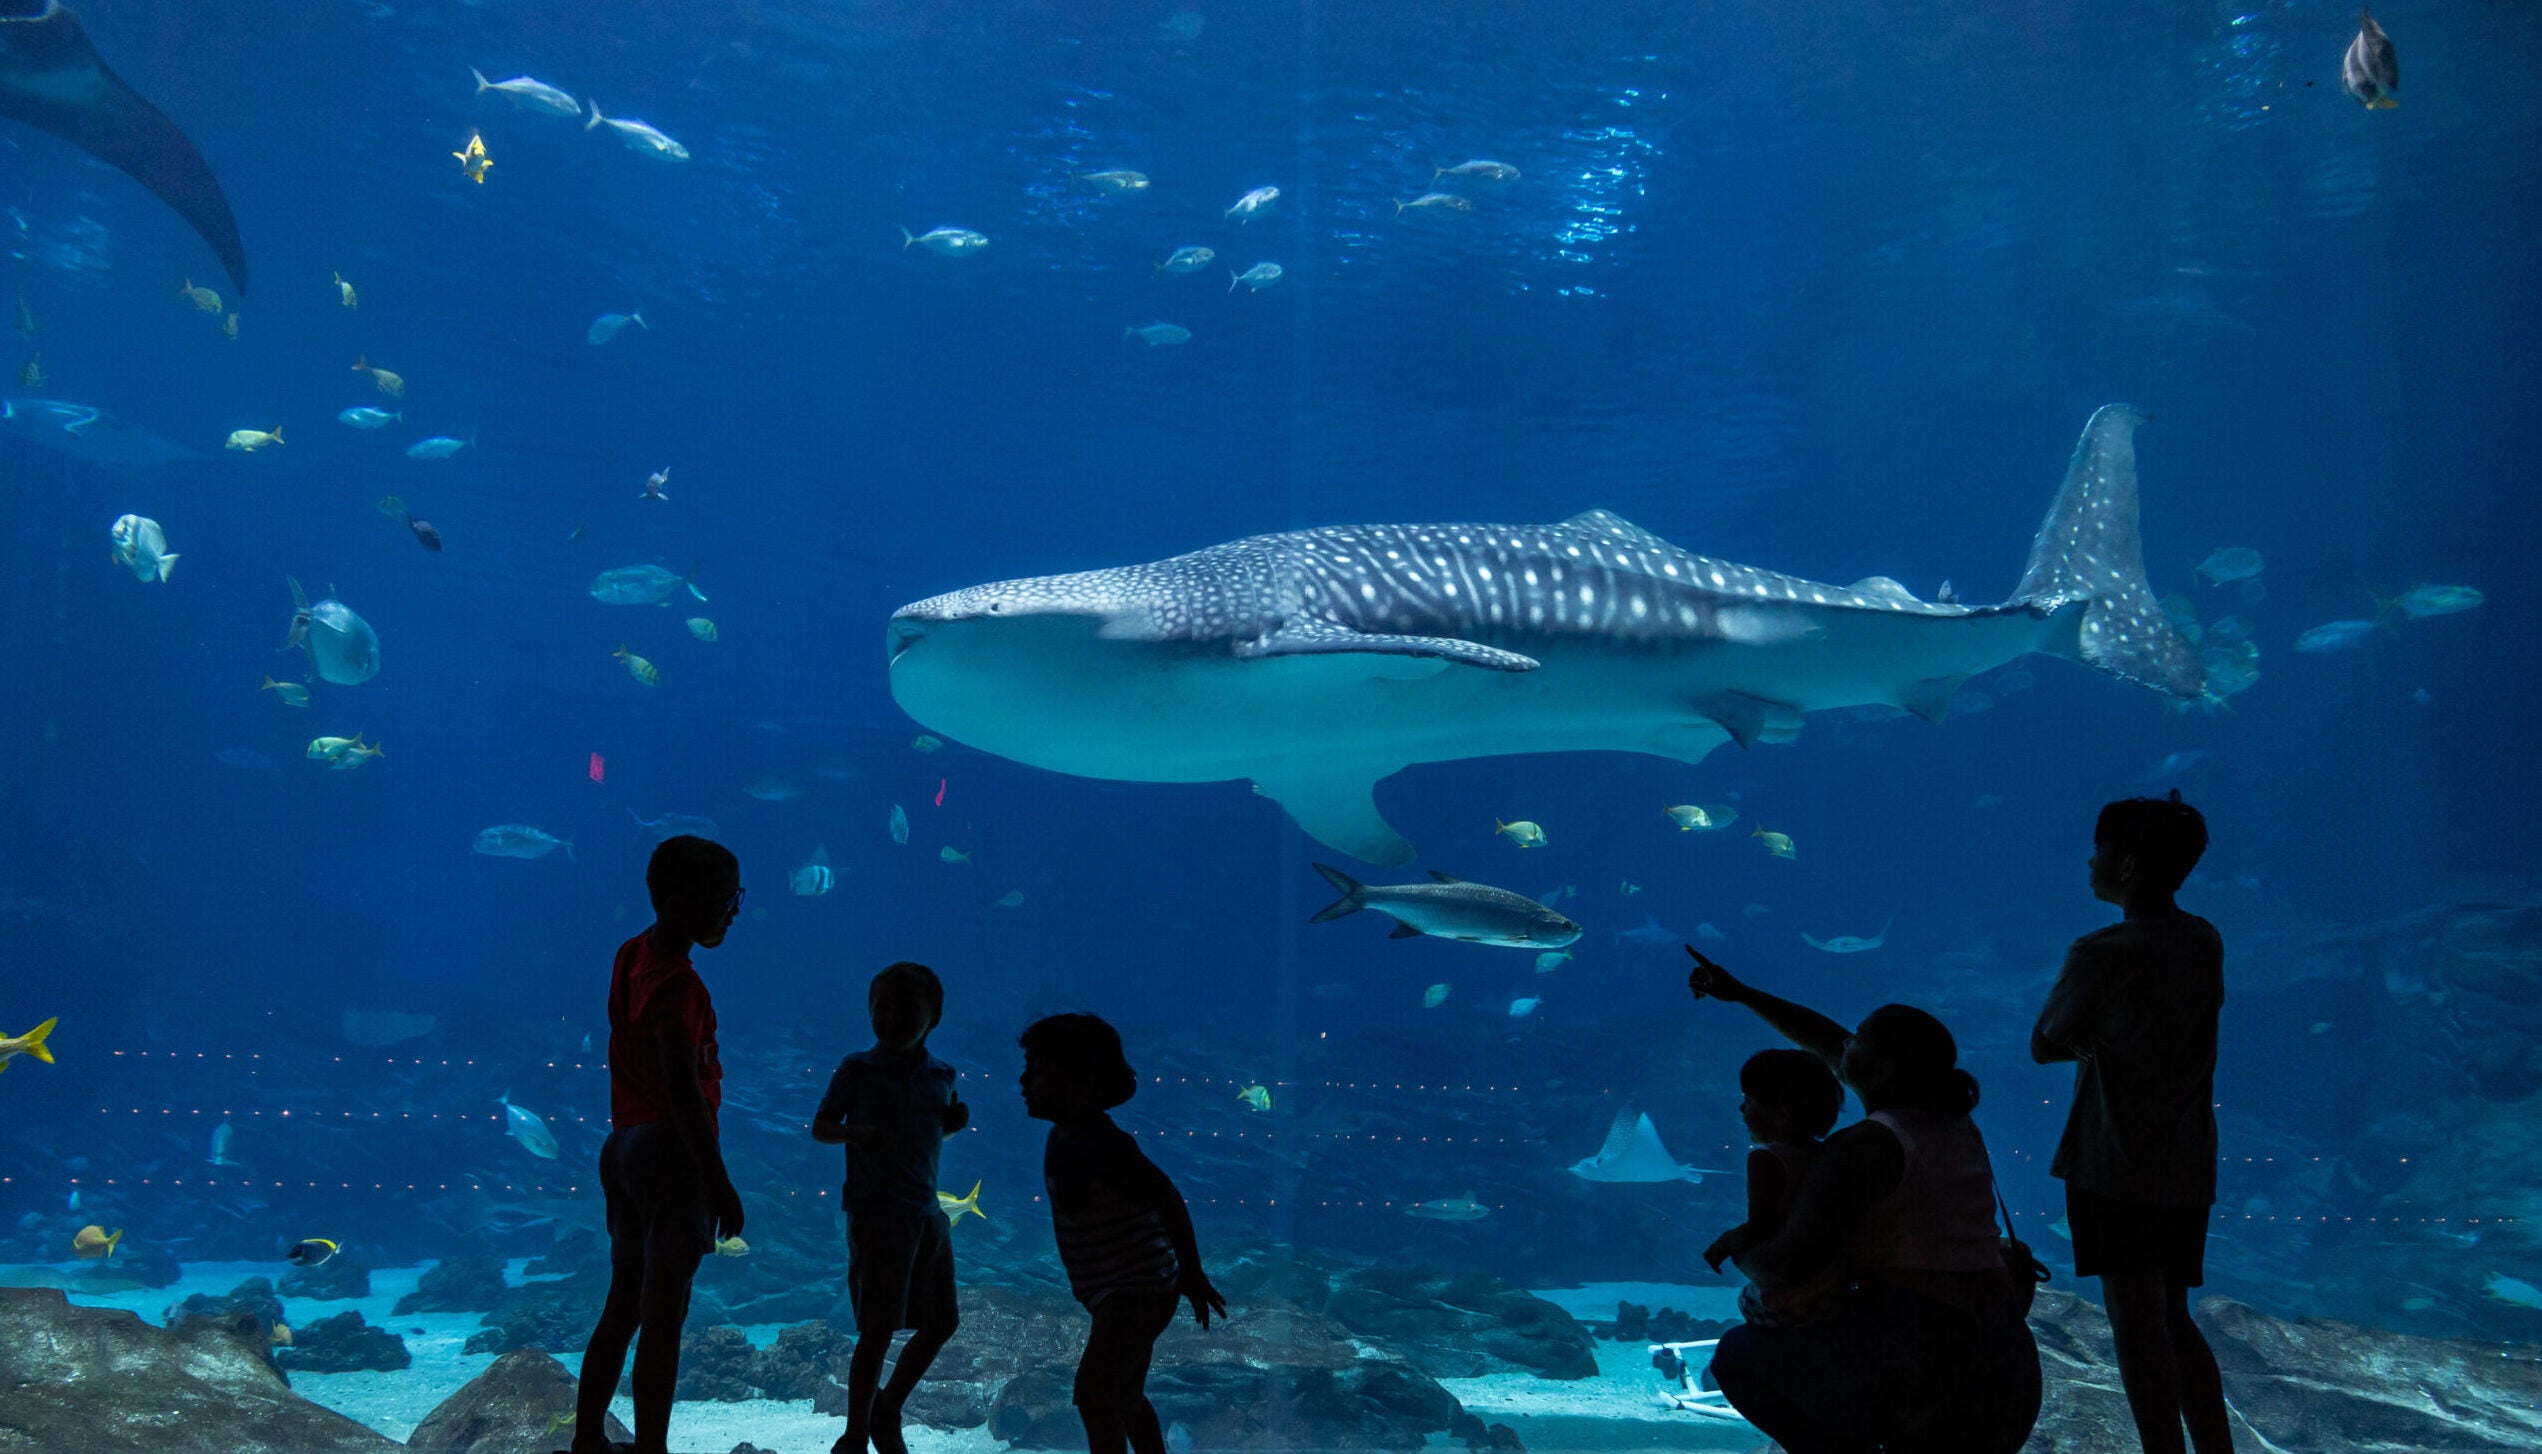
Aquariums do more than just display fish in glass tanks — they transport you into another world. From mesmerizing ocean tunnels and gigantic whale shark exhibits to interactive touch pools and immersive walk‑through habitats, the world’s best aquariums are destinations in their own right. Whether you’re a backpacker looking for inexpensive wonders, a family planning unforgettable memories, a digital nomad chasing inspiration, or a luxury traveler seeking exclusive experiences — this guide will help you plan the perfect aquatic adventure.
Introduction: Why Visit the World’s Best Aquariums?
Imagine strolling beneath a glass tunnel as sharks glide overhead. Or watching a diver hand‑feed tropical fish while schools of rays swirl nearby. Aquariums combine education, conservation, and entertainment — making them ideal for solo travelers, teams on workations, or families creating lifelong memories. Many aquariums today are architectural marvels, blending cutting‑edge technology with marine science to bring ecosystems alive.
From the South China Sea to the Atlantic Coast, these aquatic wonderlands showcase biodiversity, inspire awe, and offer something for every travel style.
Best Time to Visit — Seasonal Guide
Greatest Aquariums in the World are mostly indoor attractions (meaning you can visit year‑round), the experience around your visit — crowds, pricing, and local festivals — varies by season:
Spring (March–May)
Pros: Mild weather, fewer crowds — especially great for outdoor aquarium campuses (like those with adjacent marine parks).
Best for: Backpackers & families avoiding peak crowds.
Summer (June–August)
Pros: Long daylight hours and peak tourist season.
Cons: Higher prices, crowded weekends.
Best for: Families on school vacations.
Autumn (September–November)
Pros: Mild weather, off‑peak advantages, ideal for combo trips (city tours + aquariums).
Best for: Digital nomads & couples.
Winter (December–February)
Pros: Lowest travel costs, indoor attractions shine.
Best for: Budget travelers & luxury travelers seeking quieter experiences.
Top 10 Must‑Visit Aquariums Around the World
Here are the most iconic aquariums globally, carefully selected for experience quality, conservation efforts, visitor engagement, and cultural context:
1. Monterey Bay Aquarium — USA
Perched on California’s rugged coastline, this aquarium is known for its jaw‑dropping Open Sea exhibit, kelp forests, and hands‑on tidepools. Conservation programs and ocean research make this a must for eco‑curious travelers.
2. Osaka Aquarium Kaiyukan — Japan
One of the largest aquariums in the world, Kaiyukan’s central Pacific Ocean tank is home to whale sharks and manta rays. Its design lets you journey from the icy north to the tropical south in one continuous flow.
3. Georgia Aquarium — USA
Located in Atlanta, this is among the world’s largest indoor aquariums, boasting up to 100,000 animals across hundreds of species, including majestic whale sharks and beluga whales.
4. Dubai Aquarium & Underwater Zoo — UAE
Located inside Dubai Mall, this aquarium combines luxury and accessibility. Its massive viewing tunnel and glass‑bottom boat rides offer dramatic perspectives on marine life.
5. L’Oceanogràfic — Spain
Part of City of Arts and Sciences in Valencia, this is Europe’s largest aquarium with unique habitats: Arctic, Mediterranean, Red Sea, and deeper ocean zones.
6. S.E.A. Aquarium — Singapore
Housing tens of thousands of sea creatures, the standout is the Open Ocean Habitat, a massive viewing panel where graceful rays and large fish glide by.
7. Aqua Planet Jeju — South Korea
A blend of dramatic design and immersive displays, this aquarium offers night shows, touch pools, and themed galleries.
8. Two Oceans Aquarium — South Africa
Situated at Cape Town’s Victoria & Alfred Waterfront, this aquarium highlights the meeting of the Atlantic and Indian Oceans — complete with playful penguins.
9. Aquarium of Genoa — Italy
Italy’s largest aquarium is rich in Mediterranean species and features immersive exhibits that feel like traveling through the sea itself.
10. National Aquarium — USA
In Baltimore’s Inner Harbor, this aquarium mixes architectural beauty with innovative exhibits, including a stunning tropical rainforest.
Local Cuisine & Best Places to Try Them
Pairing great food with great aquarium visits makes the travel experience unforgettable. Here’s what to eat and where:
Monterey, USA
Dish: Cioppino (seafood stew)
Try At: Old Fisherman’s Grotto — waterfront classic with fresh catches.
Osaka, Japan
Dish: Takoyaki & Okonomiyaki
Try At: Dotonbori Street — the heart of Osaka street food culture.
Dubai, UAE
Dish: Shawarma & Lebanese mezze
Try At: Al Mallah & Ravi Restaurant — affordable local favorites.
Valencia, Spain
Dish: Paella Valenciana
Try At: Casa Roberto — traditional paella near the old town.
Singapore
Dish: Chili Crab
Try At: Jumbo Seafood — iconic Singaporean seafood hub.
Cape Town, South Africa
Dish: Snoek Braai (grilled fish)
Try At: The Codfather — upscale seafood with local catch.
Transportation Tips
Airports & Access
Monterey: Monterey Regional Airport (MRY) — short taxi or shuttle to aquarium.
Osaka: Kansai International Airport (KIX) — train/bus to Osaka Bay.
Dubai: Dubai International (DXB) — metro to Dubai Mall.
Valencia: Valencia Airport (VLC) — tram or taxi to the city.
Singapore: Changi Airport (SIN) — metro to the aquarium.
Public Transport
Major cities hosting these aquariums have seamless public transit — from subways (Osaka, Singapore) to trams (Valencia). Always check local transport apps for realtime schedules.
Car Rentals
Recommend for backpackers and road trip itineraries (Monterey & Cape Town especially). Use global or local providers — compare prices on RentalCars or Kayak for best deals.
Budget Breakdown
Here’s a ballpark daily cost estimate depending on travel style:
| Category | Backpacker | Mid‑Range | Luxury |
|---|---|---|---|
| Accommodation | $20–$50 | $80–$180 | $250+ |
| Meals | $15–$35 | $40–$80 | $100+ |
| Aquarium Entry | $20–$40 | $35–$60 | $60+ |
| Local Transport | $5–$15 | $15–$40 | $50+ |
| Extras | $10–$20 | $30–$60 | $80+ |
| Daily Avg | $70–$160 | $200–$420 | $540+ |
Tip: Family passes, online reservations, and combo tourist cards can significantly reduce costs.
Hidden Gems & Off‑The‑Beaten‑Path Spots
Even after visiting the top aquariums, these lesser‑known experiences are worth seeking:
Toba Aquarium, Japan: Smaller but stunning exhibits with local marine life.
Lisbon Oceanarium, Portugal: Innovative design focused on environmental sustainability.
Acquario di Cattolica, Italy: Great for families, walkable from the beach.
Marinelife Center, Maui, USA: Outdoor marine rescue center + tide pools.
Exploring these will delight travelers who crave unique discoveries beyond the usual.
Safety Tips & Cultural Etiquette
Respect Wildlife: Do not tap on glass or disturb animals.
Photography Rules: Some exhibits restrict flash photography — check signs.
Local Etiquette: Many aquariums are part of larger cultural sites — be courteous in shared spaces.
Health & Safety: Always follow posted guidelines, especially in interactive areas or touch tanks.
Sample Itineraries
3‑Day Quick Aquatic Tour (Multi‑City)
Day 1 — Osaka
Morning: Kaiyukan
Afternoon: Osaka Bay Cruise
Evening: Street food in Dotonbori
2 — Singapore
Morning: S.E.A. Aquarium
Afternoon: Sentosa Beaches
Evening: Night Safari
Day 3 — Valencia
Morning: L’Oceanogràfic
Afternoon: Old Town & Paella lunch
Evening: Sunset by the Turia Gardens
7‑Day Family & Adventure Mix
Days 1–2: Monterey Bay Aquarium + coastal hikes
Day 3: Drive to Santa Cruz & visit local marine center
Day 4: Fly to Atlanta – Georgia Aquarium + city tour
Day 5: ATL to Baltimore – Inner Harbor & National Aquarium
Day 6–7: Washington, DC museums + Smithsonian National Zoo
Conclusion: Ready to Dive In?
The Greatest Aquariums in the World are more than stops on a travel map — they’re gateways to understanding our oceans and planet. No matter your travel style — whether you’re chasing budget adventures, enriching family vacations, or luxurious escapes — there’s an aquarium experience waiting for you.
Final Tips
Book online in advance — skip queues and secure discounts.
Pair aquariums with local experiences — beaches, museums, markets.
Consider seasonality — off‑peak months often offer the best value.
Pack your sense of wonder — and dive into the world’s most breathtaking aquatic destinations!

London has thousands of photo spots. Most tourists spend their entire trip photographing the same five – Big Ben, Tower Bridge, red phone boxes, black cabs, and Buckingham Palace. This guide reveals 18 photogenic London spots that most tourists walk right past, the hidden streets, rooftop views, moody alleyways, and atmospheric locations that will give your London photo ideas an entirely different look.
The best London photography spots do not appear on map apps. They come from locals who know where the light hits at what hour and which doorway looks best on a foggy morning. That knowledge is exactly what this guide gives you.
Leadenhall Market at Dawn
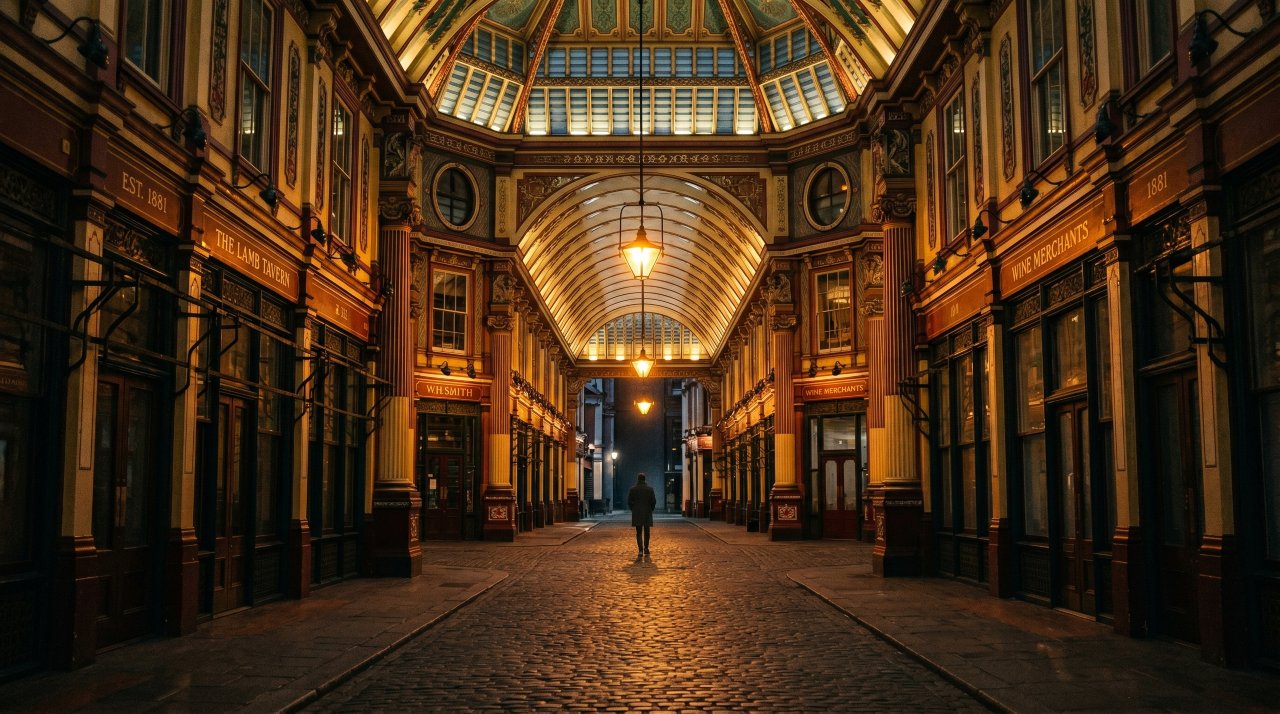
Leadenhall Market is a Victorian covered market built in 1881 with a soaring painted ceiling in red, green, and gold. At 5:30 AM on a weekday the market is completely empty and lit only by its own gas-effect lanterns. This is the single most dramatic interior photography location in London.
The market sits at the junction of Gracechurch and Whittington Avenue, EC3V 1LT. Stand at the center crossing and shoot straight up for the ceiling composition, or shoot down the main arcade with a single figure in the distance. It doubles as Diagon Alley in the Harry Potter films – another great fact for your caption.
Best time: 5:30-7 AM weekdays, before the shops open.
Cost: Free.
Columbia Road Flower Market, Shoreditch
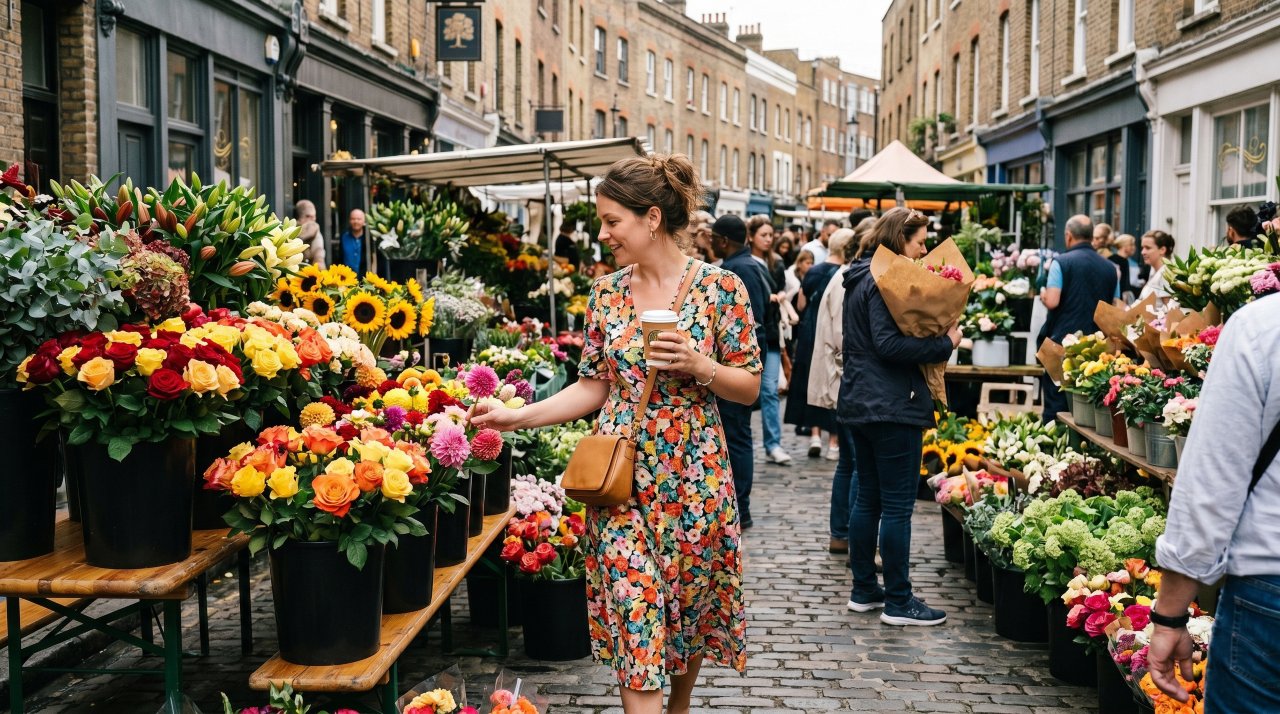
Every Sunday morning Columbia Road E2 transforms into a river of flowers. The narrow Victorian street fills with stalls selling cut flowers, potted plants, and small trees. The flower sellers shout their prices in rhyming Cockney patter. The visual density of color against the old brick buildings is extraordinary.
Arrive at 8 AM when the stalls open for the freshest stock and fewest people. By 10 AM it is shoulder-to-shoulder. Shoot from street level looking down the market for the tunnel of color effect. The shop facades behind the flower stalls are beautifully preserved Victorian storefronts.
Best time: 8-9:30 AM Sunday only. Open year-round.
Cost: Free. Flowers from £5 per bunch.
St Dunstan in the East

St Dunstan in the East is a ruined church bombed in the Blitz and now left as a public garden with the Gothic stone walls intact. Ivy, wisteria, and climbing roses grow up through the stone arches. On a misty morning this spot looks like something from a fantasy film.
Walk through from St Dunstan’s Hill, EC3R 5DD. The garden opens at dawn and closes at dusk. The arch at the north end frames a perfect shot looking back through the ruins to the glass office towers of the City beyond – old and new London in one frame. Visit on a weekday morning to have it mostly to yourself.
Best time: Early morning, especially in fog or after rain.
Cost: Free.
Neal’s Yard, Covent Garden
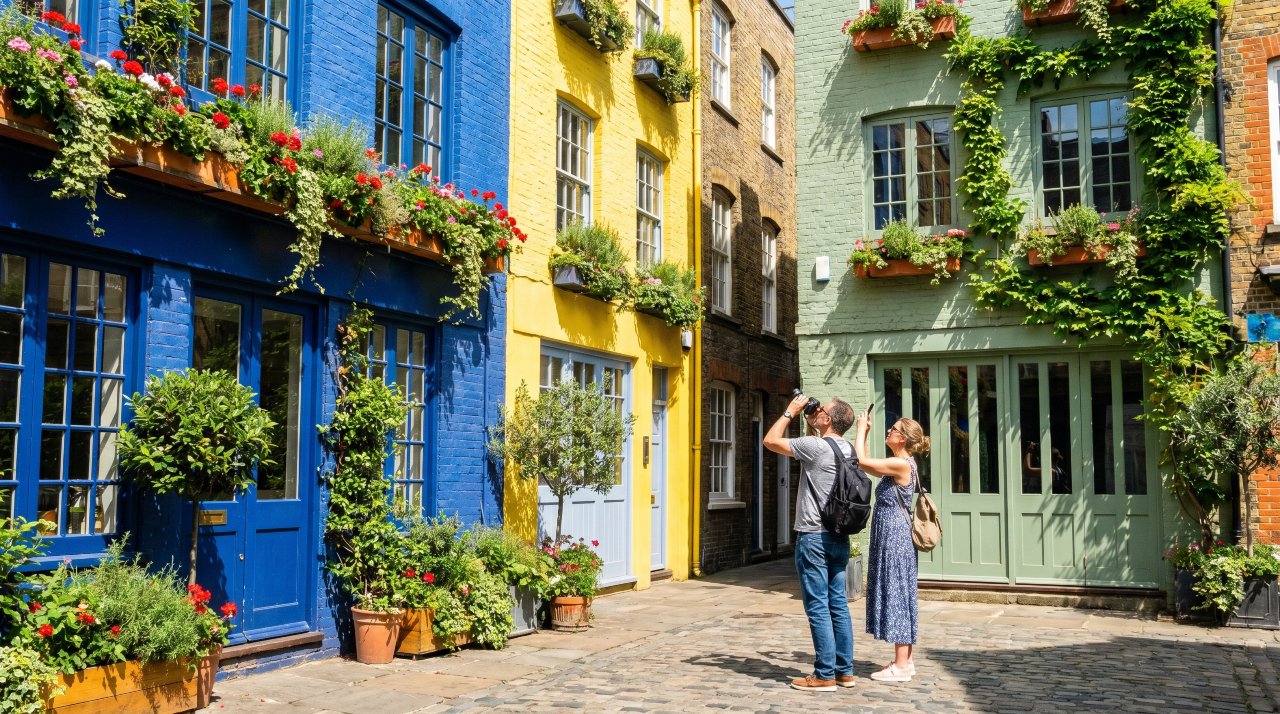
Neal’s Yard is a tiny courtyard just off Neal Street WC2H 9DP, completely hidden from the main streets of Covent Garden. Every building is painted in a different bold color – cobalt blue, canary yellow, sage green, deep red. Window boxes overflow with herbs and flowers. It is one of London’s most unexpected visual discoveries.
The best composition looks up from the center of the courtyard at the painted buildings surrounding you. Come on a sunny day when the colors are at full saturation. The courtyard is busiest at lunchtime with the surrounding cafes – visit at 9 AM or 4 PM for fewer people.
Best time: Sunny days at 9 AM or 4 PM for the light angle.
Cost: Free.
Ely Place and Ye Olde Mitre Pub
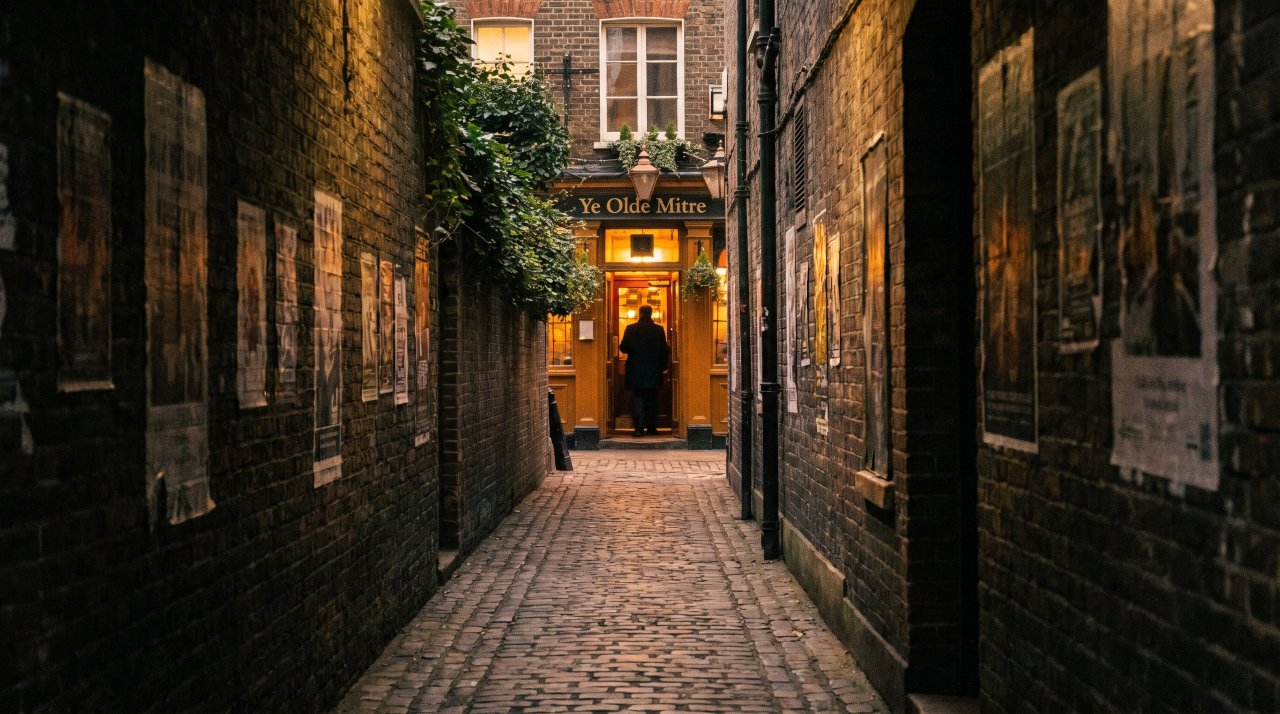
Ely Place EC1N 6RY is a private road that still has a gatehouse and a beadle. It is one of the last privately managed streets in London. Hidden in the alley at Ely Court alongside Ely Place is Ye Olde Mitre, a pub founded in 1546, one of the oldest in London and almost impossible to find on your first try.
The narrow passage to the pub is only two feet wide between buildings. Inside the pub, the preserved timber interior dates back to the 1700s. The cherry tree trunk by the entrance has been there since Elizabeth I. Shoot the entrance passage with the pub sign at the end for a genuinely Dickensian London photo.
Best time: Any day the pub is open: Monday to Friday noon to 11 PM.
Cost: Free to photograph. Pints from £6.
Greenwich Park at Sunrise
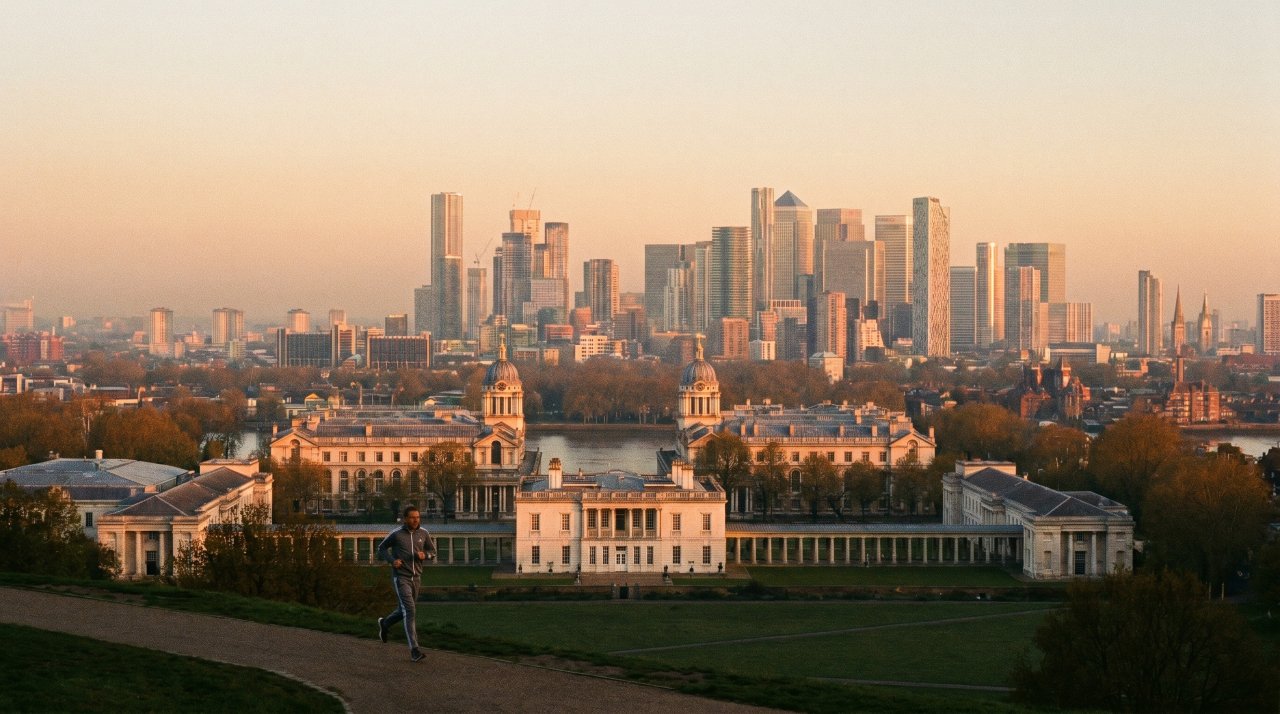
The hill in Greenwich Park gives the single best panoramic view of London from ground level. The Old Royal Naval College, the Thames, Canary Wharf, and the City skyline all align from this one spot. At sunrise the entire skyline glows with no haze.
Stand at the top of the hill by the Royal Observatory, SE10 8XJ. The sunrise alignment is perfect from October through February when the sun rises low in the east directly over the City skyline. Bring a tripod – the long exposures at blue hour are exceptional.
Best time: Sunrise, October to February.
Cost: Free. Park open from 6 AM.
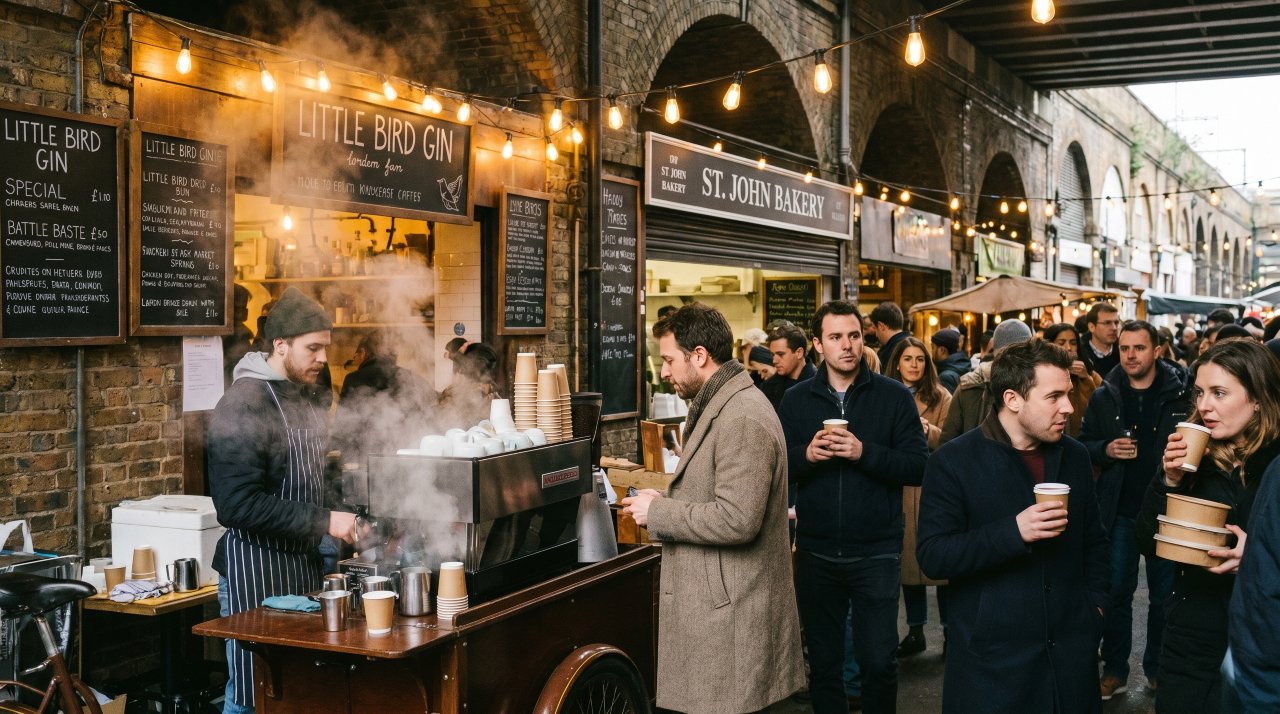
The Southwark Cathedral Churchyard at Dusk
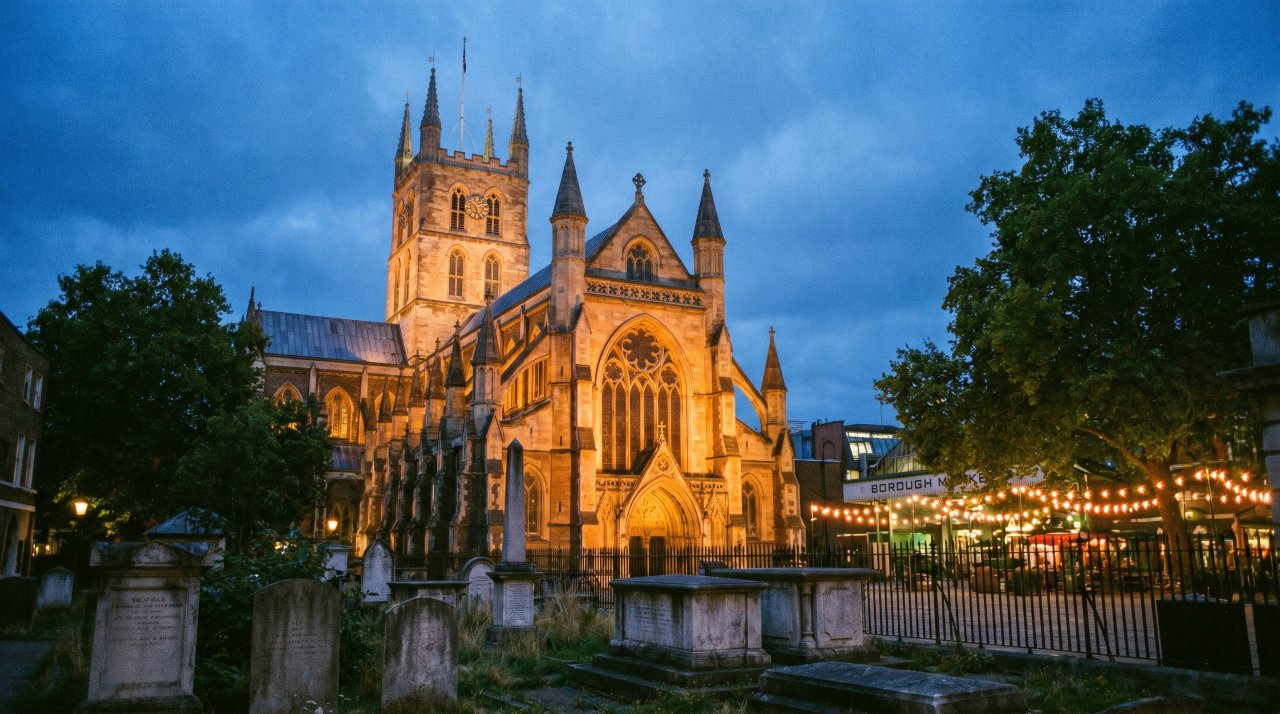
Southwark Cathedral SE1 9DA sits directly beside Borough Market and backs onto the Thames. The churchyard between the cathedral and the market has old stone monuments, mature plane trees, and a wall of Victorian brick arches from the old railway viaduct above. At dusk the lights come on in the market and the contrast with the dark churchyard stone is exceptional.
Walk through Borough Market from Borough High Street and find the small gate into the cathedral churchyard. The stone effigy of William Shakespeare overlooks the yard. The cathedral floodlights come on at dusk and the combination of warm amber floodlight against the deep blue sky creates a beautiful short shooting window.
Best time: 20 minutes after sunset when floodlights activate.
Cost: Free.
Exmouth Market, Clerkenwell
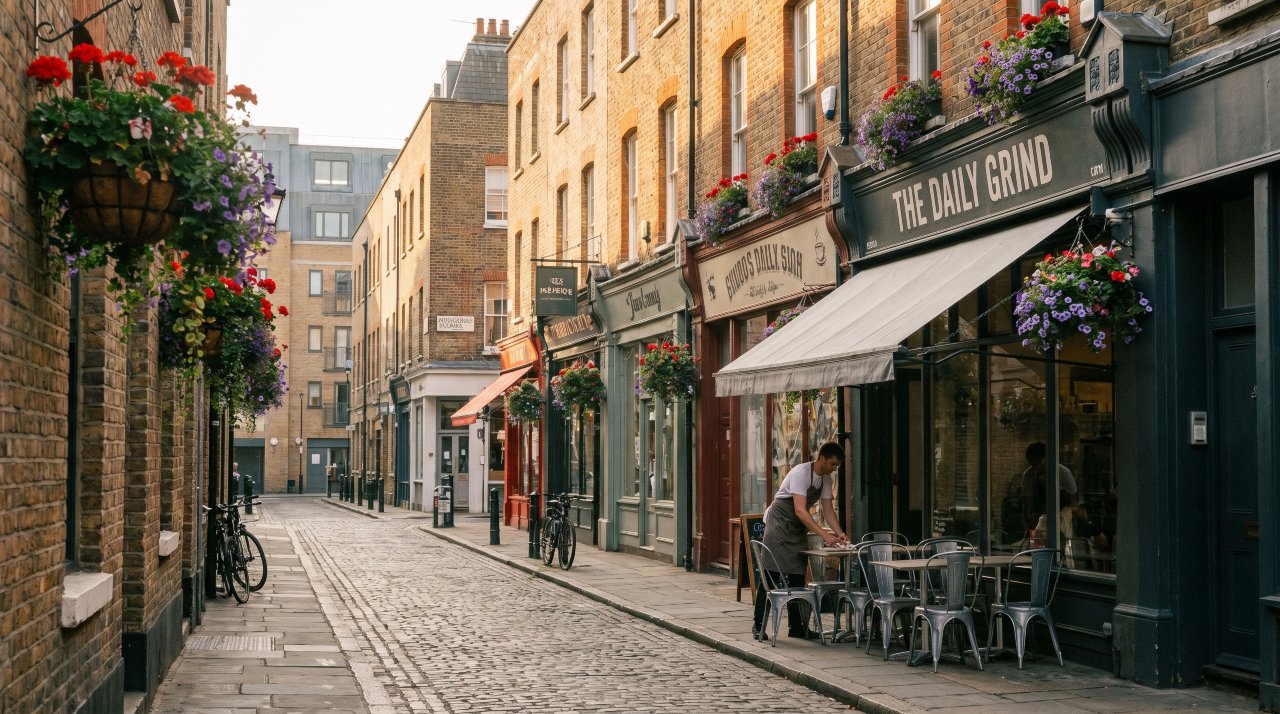
Exmouth Market EC1R 4QE is a quiet pedestrianized street in Clerkenwell lined with independent restaurants, a deli, and street food stalls. It is the kind of London street that feels genuinely local – no chain restaurants, no tourist menus. The terracotta buildings and hanging basket flowers are photogenic in morning light.
The street comes alive at lunchtime Tuesday to Friday when the outdoor seating fills with office workers. For empty street photography arrive at 8 AM. The Italian deli Morangi at number 38 has been there since 1977 and the storefront is a classic shot.
Best time: 8 AM for empty street or noon for street life.
Cost: Free. Coffee from £3.50.
The Wapping Hydraulic Power Station
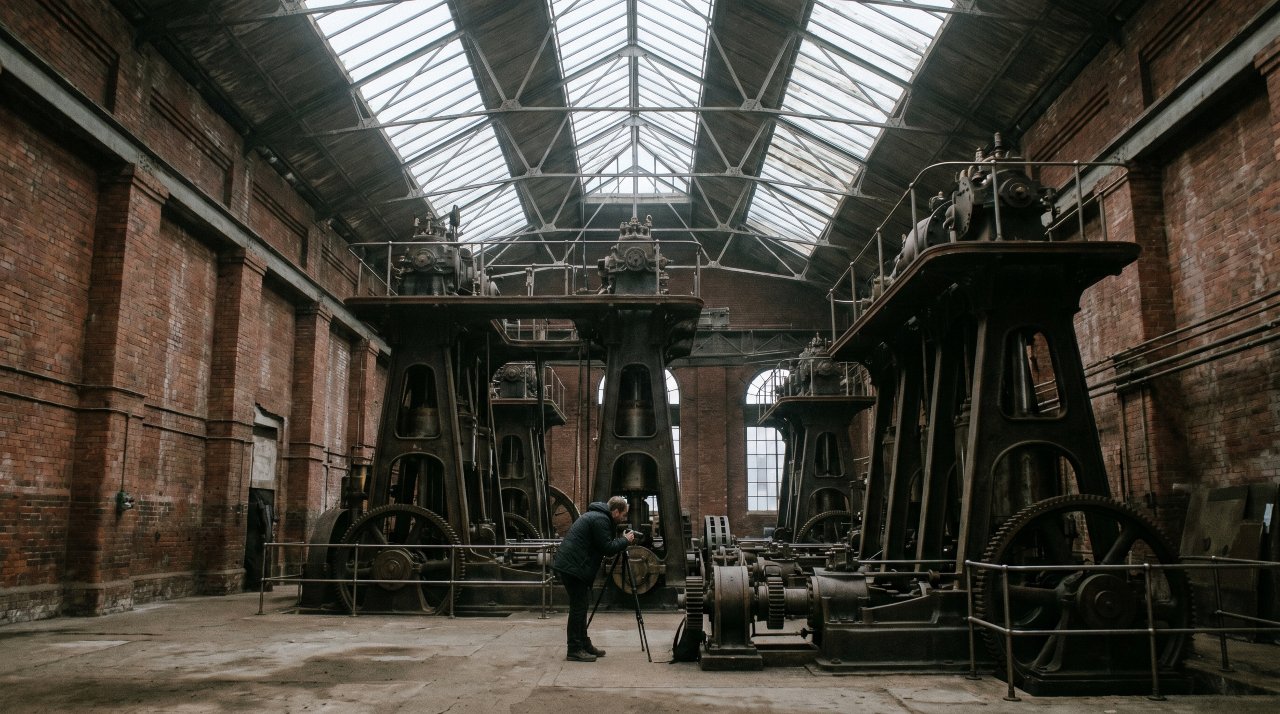
The Wapping Project in east London occupies a former 1890s hydraulic power station that once powered the Tower Bridge lifting mechanism and most of the docks. The industrial interior of cast iron columns, exposed brick, and rusting machinery is one of the most visually striking spaces in London.
The building now operates as a venue and is accessible during events and open days. Check thewappingproject.com for the schedule. The machinery hall has extraordinary scale – original piston engines still stand 30 feet tall surrounded by the red brick Victorian industrial architecture. Shoots here are almost always editorial in quality.
Best time: During scheduled open days or events.
Cost: Varies by event. Check thewappingproject.com.
Crossness Pumping Station

Crossness Pumping Station in southeast London is Victorian cathedral masonry applied to a sewage pumping station. The interior has four massive beam engines surrounded by elaborate cast-iron Gothic tracery in deep reds, golds, and greens. It is one of the most extraordinary interiors in Britain and almost nobody knows it exists.
Open days run once a month on Sundays – book at crossness.org.uk. The volunteer-run restoration charity allows photography throughout. The scale of the four engines named after members of the Royal Family is overwhelming. Plan for two to three hours. Travel by Overground to Abbey Wood, then a 20-minute walk.
Best time: Scheduled open days only. Book in advance.
Cost: £10 adult. crossness.org.uk.
The Sky Garden at 20 Fenchurch Street
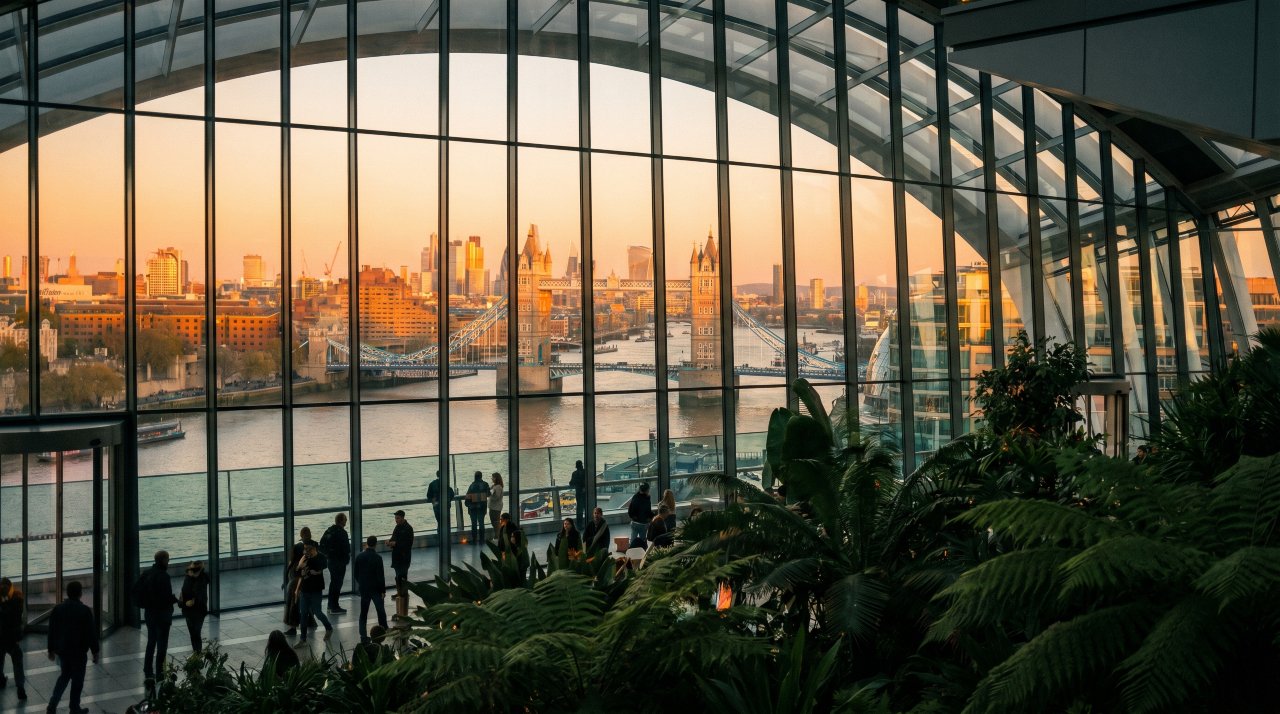
The Sky Garden is a free public rooftop garden at the top of the Walkie Talkie building, 37 floors up, with 360-degree glass walls and views across the entire City of London. It is free to enter with an advance booking. This is one of the best London photo ideas that costs absolutely nothing.
Book online at skygarden.london at least two to three weeks in advance – it books out fast. The cocktail bar inside has the same view for the cost of a drink. The best photography is from the open air terrace on the east side looking toward Tower Bridge and the Thames.
Best time: Evening for golden hour city views. Book 2-3 weeks ahead.
Cost: Free with advance booking. skygarden.london.
Bermondsey Street
Bermondsey Street SE1 runs south from London Bridge through a neighborhood that shifted from leather tanning to galleries and restaurants over the last 20 years. The Victorian brick warehouse buildings have been converted with enormous plate glass shopfronts. The street is long, quiet on weekend mornings, and beautiful at almost any hour.
The Fashion and Textile Museum at number 83 has a vivid orange and pink facade that is one of the most photographed building facades in south London. The White Cube Gallery at number 144 is a clean white cube building with strong lines. Both sit in the same block for back-to-back architectural shots.
Best time: Weekend mornings before 10 AM for empty streets.
Cost: Free.
Little Venice, Maida Vale
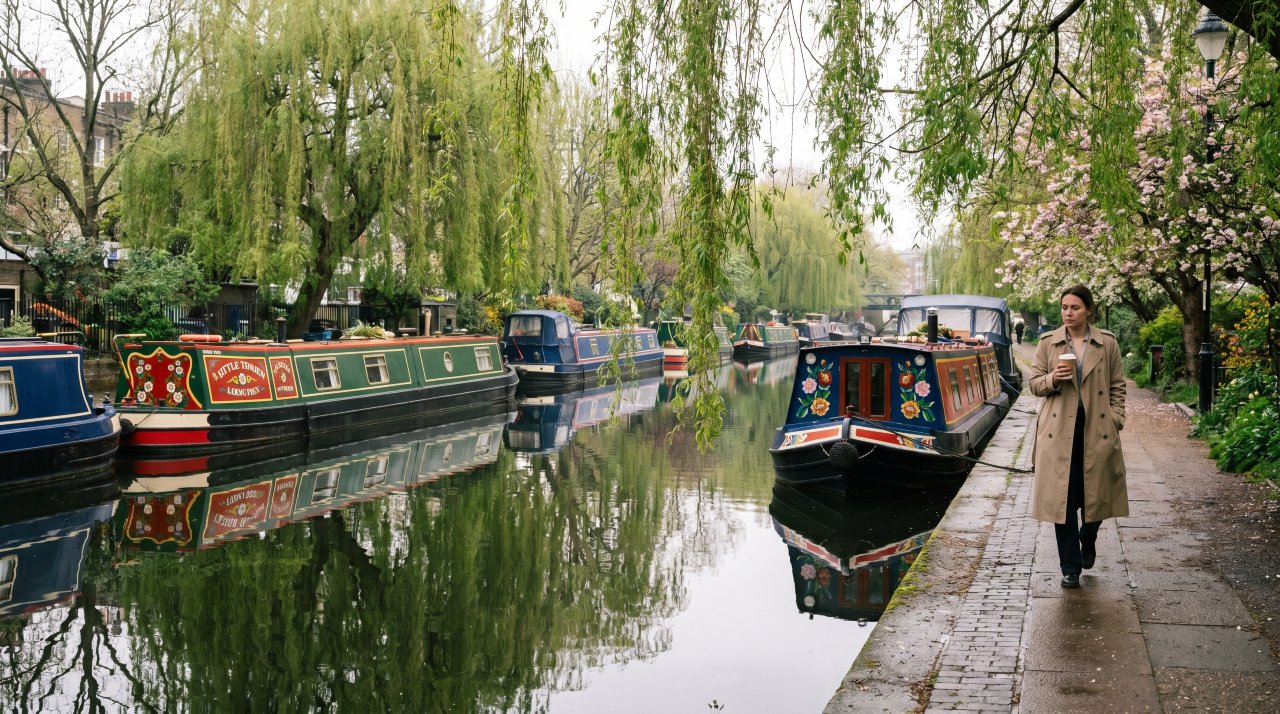
Little Venice W9 is where the Grand Union Canal meets the Regent’s Canal in a wide pool lined with willow trees and permanently moored narrowboats painted in traditional canal boat colors. On a still morning the boats reflect perfectly in the flat canal water. It looks nothing like the London tourists expect.
Walk from Warwick Avenue Tube station five minutes to the canal pool. The best shots look across the pool from the south bank toward the painted narrowboats with the willow trees behind. The floating café boat serves excellent coffee. Come in spring when the cherry trees and wisteria along the towpath are in bloom.
Best time: Spring mornings for blossom. Still days for reflections.
Cost: Free.
Kyoto Garden, Holland Park
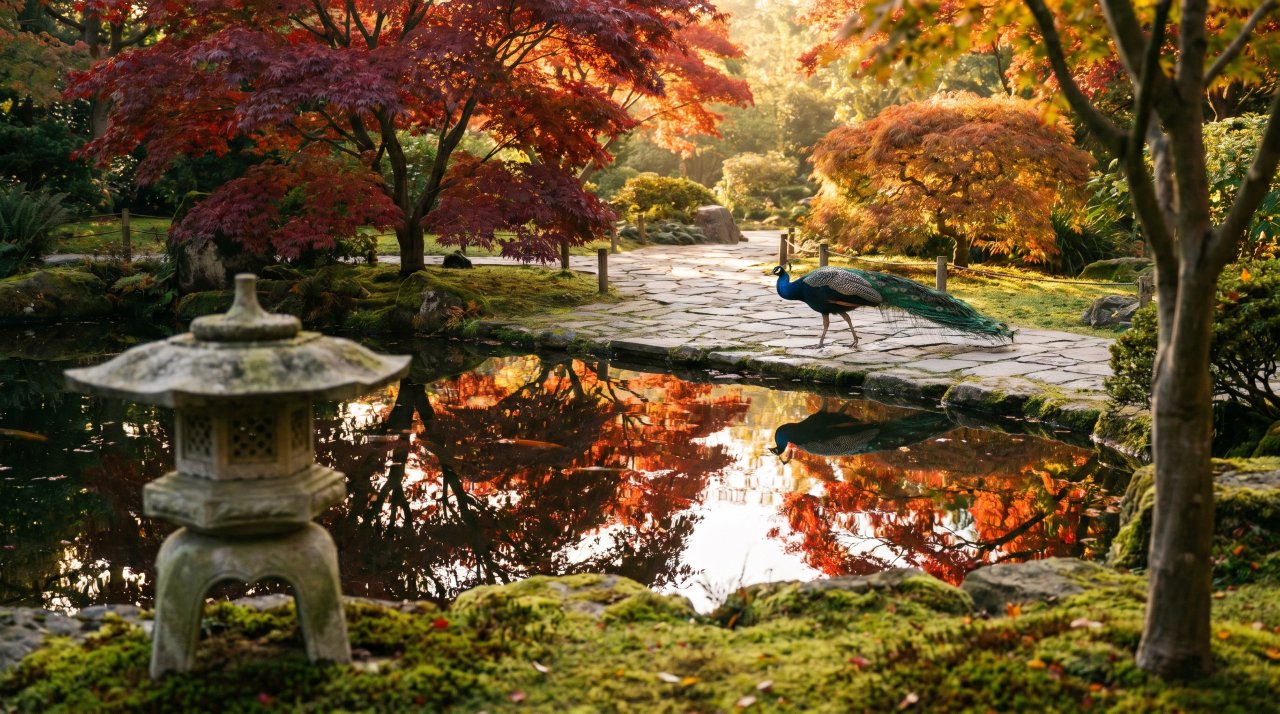
The Kyoto Garden is a traditional Japanese garden hidden inside Holland Park W8 – one of the most formal and least-visited of London’s major parks. The garden has a koi pond, a traditional stone lantern, maples, bamboo, and a small waterfall. Peacocks roam the surrounding woodland.
Enter Holland Park from Ilchester Place W8 and walk northeast through the woodland. The Kyoto Garden is signposted from the main lawn. The maple trees turn deep red and orange in October and November, making it one of the best autumn photography spots in London. Come at 8 AM when the park opens and the garden is completely empty.
Best time: October and November for autumn color at 8 AM opening.
Cost: Free.
Brick Lane at the Junction of Hanbury Street
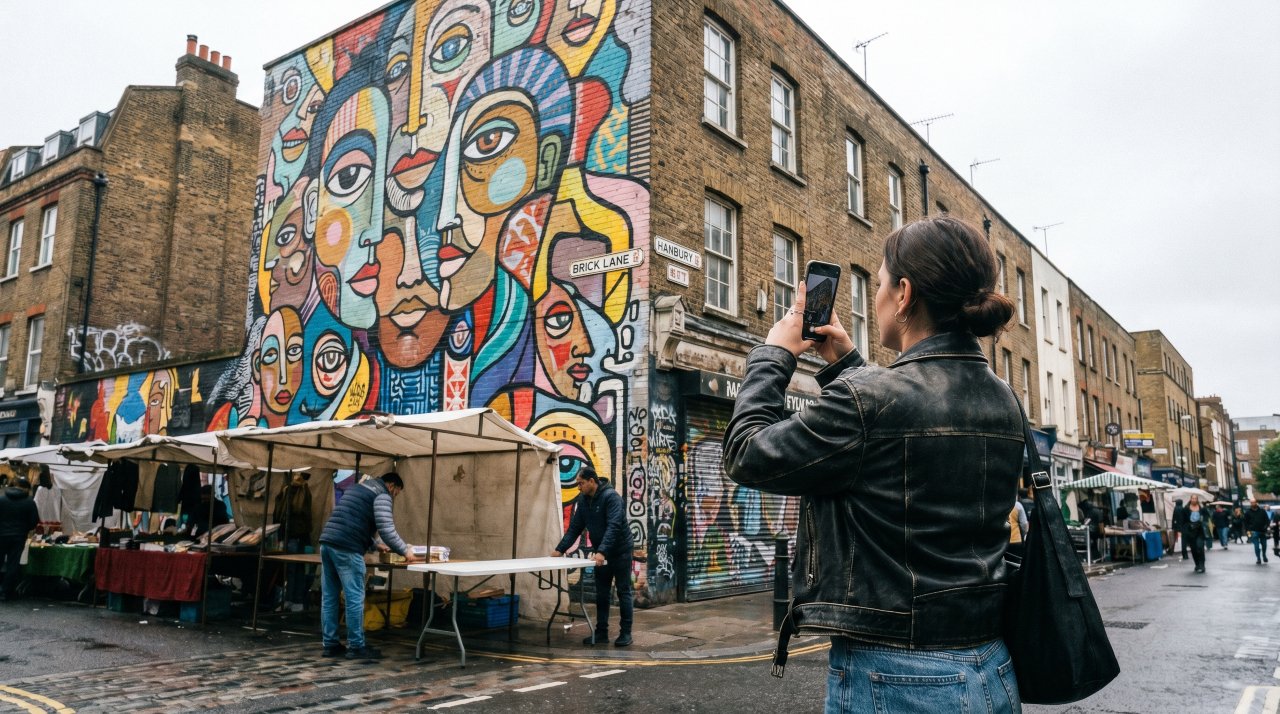
Brick Lane E1 is the center of London’s street art scene. Every surface is covered and repainted continuously. The best photography concentration is at the junction of Brick Lane and Hanbury Street where several large-scale murals face each other. The work changes regularly – each visit produces different images.
Come on a Sunday morning when Brick Lane Market is setting up for the best combination of street art and street life photography. The weekly market runs 10 AM to 5 PM and the textile stalls, food vendors, and vintage clothing sellers add human scale to the murals. The light is best on the east wall of Hanbury Street in the morning.
Best time: Sunday morning 8-10 AM for best light and market setup.
Cost: Free.
Primrose Hill Sunrise
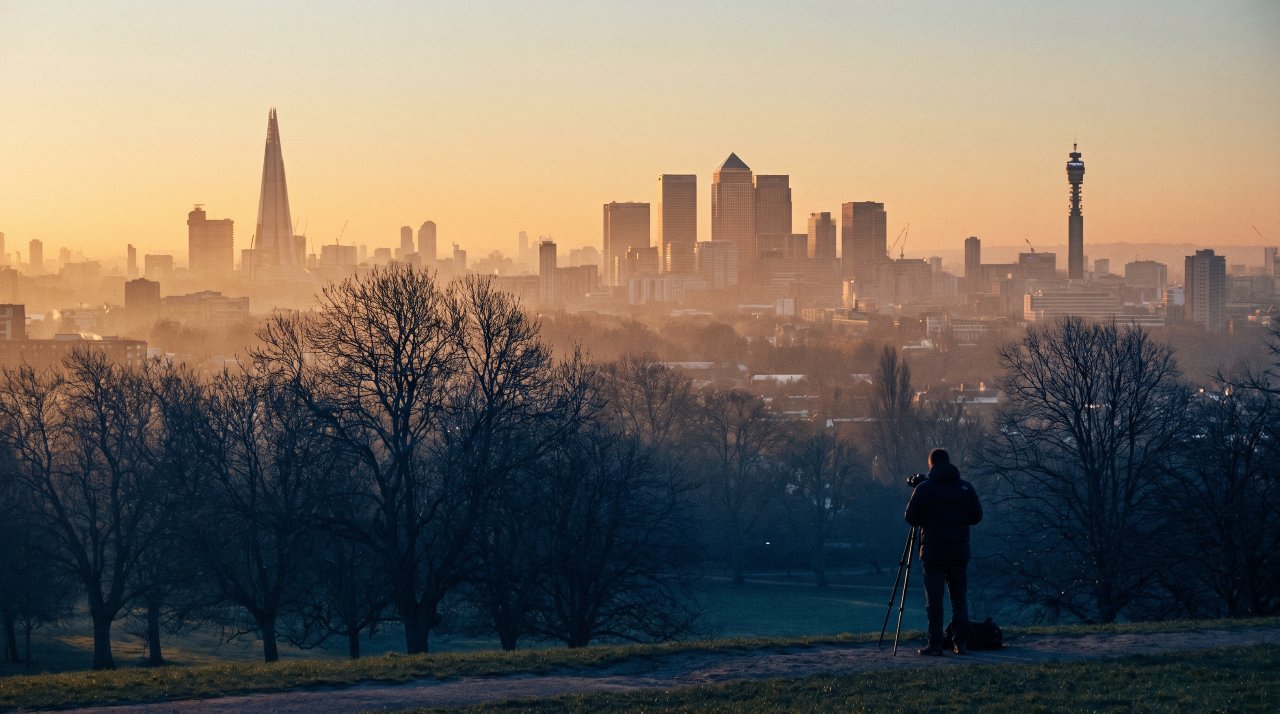
Primrose Hill NW1 has what many photographers consider the best London skyline viewpoint. The summit at 256 feet gives a clear sightline over Regent’s Park to the full London skyline from Canary Wharf to the Shard to the BT Tower – all in one frame with no obstructions.
Stand at the summit viewpoint and shoot southeast for the classic skyline. At sunrise in winter the buildings glow amber above the blue shadow of Regent’s Park trees. The hill is a five-minute walk from Primrose Hill station. Come at least 20 minutes before sunrise to set up. This spot is genuinely one of London’s best-kept photography secrets.
Best time: Sunrise, October to February.
Cost: Free. Open 24 hours.
The Diana Memorial Fountain, Kensington Gardens at Mist
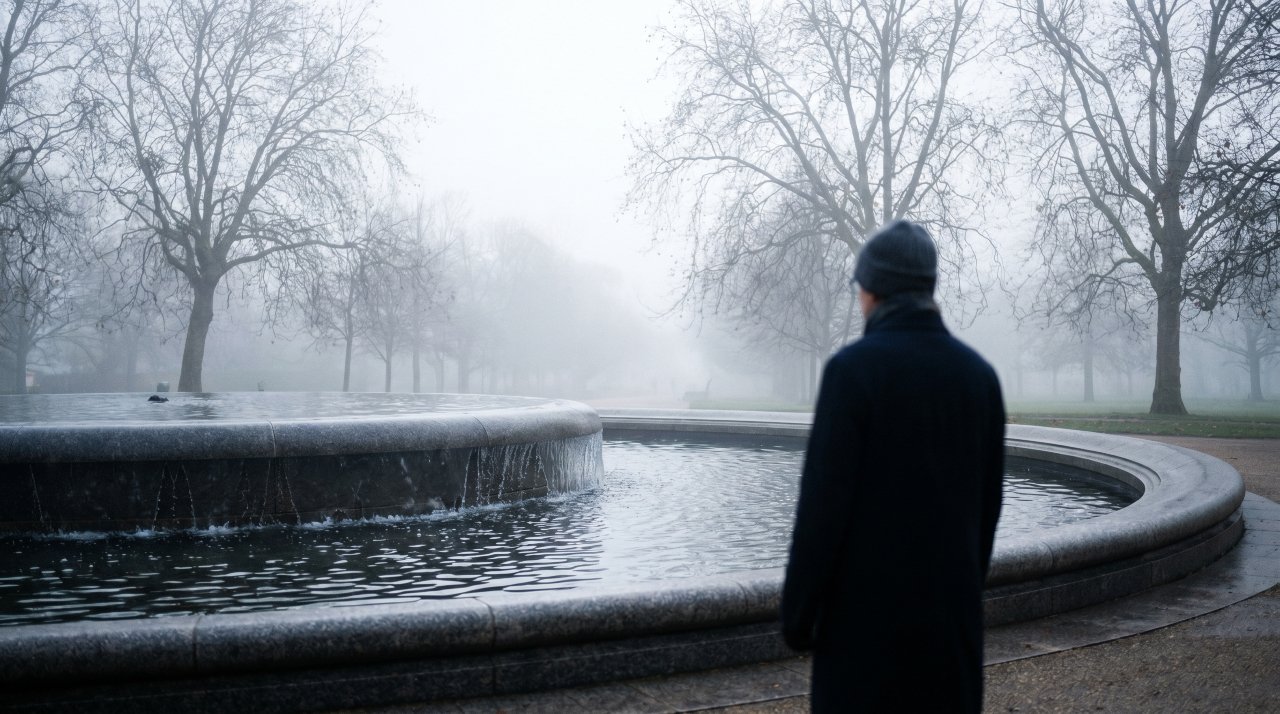
The oval granite fountain memorial in Kensington Gardens W2 looks its best in autumn morning mist when the water sounds are muffled by fog and the surrounding trees are bare. Most tourists skip this spot entirely. In mist it looks ethereal.
Walk from Lancaster Gate Tube to the center of Hyde Park/Kensington Gardens. The fountain is in the southern section of Kensington Gardens near the Serpentine. In autumn the deer from the nearby managed herd sometimes appear in the morning fog around the fountain. Arrive before 8 AM for the best mist before it burns off.
Best time: Misty autumn mornings before 8 AM.
Cost: Free.
Maltby Street Market, Bermondsey
Maltby Street Market SE1 3PA runs under the Victorian railway arches of the Bermondsey railway viaduct every Saturday and Sunday morning. The arched brick tunnels are filled with independent food producers – bread bakers, coffee roasters, cheese mongers, hot sauce makers. The red brick arches and warm market lights make for extraordinary atmosphere.
Arrive at 9 AM for fresh stock and quiet enough to photograph properly. The arches run along Maltby Street and Rope Walk. The Kernel Brewery is at the far end for a morning beer if you want the full experience. The arched tunnel shots with silhouettes of vendors and customers are uniquely London.
Best time: 9-11 AM Saturday or Sunday.
Cost: Free. Food from £4.
London Has More to Offer Than You Think
These 18 London photo ideas take you far beyond the tourist trail and into the London that locals love. Most of these spots cost nothing and require only an early start. The photographers who come home with the most memorable London images are the ones who set their alarm for sunrise and walk the streets before the crowds arrive. Save this guide, pin it for your 2026 London trip, and share it with any photographer who thinks they have already seen London.
Hawaii has some of the most dramatic photography spots on earth. These 15 Hawaii photography spots go far beyond the typical tourist shots – this guide shows you the exact locations, best times to visit, and what to look for at each one, so you can come home with images that actually stop the scroll. Whether you shoot on a phone or a mirrorless camera, these spots will transform your Hawaii picture ideas into real results.
Not every jaw-dropping location in Hawaii is crowded with tour groups. Many of the best spots take a short hike or an early wake-up call. The effort is always worth it.
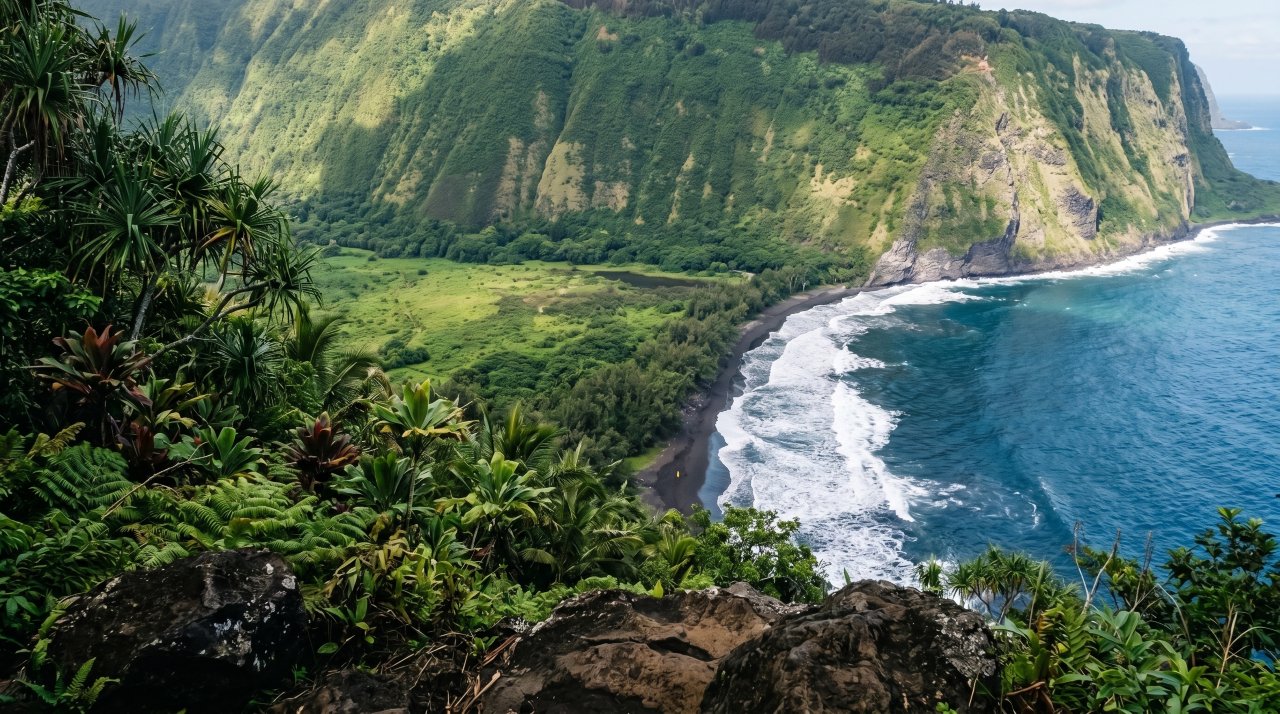
Waipio Valley Lookout, Big Island
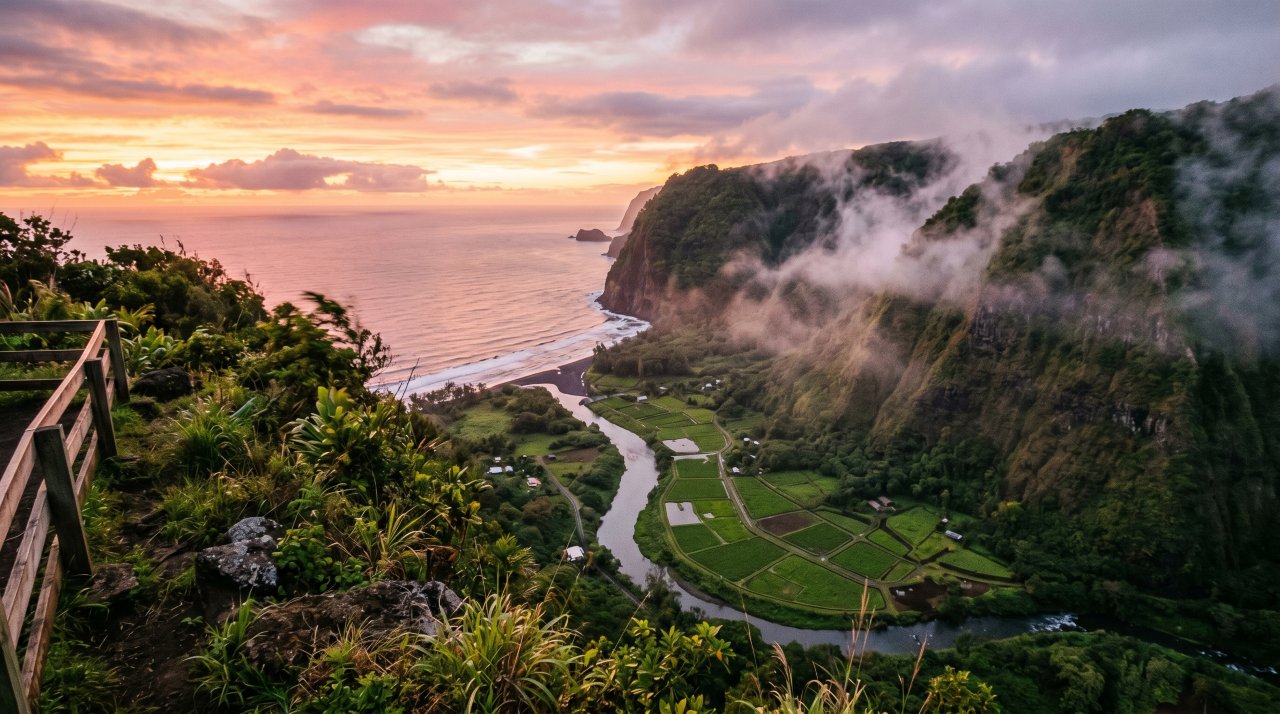
Waipio Valley is one of the best Hawaii photography spots for a reason. The valley drops 2,000 feet straight down from the lookout, with a black sand beach, a winding river, taro fields, and the open Pacific all visible in one frame. You will not find a more dramatic composition anywhere on the island.
Go at sunrise. The valley floor fills with golden mist as the sun clears the ridge. If you want the shot with no other visitors in frame, arrive before 6:30 AM. A 200mm lens lets you compress the layers of the valley for a powerful shot.
Best time: Sunrise, year-round. After heavy rain the waterfalls multiply.
Getting there: Drive to Waipio Valley Lookout, Kukuihaele, HI 96727. Free parking.
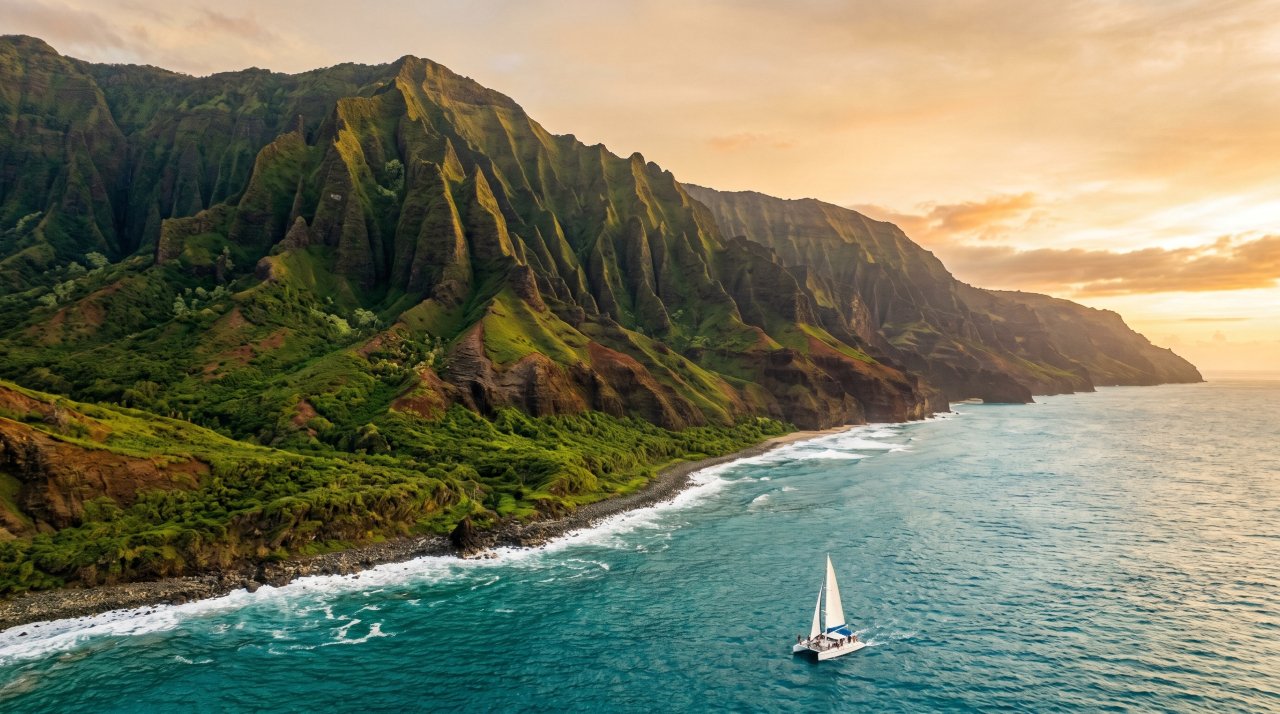
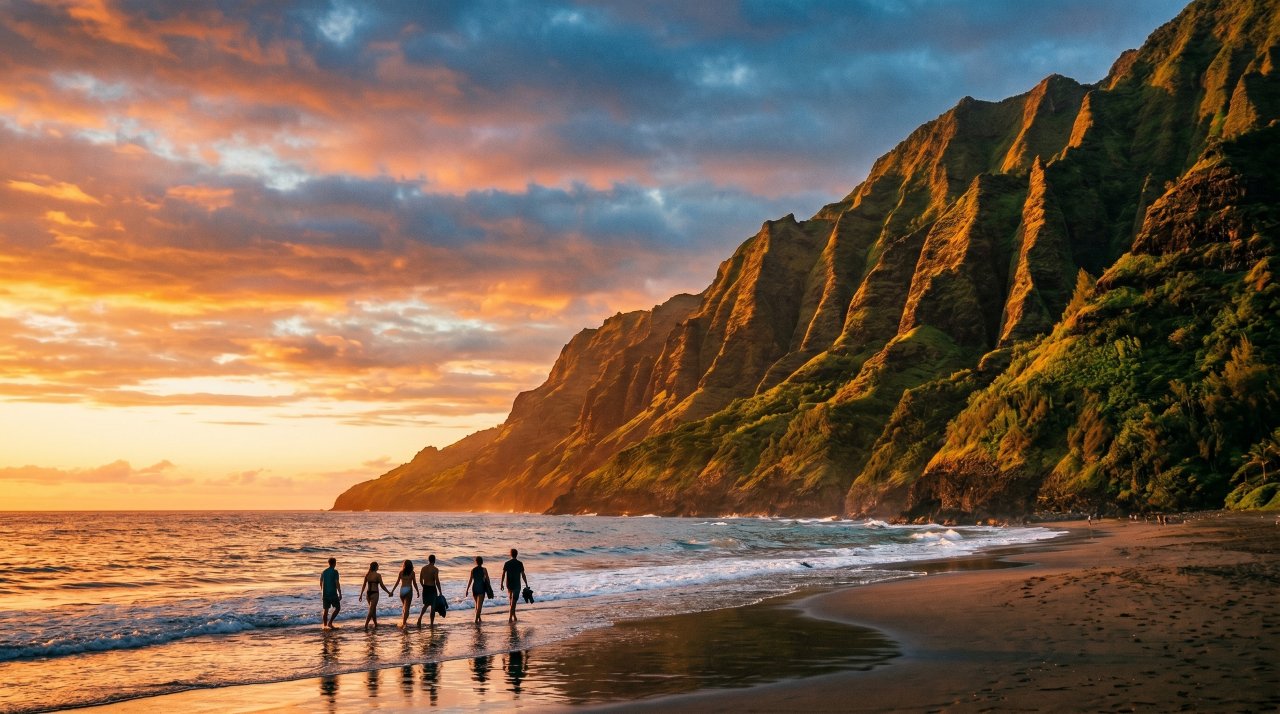
Nā Pali Coast, Kauai
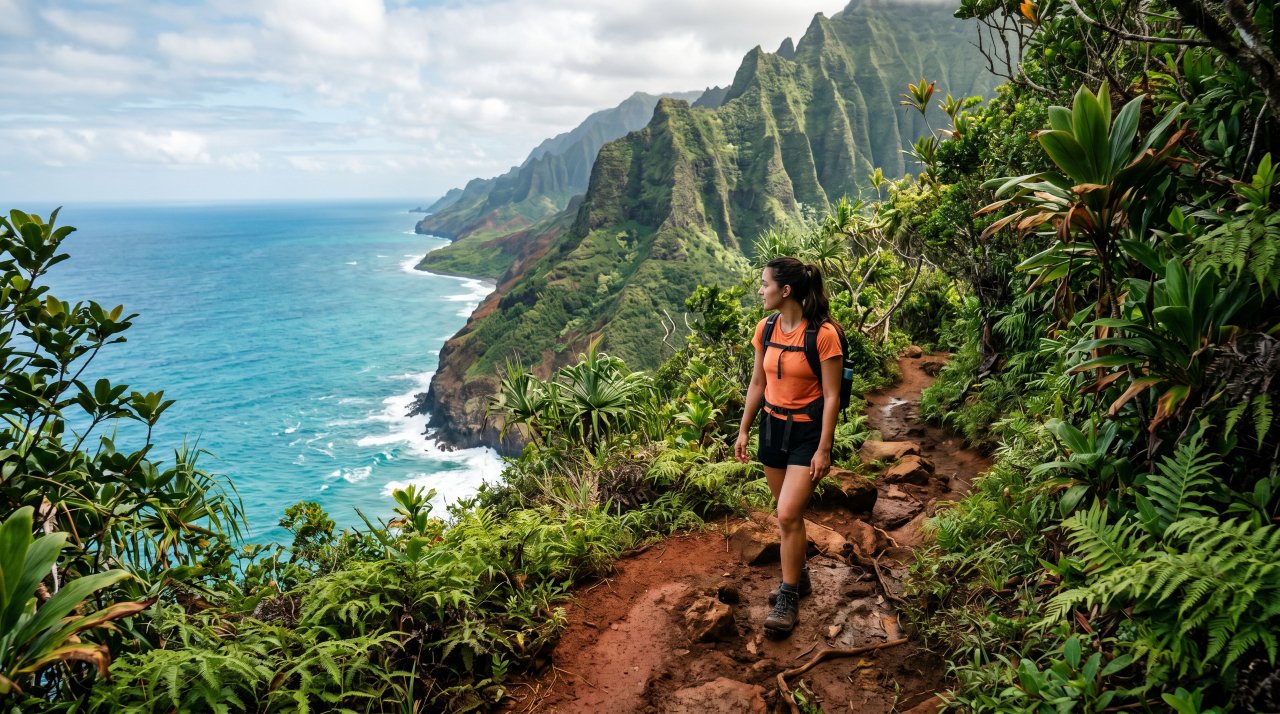
The Nā Pali Coast is the most photographed coastline in Hawaii for good reason. The fluted green cliffs rise 4,000 feet straight from the turquoise ocean, draped in waterfalls after rain. No road reaches this coast. You earn this shot by hiking the Kalalau Trail or booking a boat tour.
The 11-mile Kalalau Trail starts at Ke’e Beach. The first two miles to Hanakapi’ai Beach are doable without a permit and deliver stunning cliff views. For the full coast, a boat tour around the north shore gives you angles the trail cannot.
Best time: Sunrise for the golden cliff glow. May to September for calm seas.
Permit: Day hiking to Hanakapi’ai is free. Beyond requires a $20 state permit.
Haleakalā Crater at Sunrise, Maui

Standing at 10,023 feet, Haleakalā is one of the only places on earth where you watch the sunrise from above the clouds. The crater landscape looks like the surface of Mars. The cloud layer glows pink and orange below you while the sky shifts from deep cobalt to gold.
Book the sunrise permit well in advance – this is the most competitive reservation in Hawaii. Check recreation.gov starting 60 days before your visit. The drive up takes about 90 minutes from Kahului. Dress warm. The summit sits at 40 degrees Fahrenheit at dawn.
Best time: Sunrise. Book at recreation.gov 60 days out. Free with Hawaii state park reservation.
Lens: 16-35mm wide angle for the crater scale.
Lanikai Beach, Oahu

Lanikai is consistently ranked among the most beautiful beaches in the world. The water is a surreal shade of flat turquoise. Two tiny offshore islands called the Mokulua Islands sit perfectly placed for composition. At sunrise the sky goes deep rose and lavender.
Park on Mokulua Drive and walk through the beach access paths between the houses. The beach is narrow and faces east, making it perfect for sunrise only. By 8 AM the light becomes harsh. Come early, stay two hours, leave before the crowds.
Best time: 30 minutes before sunrise to 45 minutes after.
Parking: Free street parking on Mokulua Drive, Kailua, HI.
Waimea Canyon, Kauai
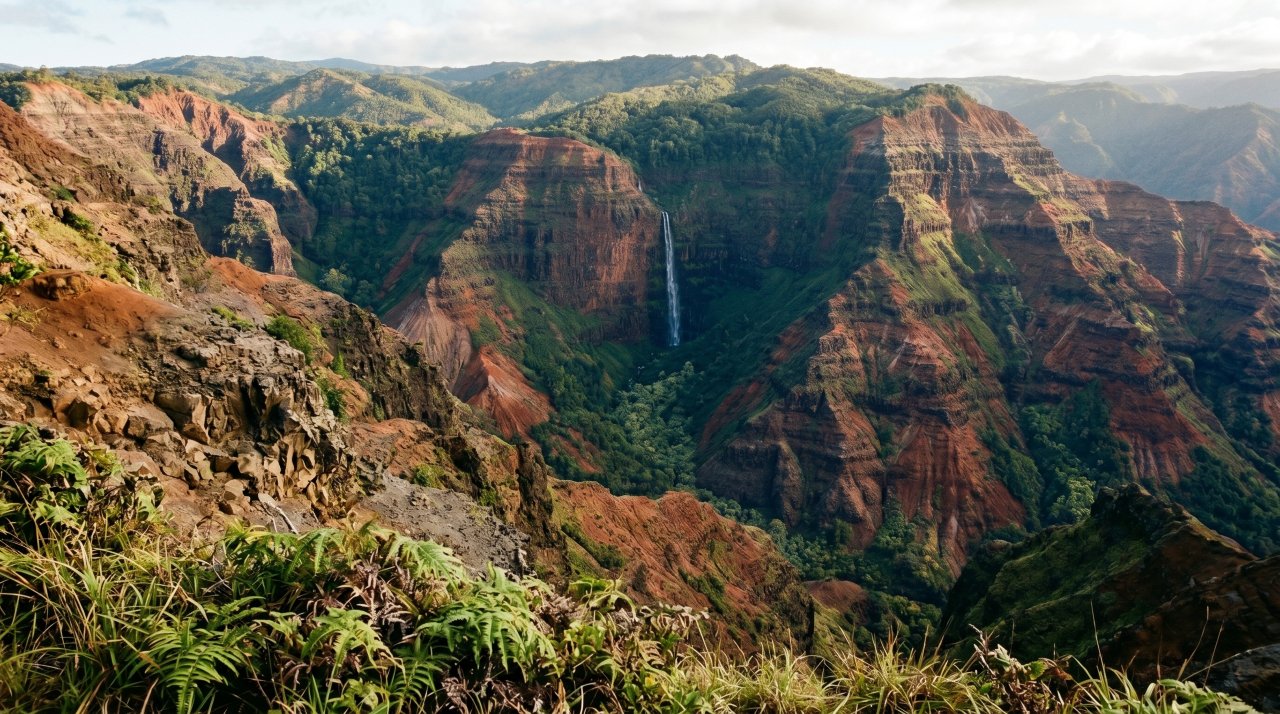
Called the Grand Canyon of the Pacific, Waimea Canyon is 10 miles long, 3,600 feet deep, and completely unexpected on a tropical island. The layered red and green canyon walls are stunning in morning light when the shadows are still deep inside the canyon.
Drive to Pu’u Hinahina Lookout at mile marker 13.5 on Waimea Canyon Drive for the widest views. Go on a day after rain if possible – waterfalls appear along the canyon walls for 24-48 hours after heavy rain. A polarizing filter cuts haze and deepens the red tones.
Best time: 8-10 AM for angled morning light inside the canyon.
Cost: $10 vehicle entry fee to Koke’e State Park.
Makapuu Point Lighthouse Trail, Oahu
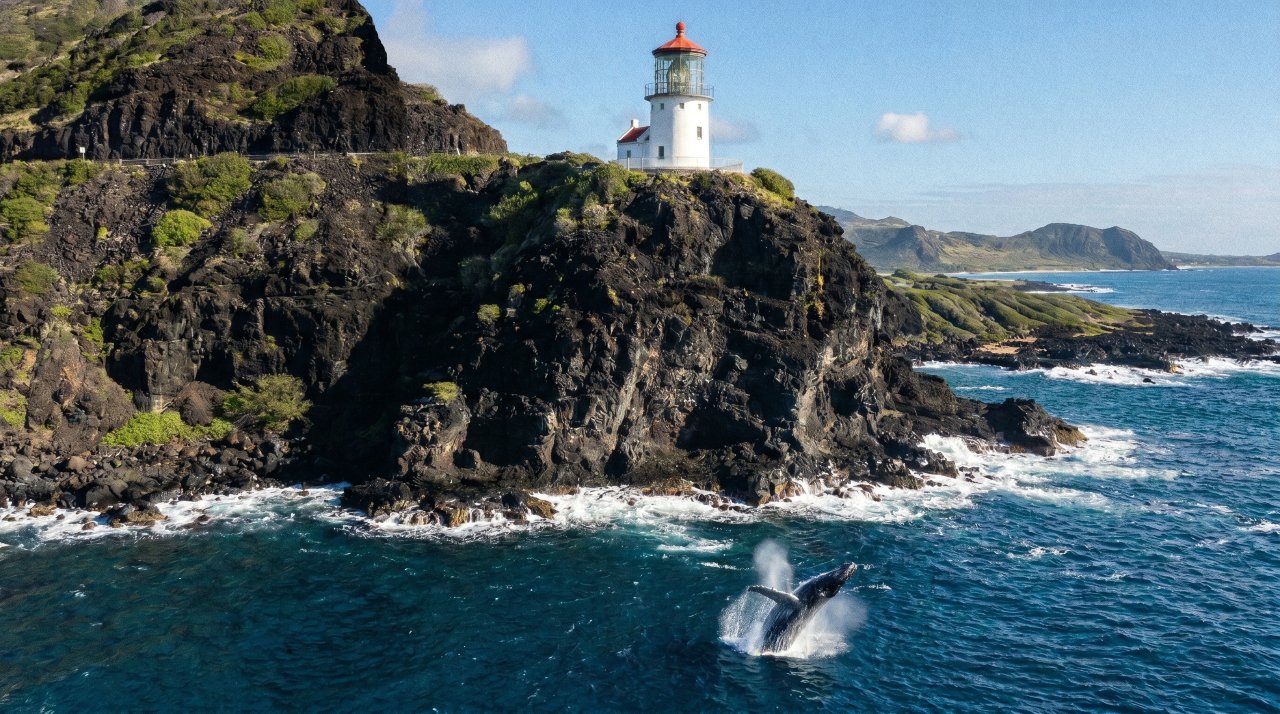
This easy 2-mile paved trail to the Makapuu Point Lighthouse delivers some of the best coastal photography on Oahu with minimal effort. The white lighthouse sits on a dramatic black lava headland above the crashing Pacific. From January to May, humpback whales pass directly below.
The trail gains about 500 feet and takes around 45 minutes one-way. No crowds early. The light on the lighthouse is best in the morning when the sun is behind you. Bring a longer lens in winter months for whale shots.
Best time: 7-9 AM. January to May for whale season.
Cost: Free. Parking at Makapuu Point Lookout, Waimanalo, HI 96795.
Road to Hana Waterfall Pools, Maui
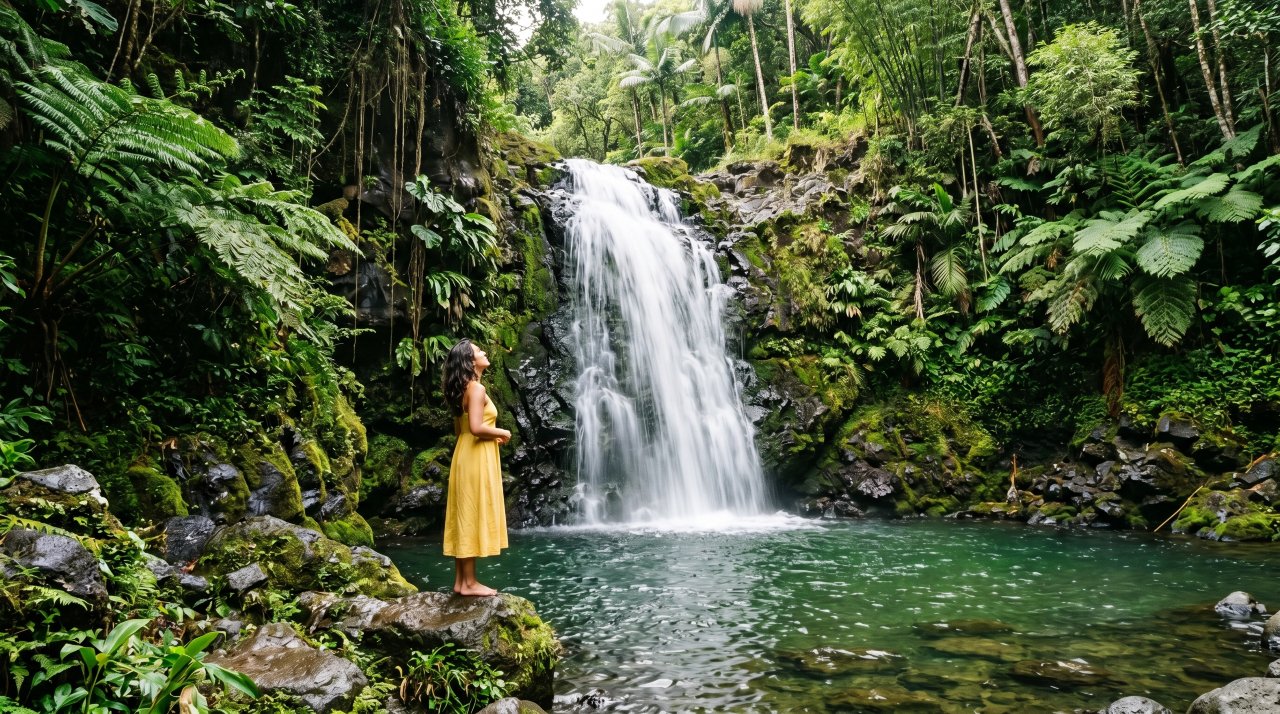
The Road to Hana is 52 miles of switchbacks with over 600 curves and 59 bridges. Every few miles a new waterfall or hidden pool appears. The most photographed stop is Twin Falls near mile marker 2, but the best shots are further along where the crowds thin out.
Stop at Upper Waikani Falls (Three Bears) near mile marker 28 and Wailua Valley State Wayside near mile marker 18 for the best waterfall photography. Arrive before 9 AM at any stop to photograph without crowds. A circular polarizer is essential for shooting waterfalls in bright conditions.
Best time: Early morning, after rain for maximum flow.
Permit: Hana Highway parking reservations are required at some stops. Check gomaui.com.
Pololu Valley Lookout, Big Island
Pololu Valley is the quieter twin of Waipio. Fewer tourists know it and the view from the lookout is just as dramatic – a black sand beach, a taro valley, and pali cliffs covered in dense green jungle. The trail down to the beach takes 20 minutes and the beach is almost always empty.
Stand at the lookout first to compose your wide shot, then hike down for close-up beach shots. The black sand contrasts beautifully with the turquoise water and green cliffs. Come in the morning before clouds settle into the valley.
Best time: 7-10 AM before valley clouds build.
Cost: Free. Located at the end of Highway 270, North Kohala, Big Island.
Iao Valley State Monument, Maui
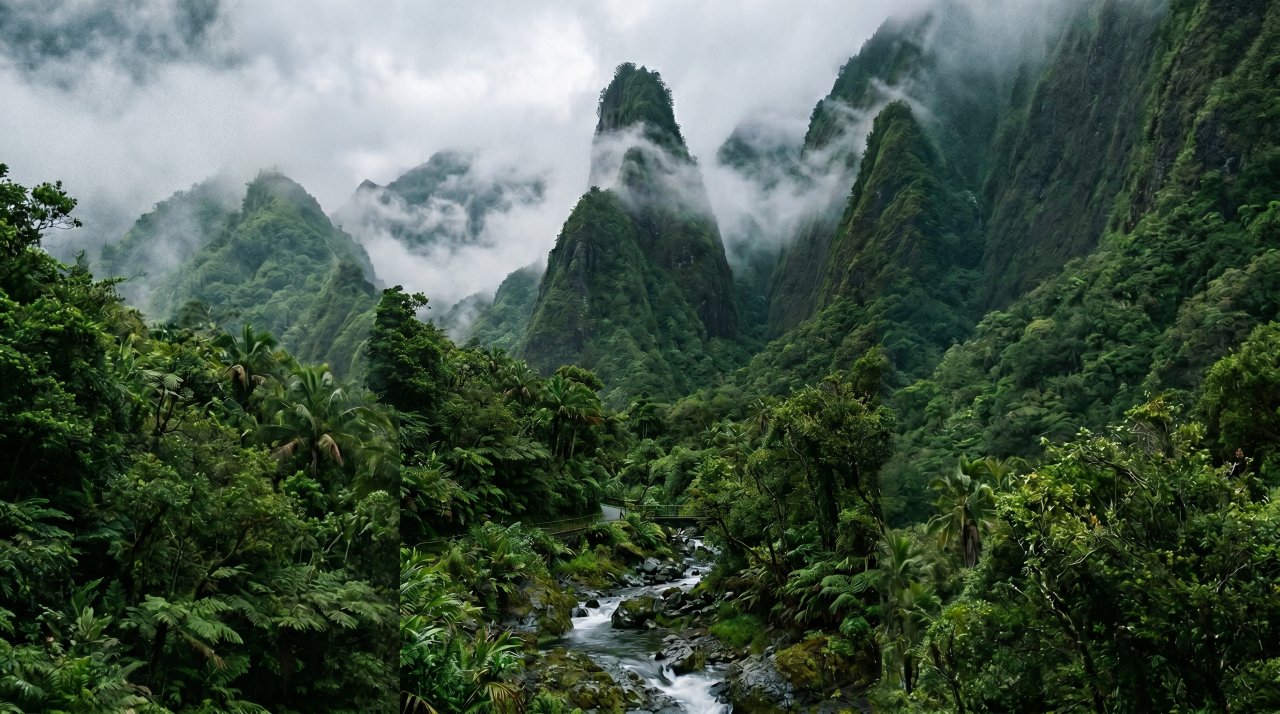
The Iao Needle rises 1,200 feet from the valley floor – a dramatic green basalt spire wrapped in tropical mist. The monument is only 3 miles from Wailuku and takes 30 minutes total. Despite being one of the best Hawaii photography spots on Maui it is often overlooked by beach-focused visitors.
Morning is best before clouds thicken. The valley faces west so afternoon light hits the needle directly but morning gives moody mist. A 50mm lens captures the needle in full while still showing the valley depth.
Best time: 8-10 AM for mist and softer light.
Cost: $5 per person entry fee. Open daily 7 AM to 6 PM.
Punalu’u Black Sand Beach, Big Island
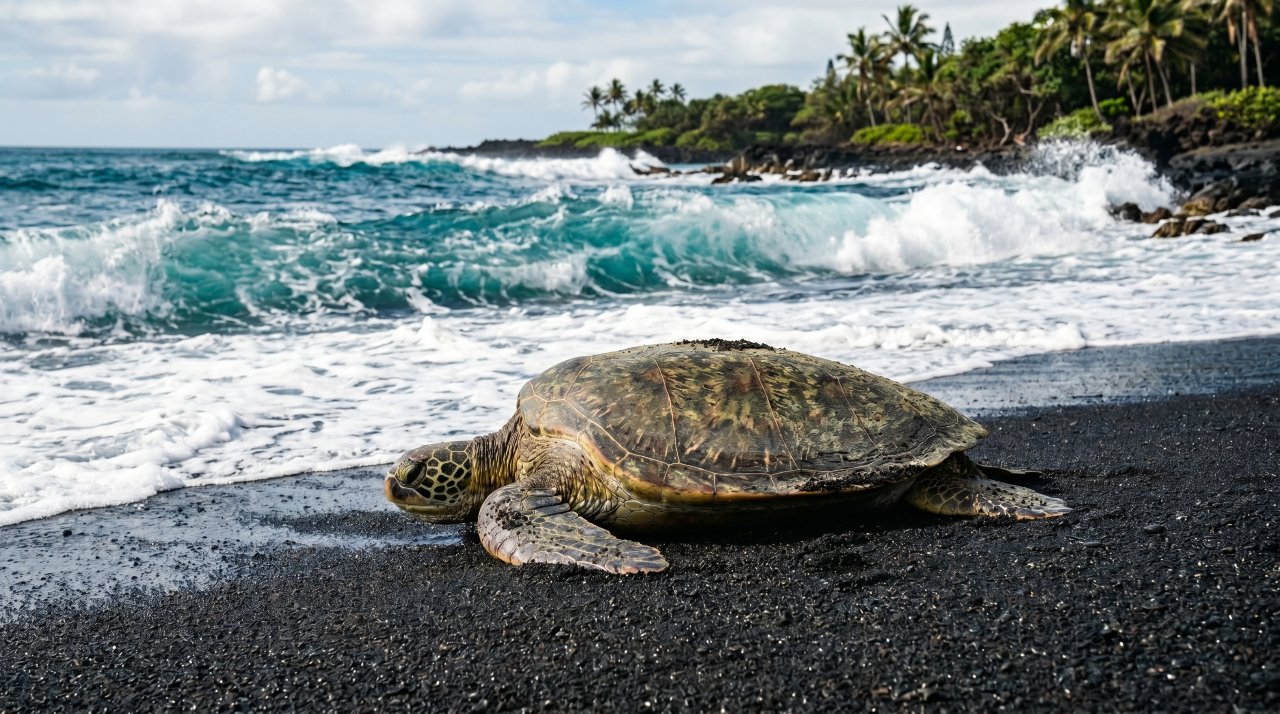
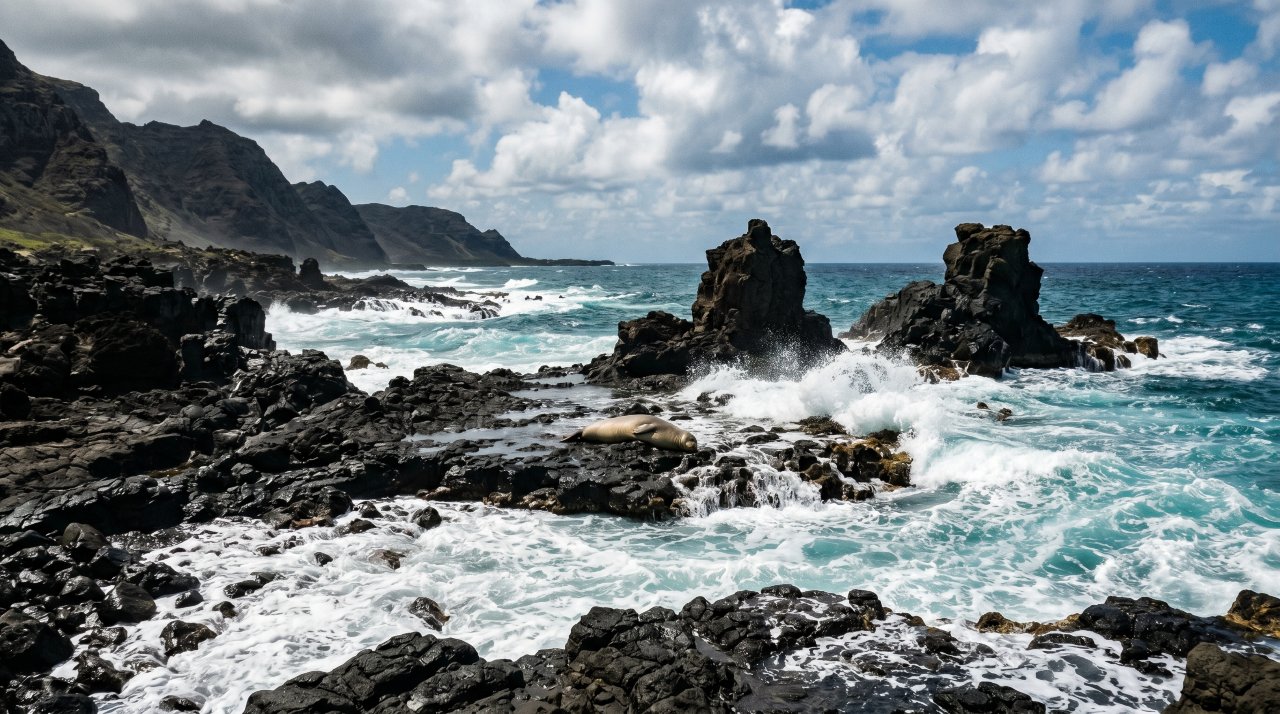
Punalu’u is one of the few places in Hawaii where green sea turtles (honu) regularly haul out onto the beach to rest. Photographing a sea turtle on jet-black volcanic sand is a shot you will not get anywhere else on your Hawaii trip.
Keep at least 10 feet from all sea turtles – this is federal law. Use a 100-400mm zoom lens to photograph from a respectful distance. The best turtle activity is late morning. The black sand itself is photogenic at any hour with the contrast of the white surf.
Best time: 9 AM to noon for turtle activity.
Cost: Free. Located off Highway 11, Ka’u District, Big Island.
Diamond Head Crater Summit, Oahu
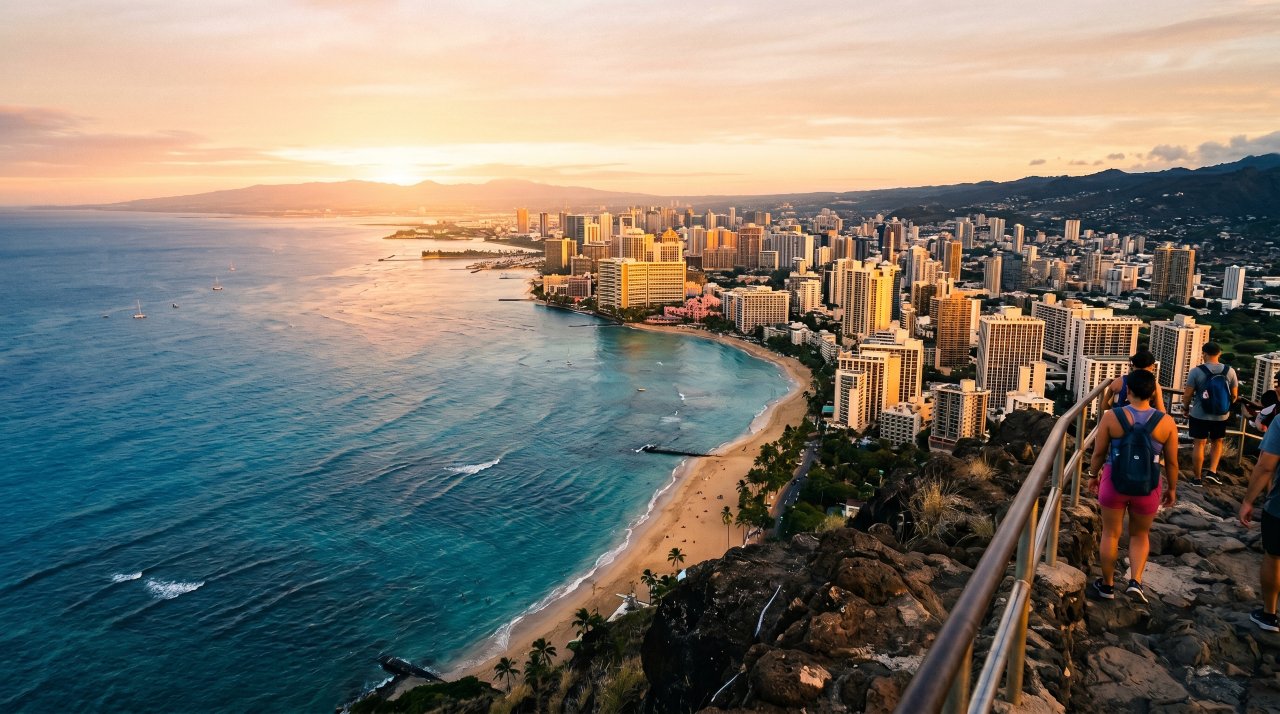
The view from Diamond Head summit at 761 feet shows the entire arc of Waikiki Beach and Honolulu’s skyline below, with the Pacific stretching to the horizon. It is the most iconic Oahu skyline shot. The 1.6-mile round-trip hike takes about 90 minutes.
Start your hike before 7 AM to beat the crowds and catch the morning light on the city. The summit gets crowded by 9 AM on weekends. Bring a wide-angle lens for the full panorama. The tunnel and bunker stairs en route to the summit are also great moody architectural shots.
Best time: 6-7:30 AM.
Cost: $5 per person. Advance reservation required at gostateparks.hawaii.gov.
Ke’e Beach and Na’Pali Reef, Kauai
Ke’e Beach marks the end of the north shore road on Kauai and sits at the foot of the Nā Pali cliffs. The snorkeling reef just offshore is excellent for underwater photography. Above water, the beach frames the cliffs perfectly at sunset.
The cliffs face west and catch warm orange sunset light directly. A 50mm or 85mm lens frames the cliffs above the beach without distortion. In winter the surf gets rough – visit May to September for calm swimming and photography conditions.
Best time: Sunset, May to September.
Cost: Free. Parking at Ke’e Beach State Park, Ha’ena, HI 96714.
Akaka Falls, Big Island
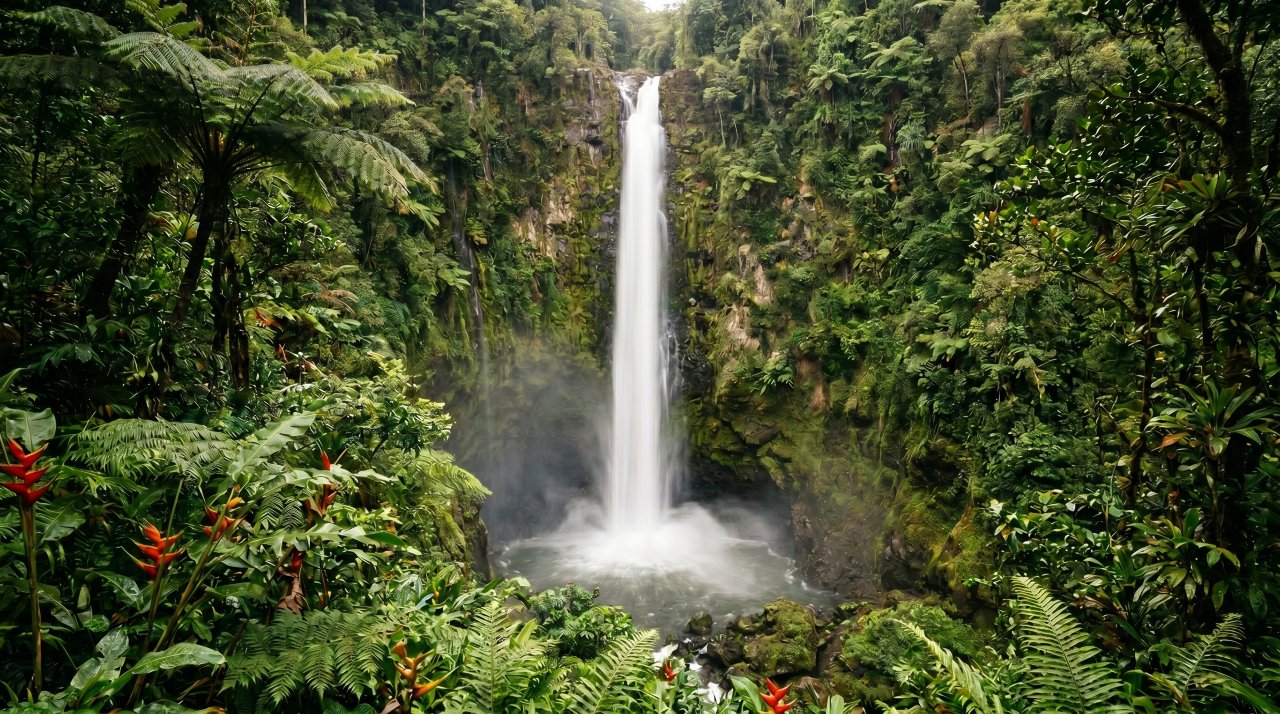
Akaka Falls drops 442 feet in a single free-falling plume into a lush gorge draped in heliconia, ginger, and giant ferns. It is the tallest easily accessible waterfall in Hawaii. The short 0.4-mile loop trail winds through a botanical garden to the main viewpoint.
A slow shutter speed (1/4 to 1 second) silks the waterfall beautifully. Arrive right at 8 AM opening to photograph before other visitors appear in frame. The jungle around the falls is as photogenic as the waterfall itself.
Best time: 8-9 AM.
Cost: $5 per person. Open daily 8 AM to 5 PM.
Maui’s Lavender Farm at Sunrise, Upcountry
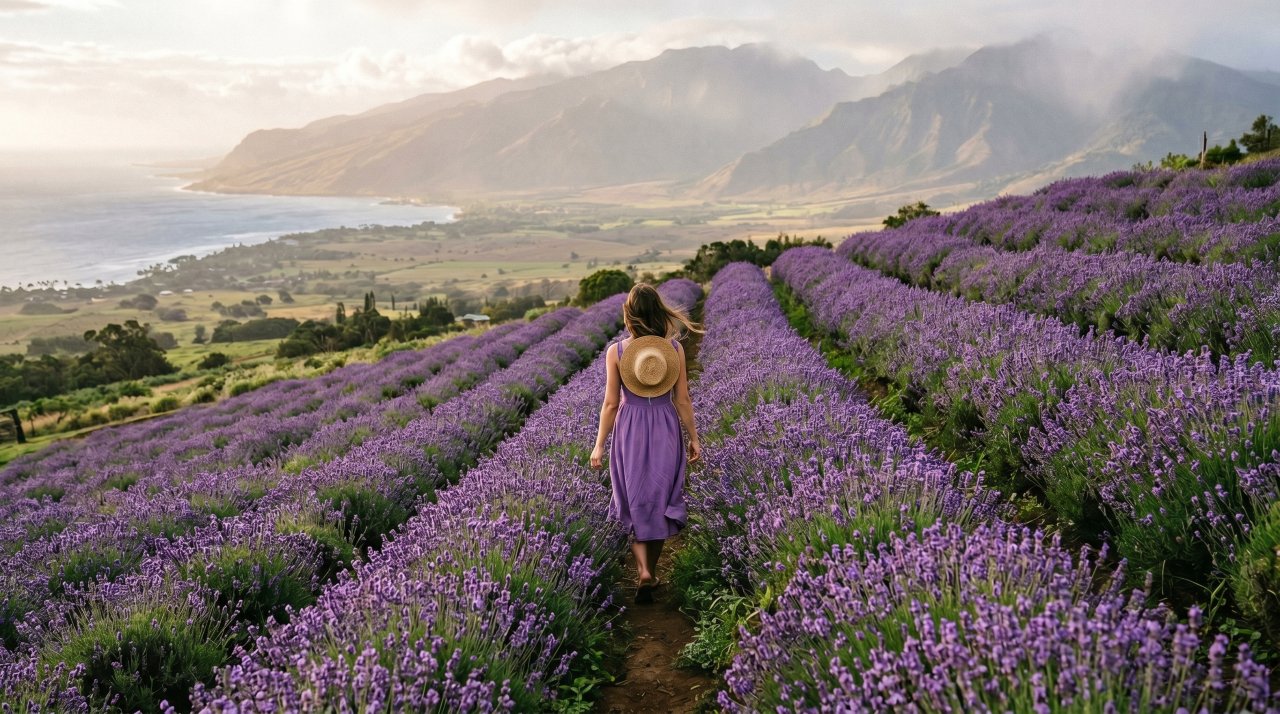
Most visitors never see this side of Maui. The Ali’i Kula Lavender Farm sits at 4,000 feet in Upcountry Maui where it is cool and misty in the morning. Rows of purple lavender stretch across the hillside with a clear view of the West Maui Mountains and ocean below.
The farm opens at 9 AM. Arrive right at opening for the best light and fewest visitors. The lavender peak season is May to June. Even outside bloom season the landscape views are exceptional and completely unlike any other Hawaii picture idea you have seen.
Best time: May to June for full bloom. Opening time for best light.
Cost: Free to walk the grounds. aliikula.com.
Kaena Point Natural Area Reserve, Oahu
Kaena Point is the most remote accessible spot on Oahu and one of the only places to photograph Hawaiian monk seals and albatross at close range on land. The 5-mile round-trip trail along the coastline has no shade but delivers dramatic sea stacks, blowholes, and wildlife.
Access from the Waianae side is slightly shorter. Go October to February for the best monk seal sightings. The albatross nesting colony at the point is active November to July. The rugged volcanic coastline itself makes for compelling abstract photography even on days with no wildlife.
Best time: October to February for monk seals. Early morning before wind picks up.
Cost: Free. Bring water – no facilities.
Your Hawaii Photography Starts Here
These 15 Hawaii photography spots give you a roadmap from the iconic to the truly hidden. The best Hawaii picture ideas are the ones you have to work for a little – an early alarm, a short hike, or a drive to the end of the road. Every one of these locations rewards that effort with images you will not find anywhere else on Pinterest. Save this guide and share it with someone planning their Hawaii trip in 2026.
Travel aesthetic is more than a visual trend. It is the way you see, frame, and remember your trips. The right light, setting, and moment can turn an ordinary travel photo into something people save and come back to. These travel aesthetic ideas will help you find and capture that feeling on every trip. From golden hour windows to moody cobblestone streets, each idea here is something you can actually use. You do not need a professional camera. You need the right eye and the right moment.
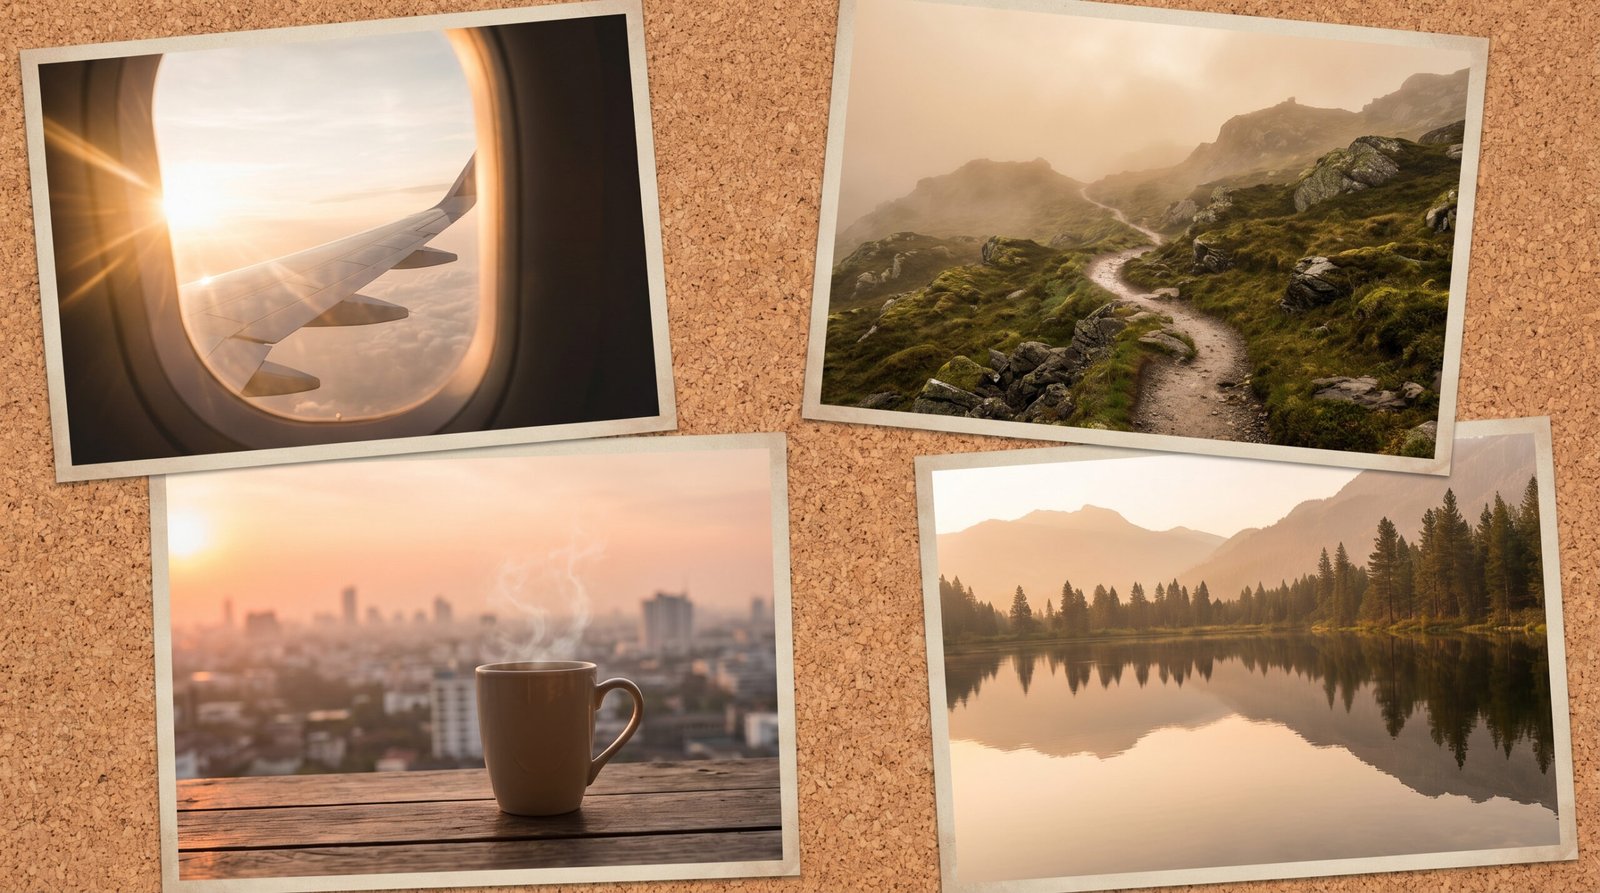
1. Airplane Window at Golden Hour Travel Aesthetic

The airplane window shot is one of the most saved travel aesthetic images on Pinterest. It works because it combines movement, light, and the promise of arrival into one frame. Shoot during sunrise or sunset. Let the wing sit naturally in the corner.
The orange and gold tones of a golden hour sky through a scratched oval window feel cinematic. The clouds below add depth. No filter needed when the light does the work for you.
2. Cave Hotel Room With a View Travel Aesthetic
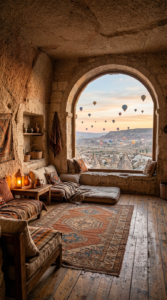
Waking up in a cave hotel with hot air balloons drifting past your window is a travel aesthetic that never gets old. Locations like Cappadocia make this possible. The contrast between rough stone walls and a soft cushioned interior creates a layered, tactile beauty.
Set up your seating area with pillows, a woven rug, and a warm drink before shooting. Let the landscape fill the background. The frame within a frame composition is what makes this image so pinnable.
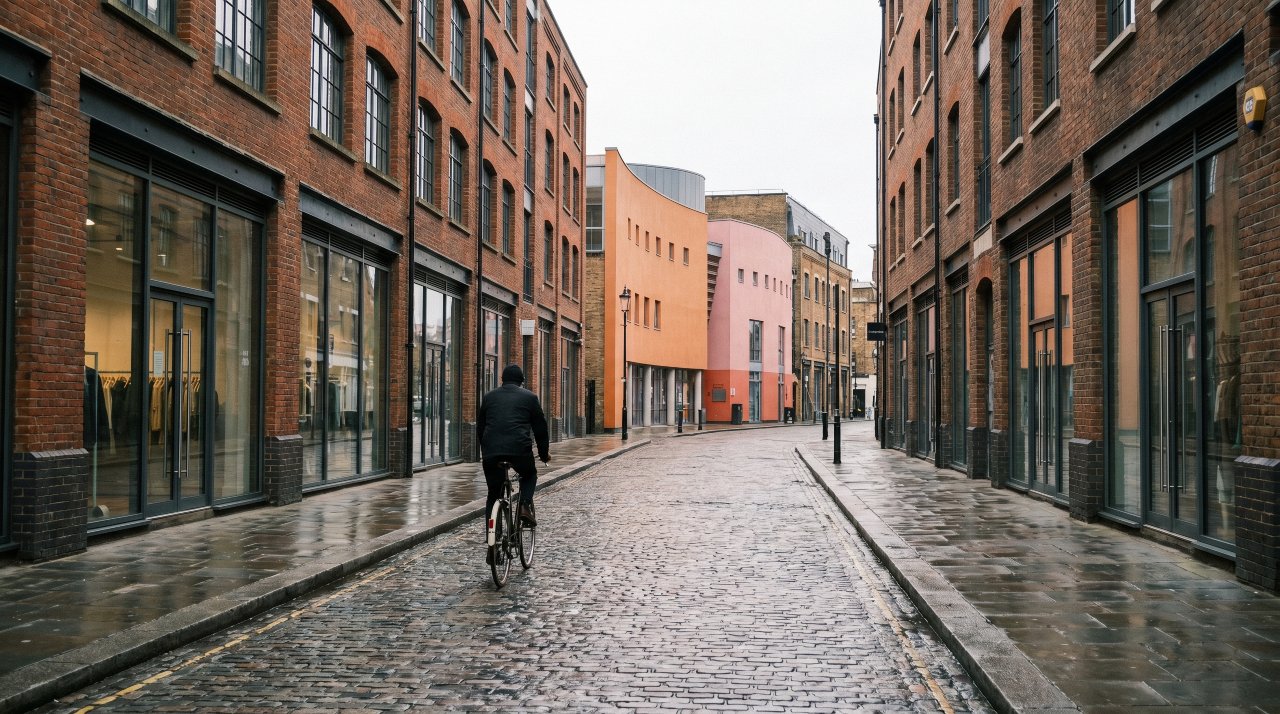
3. Cobblestone Street at Blue Hour Travel Aesthetic
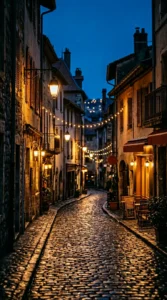
Blue hour hits just after sunset and just before sunrise. The sky turns a deep navy and the streetlights glow amber. Cobblestone streets in European cities look completely different at this time compared to midday.
Walk slowly and look for reflections in the wet stone. A lone figure in the distance, a glowing café window, or a row of hanging lanterns can all anchor the shot. Blue hour lasts only minutes, so be ready.
4. Rooftop at Sunrise Travel Aesthetic
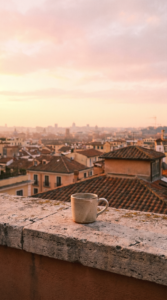
Rooftops give you the city without the crowd. Sunrise is when the light is softest and the streets are quiet below. A cup of coffee, a simple chair, and a view of terracotta rooftops or a skyline can create a powerful travel aesthetic image.
Go up alone or with one other person. Keep the frame clean. The horizon line, the soft sky, and the stillness of the morning are what make this shot work.
5. Train Window Countryside Travel Aesthetic

Train travel has a specific aesthetic that no other mode of transport matches. The blurred green fields, the rhythm of the tracks, and the warm light through the glass create a dreamy moving frame. Shoot toward the window with your subject or just the landscape.
Prop a book, a coffee cup, or a camera bag on the ledge for foreground interest. The motion blur outside contrasts beautifully with the still foreground. This travel aesthetic works in any country with scenic rail routes.
6. Mountain Lookout Point Travel Aesthetic
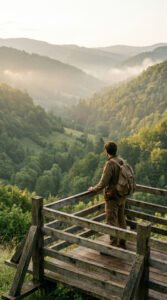
A lookout point above the treeline gives you a perspective that most travelers never reach. The scale of mountains behind a single figure creates an instant emotional response. Mist in the valley below adds drama without any editing.
Shoot in the early morning before the haze burns off. Wear earth tones so you blend into the scene rather than compete with it. The mountain is the subject and you are the scale.
7. Beachside Hammock Golden Hour Travel Aesthetic

A hammock between two palms with the ocean behind it is a travel aesthetic that performs consistently on Pinterest. The combination of tropical warmth, soft light, and stillness triggers a deep save response. Shoot at golden hour when the water turns gold and the shadows go long.
Use a wide angle to include both trees and the water. Let the hammock curve naturally in the frame. A book or a sun hat adds a personal touch without cluttering the composition.
8. Misty Forest Path Travel Aesthetic
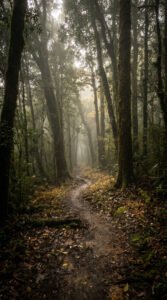
Forest paths with soft morning mist have a quiet, atmospheric quality that works across all travel aesthetic styles. The diffused light through the trees, the wet leaves, and the narrowing path create natural depth. This shot works in autumn with orange leaves or in summer with a dense green canopy.
Walk to the center of the path and shoot straight ahead. Keep your horizon level. The vanishing point pulls the viewer in and holds their attention.
9. Desert Sand Dunes at Dusk Travel Aesthetic
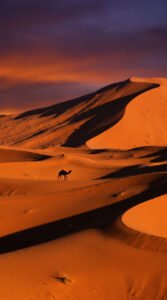
Sand dunes at dusk have an otherworldly quality. The long shadows cutting across the ridges, the burnt orange light, and the silence all contribute to a travel aesthetic that feels rare and aspirational. Locations like Sahara, Wadi Rum, and the Arabian Desert all deliver this shot.
Climb to a ridge and shoot along the line of the dune. A lone camel, a figure in local dress, or just the pure abstract geometry of the sand can all work. Dusk gives you roughly 20 minutes of this light before it goes.
10. Floating Bungalow Over Crystal Water Travel Aesthetic
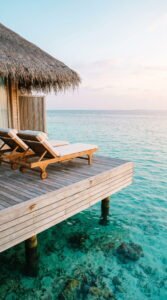
Overwater bungalows in the Maldives or Bora Bora deliver a travel aesthetic that is immediately recognizable and consistently high-saving on Pinterest. The turquoise water below, the wooden deck, and the infinity of ocean in every direction make this one of the most aspirational images in travel.
Shoot from the edge of the deck looking out. Early morning before other guests are awake gives you clean uncluttered water. The reflection of the bungalow in still water is a bonus composition when conditions are right.
11. Night Market Lantern Glow Travel Aesthetic
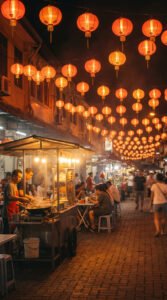
Night markets in Southeast Asia produce a travel aesthetic that is warm, colorful, and full of life. Hanging lanterns over a crowded walkway, the glow of food stalls, and the movement of people in the soft light all create a vibrant cinematic scene.
Shoot at low shutter speed to let some motion blur into the crowd. This adds energy without making the image chaotic. The lanterns above anchor the frame and give it structure.
12. Snowy Alpine Village Travel Aesthetic

A snow-covered alpine village with glowing windows and pine trees heavy with snow is a travel aesthetic built for winter saves. The contrast between cold blue shadows and warm interior light creates a cozy yet dramatic image.
Shoot just after snowfall before footprints disturb the surface. Twilight gives you a deep blue sky that contrasts beautifully with the warm orange windows. This is a travel aesthetic that converts well from pin to click.
13. Ancient Temple Stone Steps Travel Aesthetic

Ancient temple complexes like Angkor Wat, Borobudur, or Machu Picchu offer a travel aesthetic built on scale and history. Moss-covered stone steps, carved stone walls, and the silence of an ancient site at sunrise create a profound sense of place.
Arrive before the crowds. The first light of the day hits the stone in a way that no midday shot can replicate. A lone figure climbing the steps adds human scale and emotional depth.
14. Narrow Alley With Hanging Laundry Travel Aesthetic
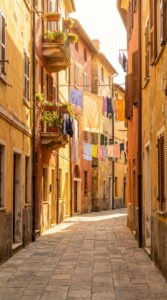
Narrow alleys in cities like Lisbon, Naples, or Valletta have a lived-in aesthetic that feels authentic and cinematic. Colorful laundry hanging between buildings, painted walls, and the human scale of tight streets create an image full of character.
Look for alleys with strong leading lines and color contrast in the hanging clothes. Mid-morning light works well when the sun is low enough to reach into the alley but not harsh. This travel aesthetic rewards patience and slow walking.
15. Coastal Cliffside View Travel Aesthetic
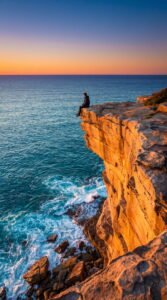
A coastal cliff with the ocean far below and a clear horizon is one of the most enduring travel aesthetics across all platforms. The sense of height, the color contrast between rock, sea, and sky, and the openness of the composition all make this image stop-worthy.
Shoot wide. Let the scale of the cliff and the expanse of ocean fill the frame. Golden hour light turns the rock face warm while keeping the water vibrant. This travel aesthetic works equally well with or without a person in the frame.
16. Ancient Medina Archway Travel Aesthetic

Walking through an ornate archway into a sunlit medina courtyard is a travel aesthetic specific to Morocco, Tunisia, and parts of Spain. The carved plaster, the geometric tilework, and the filtered light through a latticed ceiling create a composition that is rich in texture and color.
Position yourself in the shadow of the arch and shoot toward the lit courtyard beyond. The contrast between dark foreground and bright background creates natural drama. A person walking through adds movement and scale.
17. Lake Reflection at Sunrise Travel Aesthetic

Still mountain lakes at sunrise produce mirror reflections that double the visual impact of any landscape. The pink and gold sky, the dark treeline, and the perfect symmetry of the reflection create an image that feels almost unreal.
Arrive early and wait for the wind to die. Even a small ripple will break the reflection. A small wooden rowboat at the water’s edge is a classic and effective foreground element for this travel aesthetic.
18. Vineyard Golden Hour Travel Aesthetic

Rows of grapevines stretching across rolling hills at golden hour have a warmth and abundance that reads as pure lifestyle travel. Tuscany, Burgundy, and the Douro Valley all produce this shot. The symmetry of the vine rows and the warm light together create a deeply satisfying composition.
Walk to the end of a row and shoot back along the lines. The converging perspective and the backlit leaves create a natural glow. A simple picnic setup at the end of a row adds a personal element without breaking the aesthetic.
19. Bosphorus Ferry at Dusk Travel Aesthetic
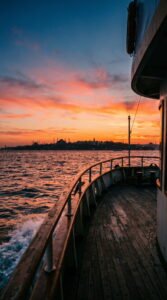
Crossing a body of water on a ferry at dusk is a travel aesthetic that few cities outside Istanbul can match. The silhouette of minarets on the horizon, the orange sky reflected in the water, and the movement of the boat all combine into a cinematic frame.
Stand at the bow of the ferry and shoot toward the horizon. The wake of the boat in the foreground and the city skyline behind create strong depth. This travel aesthetic is best captured in the last 10 minutes of light.
20. Wildflower Meadow Open Road Travel Aesthetic
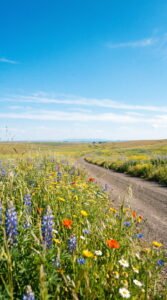
An open road cutting through a wildflower meadow under a wide blue sky is a travel aesthetic that feels like freedom. The road as a leading line, the color of the flowers on either side, and the openness of the sky create an uncomplicated but powerful image.
Shoot low and wide. Get the road starting at the very bottom of the frame. The flowers in the foreground, the vanishing road in the middle, and the open sky above work together to create natural visual flow. This is one of the cleanest and most saveable travel aesthetic compositions.
Travel aesthetic is something every traveler can develop with practice. The best images come from slowing down, noticing the light, and looking for the frame before you raise your camera. These 20 ideas give you a starting point for every type of trip. Save this list and come back to it before your next adventure. For more travel inspiration, explore the rest of the Savvy Dispatches blog.

Hiperdex: A Complete Guide to the Online Manga Reading Platform

A Few Days In Singapore