Travel
A Local’s Guide to First-Time Travel in London
There’s a moment when your plane begins to descend and you glimpse the Thames curling like a silver ribbon through the sprawl — that’s when London starts working its quiet magic. It’s a city that defies neat introductions, layered in contradictions and stories. For a first-time visitor, it can feel like too much at once: the speed, the size, the sheer density of things to see. But travel here isn’t about racing from sight to sight; it’s about learning the city’s rhythm, the small human details between the monuments. This local guide will help you do just that — move confidently, see deeply, and find calm inside the chaos.
When to Come and What to Expect
London wears four distinct faces each year, and none is wrong. Spring is tender and full of promise; parks glow with cherry blossoms, and the air smells faintly of rain and new leaves. Summer stretches long into the night — the city spilling outdoors into rooftop terraces and music festivals. Autumn brings a kind of reflective beauty, soft light falling over the golden trees in Hyde Park and Richmond. Even winter, often maligned, has its charm: fewer crowds, fairy lights along Oxford Street, steaming cups of mulled wine at Southbank’s Christmas market.
If it’s your first time, choose a shoulder month — May or October — when the weather is kind, prices dip, and locals reclaim their streets. The pace slows enough for you to breathe.
Understanding the Shape of London
London isn’t a single organism; it’s a living mosaic of neighborhoods — each shaped by centuries of history, migration, and reinvention. What makes the capital so captivating isn’t just its monuments but the way every district feels like its own small town, complete with character, rhythm, and quirks. To really know London, you have to move through these smaller worlds one by one.
West London – Elegance and Old-World Charm
West London is where refinement meets tradition. Think wide, tree-lined avenues, white stucco terraces, and leafy garden squares. Kensington houses the Natural History Museum and Victoria & Albert Museum, while Notting Hill charms visitors with pastel townhouses, vintage bookshops, and the weekend bustle of Portobello Road Market.
Chelsea and Belgravia embody old-money sophistication, with boutiques, art galleries, and quiet streets where flowers spill over wrought-iron fences. Evenings here feel slower — dinner in a hidden brasserie, a walk by the Thames, a sense that the city exhales for a while.
East London – Creative Energy and Modern Edge
Across the river and a few Tube stops away, East London hums with creative energy. Shoreditch and Hoxton wear their street art proudly — every wall a mural, every alley a story. This is where vintage markets, independent cafés, and tech start-ups share the same postcodes.
On Brick Lane, curry houses sit beside record stores and art galleries, the air scented with spices and spray paint. Hackney stretches the city’s artistic pulse even further, with weekend markets, reclaimed warehouses, and parks that fill with picnics and music when the sun breaks through. East London never stands still — it’s where London experiments, reinvents, and sometimes contradicts itself entirely.
North London – Green Views and Quiet Corners
Head north and London slows down, trading skyscrapers for skyline views. Hampstead is one of the city’s most picturesque districts — cobbled lanes, cozy pubs, and the vast wild expanse of Hampstead Heath, where locals climb Parliament Hill for panoramic city views.
Nearby Primrose Hill and Highgate blend literary history with modern calm, their Victorian homes framed by climbing ivy and quiet gardens. North London offers space to breathe — ideal for travelers who love local cafés, parks, and the gentle rhythm of residential streets after a day of sightseeing.
South London – Green Space and Community Feel
Crossing the Thames changes everything. South London trades grandeur for greenery and a more local tone. Greenwich is steeped in maritime history, home to the Royal Observatory, the Cutty Sark, and one of the city’s best viewpoints across the river.
Further west, Dulwich and Crystal Palace mix creative studios with family-run pubs and independent shops. Life here moves at a slower pace; weekend farmers’ markets, leafy parks, and long brunches are the norm. It’s London at ease — authentic, lived-in, and quietly beautiful.
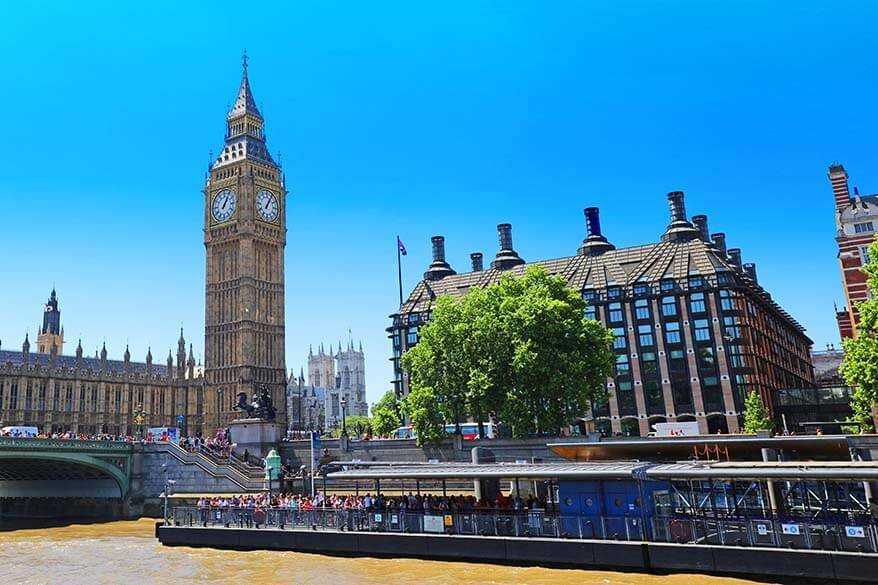
Central London – The Iconic Core
At the heart of it all lies Central London, where history and energy collide. Westminster, with Big Ben and the Houses of Parliament, anchors the political and royal center. Covent Garden bursts with street performers, artisan stalls, and hidden cocktail bars, while Soho mixes nightlife, dining, and cultural diversity in every sense.
Stroll along the South Bank for some of the best river views, crossing the bridges that link centuries of change. Central London is what you picture before you arrive — but it’s the surrounding districts that make the experience whole.
Exploring the Patchwork
Don’t try to “see London” in one sweep. Each area tells a story, and part of the joy is letting those stories unfold slowly. Use the Tube, Overground, or a classic black cab to move between them, but take time to walk. The shift in architecture, the smell of bakeries versus street food, the accents you hear — all reveal a new side of the city.
London is best understood not as one destination, but as a quilt of living neighborhoods stitched together by bridges, bus routes, and human connection. Once you see it that way, every journey — even a short one — feels like a small adventure of its own.
Arriving Gracefully
Your introduction to the city often begins at the airport, and with six of them, choosing how to arrive makes a difference. Heathrow and Gatwick handle most long-haul flights, while Stansted and Luton serve many European routes. London City and Southend cater to business and regional travelers. The distances vary — Heathrow is about 15 miles from central London, Luton closer to 35 — so your transport choice can shape the first hours of your trip.
Many visitors default to trains or buses, but locals know that landing weary and jet-lagged is no time for ticket machines or packed carriages. That’s why a pre-booked transfer can quietly elevate your arrival. Reliable services such as London Airport Taxi offer fixed-fare rides and professional drivers who monitor flights in real time. There’s something grounding about being met at arrivals, luggage handled, route sorted, and the city skyline drawing closer through the window.
If your flight brings you through Bedfordshire, the Luton Airport Taxi option delivers the same calm precision — door-to-door to your hotel or address, without the uncertainty of connections or surge pricing. London may be vast, but how you enter it can set the tone for the rest of your journey.
Moving Like a Londoner
Once you’ve arrived, movement becomes part of the experience. The London Underground — “the Tube” — is a masterpiece of efficiency, even if it feels maze-like at first. Every color on the map tells a story, every interchange a new layer of the city. Get an Oyster card or simply tap your contactless bank card on entry and exit; it’s the same price. During rush hour, stand on the right side of the escalator and let commuters dart past. This small gesture will spare you the sharp sighs of locals trying to make the 8:42.
Above ground, red double-decker buses offer slower, more scenic routes. Sit upstairs, front seat, and watch the city glide past: monuments, terraced homes, corner cafés. A single fare covers unlimited transfers for an hour — a bargain compared with most capitals. When time is short or luggage heavy, licensed black cabs are a London icon for a reason. Drivers train for years to master “The Knowledge,” knowing every backstreet by heart. For longer journeys or airport returns, a pre-booked car often works out cheaper and far less stressful.
And then there’s walking — still the best way to know London. The city reveals itself in textures: cobblestones slick with drizzle, the scent of bread near Borough Market, the hum of conversation outside Soho cafés. Give yourself permission to wander without a destination.
Where to Rest Your Head
Choosing where to stay isn’t just about price; it’s about atmosphere. The center keeps you close to the classics — Westminster’s landmarks, Covent Garden’s buzz, the South Bank’s riverfront. Rooms cost more here, but you gain precious time and energy. West London is timeless and refined; East London more playful and artistic, with warehouse lofts and boutique hotels hidden behind graffiti-covered walls. North London charms with village quiet, South London with leafy calm.
What matters most is proximity to the Tube — ideally within a ten-minute walk. London sprawls, and shaving fifteen minutes off each journey means you’ll actually have time to linger where you want to be.
If you crave character, pick small over grand. A townhouse B&B in Bloomsbury or an apartment in Notting Hill often tells a richer story than another chain hotel lobby.
What to See — and What to Feel
Everyone arrives with a checklist: Buckingham Palace, Big Ben, the Tower of London, St Paul’s Cathedral. They’re famous for good reason, and seeing them in person will still stir you. But the heart of London beats elsewhere — in its moments between the landmarks. Spend a morning wandering the South Bank, street performers below the London Eye, and watch the sunlight shift across the river. Cross the Millennium Bridge to the Tate Modern, then lose track of time in its echoing halls.
Slip into a side street and find the smaller wonders: the ruined garden of St Dunstan in the East, the pastel facades of Neal’s Yard, the hush of Temple Church tucked behind Fleet Street. Walk through Borough Market at noon, tasting fresh bread and local cheese, or climb Primrose Hill at sunset for a skyline view locals never tire of. In Camden, hear buskers under the bridges; in Greenwich, stand where the world’s time begins.
The best experiences aren’t always on maps. They happen when you pause long enough to let London surprise you.
Eating and Drinking Like You Belong
Food in London is a reflection of its people — global, inventive, sometimes eccentric. You’ll find Michelin-starred temples of cuisine sitting beside Pakistani curry houses, Jamaican jerk stands, and late-night ramen bars. For traditional flavors, try fish and chips from a proper chippy, a full English breakfast at a local café, or Sunday roast with Yorkshire pudding at a pub in Clerkenwell. Afternoon tea remains a rite of passage: tiered trays, clotted cream, and quiet indulgence under chandeliers.
Markets are where the city’s appetite really comes alive. Borough Market near London Bridge brims with artisan cheese, Ethiopian coffee, and handmade pastries. Camden Market serves global street food beneath the railway arches. On weekends, Maltby Street in Bermondsey feels like a secret known only to locals — narrow lanes, sizzling grills, and the smell of fresh dough.
When evening falls, head to a pub. Some are centuries old, their beams dark with history. Order at the bar, make conversation, and you’ll soon feel the difference between tourist London and local London. Tipping isn’t mandatory here; rounding up the bill or saying “cheers” is enough.
If you prefer a quieter night, climb to a rooftop bar or find a riverside terrace. London after dark has a softer pulse — lights reflecting on the Thames, music drifting from hidden courtyards, the sense that life here never really stops, it just changes key.
The Practical Stuff Nobody Tells You
London rewards planning, but it also tests patience. The currency is the British Pound, and almost everywhere accepts contactless cards. Keep a small amount of cash for markets or tips, but you’ll rarely need it. The weather, famously unpredictable, can shift from sunshine to drizzle in an hour — carry a compact umbrella and don’t let grey skies dampen your mood; locals barely notice the rain anymore.
Public Wi-Fi is widely available, but buying a local SIM or eSIM will save you frustration when navigating. Power sockets use the three-pin Type G plug — don’t forget an adaptor. Safety-wise, London is friendly and secure; just keep your bag zipped and stay alert in crowded spots. On public transport, mind the gap, respect the queue, and avoid blocking doors. Small courtesies make big differences here.
Most of all, give yourself time. Travel distances can be deceptive. A journey that looks short on a map might take 40 minutes once transfers and crowds come into play. Factor that breathing room into your days, and you’ll move through the city like you belong.
Suggested Flow for a First Visit
Start centrally. Spend your first full day grounding yourself among the icons — Westminster, the Thames, Trafalgar Square. These places orient you. The second day, branch outward to history and art: the Tower of London in the morning, then cross Tower Bridge and drift through the galleries of the Tate Modern. On your third, wander neighbourhoods — Notting Hill for colour, Camden for energy, Greenwich for calm. Each shows a different face of the same city.
If you have more time, use it for depth rather than distance. Visit a local theatre, picnic in Regent’s Park, or take a day trip to Windsor or Oxford. London’s train network makes short escapes effortless, but it’s the return that reminds you why this city holds you — stepping back onto its pavements feels like rejoining an old conversation.
Before You Leave
London will change you in quiet ways. You’ll catch yourself measuring time by Tube stops, craving another walk along the river, recognising landmarks from films not as pictures but as places you’ve stood. The city rewards curiosity far more than speed.
When it’s time to head back to the airport, leave earlier than you think you need to. Morning traffic can stretch forever, and train delays are part of the local folklore. Booking a taxi ahead of time means your departure ends the way your arrival began — calm, unhurried, looking out the window as the skyline recedes.
Whether you spent three days or three weeks, remember that London never truly fits into one visit. It’s a place you collect over time — a café here, a park bench there, a conversation that lingers. The more you return, the more it opens itself to you.
A Final Word
For a first-time traveler, London can seem overwhelming — but that’s its gift. Every sound, every turn, every contrast invites you to see the world’s biggest small town through your own eyes. Don’t chase it; walk with it. Sip tea slowly, listen to the accents around you, watch rain gather on red bus windows. That’s where the real city lives — not just in the sights you photograph, but in the moments you almost didn’t notice.
And when you leave, you’ll already be planning how to come back — not as a stranger this time, but as someone who knows their way from the airport to the heart of London, ready for another chapter.

If you love travel, you know the feeling. The itch to pack a bag. The curiosity about people who live differently. The quiet thrill of landing somewhere new and not knowing exactly what the day will bring.
Movies can’t replace the real thing. But they can come close. A good travel film lets you see the world through someone else’s eyes. It reminds you why you fell in love with the road in the first place.
Here are six of the best movies for travel lovers. Each one captures a different side of adventure, from soul-searching road trips to wild, real-life journeys. And if you’re planning a movie night, you can always watch free movies at losmovies to explore these stories without leaving home.
The Secret Life of Walter Mitty (2013)
Directed by and starring Ben Stiller, The Secret Life of Walter Mitty is a dream for anyone who feels stuck in routine. Walter works a quiet office job at Life magazine. He spends most of his time daydreaming about bold adventures. Then one day, he has to step out of his comfort zone and travel across the world to find a missing photograph.
The movie takes you from New York to Greenland, Iceland, and the Himalayas. The landscapes are stunning. You see icy seas, dramatic mountains, and wide open skies that make you want to book a flight immediately.
But this film isn’t just about scenery. It’s about courage. It shows that travel often starts with a small decision to say yes. For anyone who’s ever hesitated before buying a ticket, Walter’s journey hits home.
Into the Wild (2007)
Based on a true story, Into the Wild follows Christopher McCandless, a young man who gives up his possessions and savings to travel across the United States and eventually into the Alaskan wilderness.
Directed by Sean Penn and starring Emile Hirsch, this film is raw and emotional. It shows deserts, rivers, forests, and long, empty highways. You feel the freedom of sleeping under the stars. You also feel the cost of isolation and extreme choices.
This movie is perfect for travel lovers who are drawn to the idea of simplicity. It asks hard questions about society, materialism, and what it means to live fully. It also reminds you that nature is powerful and not always forgiving.
If you’re looking for something deeper than a typical adventure film, this one will stay with you long after the credits roll.
Before Sunrise (1995)
Before Sunrise, directed by Richard Linklater, is quieter but just as powerful. The story is simple. An American man and a French woman meet on a train and decide to spend one night walking around Vienna together.
There are no big action scenes or dramatic twists. Instead, you get long conversations, city streets at night, and the magic of a place seen through fresh eyes.
Vienna feels alive in this film. Cafés, parks, trams, and cobblestone streets create a romantic backdrop. It captures something many travelers know well: the intensity of short connections on the road. Sometimes you meet someone for just a few hours, yet it feels unforgettable.
For those who travel for human connection as much as for landscapes, Before Sunrise is a must-watch.
The Motorcycle Diaries (2004)
The Motorcycle Diaries tells the true story of a young Ernesto Guevara, long before he became known as Che Guevara. Played by Gael García Bernal, he sets off on a motorcycle journey across South America with his friend Alberto Granado.
They travel through Argentina, Chile, Peru, and beyond. Along the way, they meet miners, farmers, and families struggling to survive. The trip slowly changes Ernesto’s worldview.
The scenery is breathtaking. From the Andes mountains to the ruins of Machu Picchu, the film offers a sweeping look at Latin America. But what makes it special is how travel becomes a teacher. The journey shapes identity. It challenges assumptions.
If you’ve ever felt that travel opened your eyes to injustice or inspired you to think differently, this movie will resonate deeply.
Eat Pray Love (2010)
Based on the memoir by Elizabeth Gilbert, Eat Pray Love stars Julia Roberts as a woman who leaves her comfortable life behind to travel through Italy, India, and Indonesia.
This film leans into the sensory pleasures of travel. In Italy, it’s all about food and joy. You see plates of pasta, busy streets, and warm conversations. In India, the focus shifts to spirituality and discipline in an ashram. In Bali, the story moves toward balance and love.
Some critics find it idealistic, but for many travel lovers, it captures a real truth. Sometimes you need to leave everything familiar to find clarity.
It’s especially appealing if you’re drawn to solo travel. The movie shows that being alone in a foreign country can be both scary and transformative. And if you’re planning a relaxing movie night before your next trip, you can watch free movies at losmovies and dive into this journey from your couch.
The Darjeeling Limited (2007)
Directed by Wes Anderson, The Darjeeling Limited follows three brothers traveling across India by train in an attempt to reconnect after their father’s death.
The film is visually distinct. Bright colors, carefully framed shots, and detailed sets make every scene feel intentional. The train itself becomes a moving world, filled with strangers, arguments, and unexpected moments.
India is shown in fragments. Bustling markets, desert landscapes, and quiet temples pass by the train windows. The story mixes humor and grief, reminding us that travel can bring unresolved emotions to the surface.
For travel lovers, this movie feels familiar. Long train rides. Awkward conversations. The strange intimacy of sharing space with people on the move. It shows that journeys are not just about destinations. They are about what happens between stops.
Why Travel Movies Matter
Travel movies do more than show beautiful places. They reflect different reasons we leave home. Some characters travel to escape. Others go to search for meaning, connection, or adventure. Sometimes they don’t even know why at first.
Watching these films can reignite your desire to explore. They can also make you appreciate the journeys you’ve already taken. Maybe you’ll remember a late-night walk in a foreign city. Or a bus ride through mountains where you felt small and alive at the same time.
If you’re not able to travel right now, movies can fill part of that gap. You can watch free movies at losmovies and step into another country, another life, another perspective for a couple of hours.
Of course, nothing replaces real travel. The smell of street food, the sound of a new language, the feel of unfamiliar air on your skin. But until your next trip, these six films can keep your wanderlust alive.
So pick one. Make some tea. Turn off your phone. Let the story take you somewhere new.

Understanding Satiety
It is always best to select snacks that allow one to develop a state of fullness (satiety). Satiety is based on different variables like protein, fiber and healthy fats. These slow down the digestion and maintain a constant level of sugar in the blood. Studies indicate that high-protein snacks lower hormones like ghrelin more effectively in comparison to carb-rich ones. Amul Fresh Paneer is a high-protein food item that is easily available in the market, thanks to grocery delivery apps. One can easily come up with different healthy snacking recipes from this.
Swap Processed Snacks for Protein Power
One should always avoid inferior food items like chips or cookies. These increase the blood sugar and leave a person hungry after a short time, consume foods with high contents of nutrients. Amul Fresh Paneer can be regarded as an alternative in this. It offers fresh protein and healthy fat. With online grocery delivery app, it has become easier to get healthy food items delivered to your home. Amul paneer has approximately 18-20 grams of protein per 100 grams and some calcium to keep your bones strong. This paneer is the best snack to have when you need to keep your body going.
Quick Grilled Paneer Recipe
You can make customize your own recipe with amul fresh paneer. You can grill cubes of it with spices such as cumin, turmeric and black pepper to create a simple evening snack. Maillard reaction that happens during grilling provides a desirable texture without the use of oils. Serve it with cucumber slabs or cherry tomatoes as a source of fiber which further adds fullness. This combination can be ready in less than 10 minutes and provides the balanced proportion of macronutrients.
More Satiety-Boosting Snack Ideas
One can also add Greek yogurt and berries to their daily diet to bring together the protein and antioxidants or boiled eggs and avocado that contain healthy fats. But, if you want veg and pocket friendly snacking dishes, then paneer is the best item that you can go for in the current scenario.
To replace meat, roasted herbed chickpeas provide fiber and protein; a video tutorial by NutritionFacts.org shows the simple recipes of roasting chickpeas to achieve the best crunch and nutrition.
Conclusion
Now, it has become so easy to get all required ingredients for healthy snacking at your doorsteps. You can easily search for a “grocery delivery app near me” and place an order of Amul Fresh Paneer and all necessary ingredients effectively. It is important to be indulgent but in a cautious manner, even though protein is a must in our daily diets. Make a note of how much energy you gain when you consume each meal throughout the day. Also, try to select healthier versions of snacks such as grilled paneer or chickpeas which fill your tummy and boost your health levels significantly. This tweak will give you the right blend of health and taste.
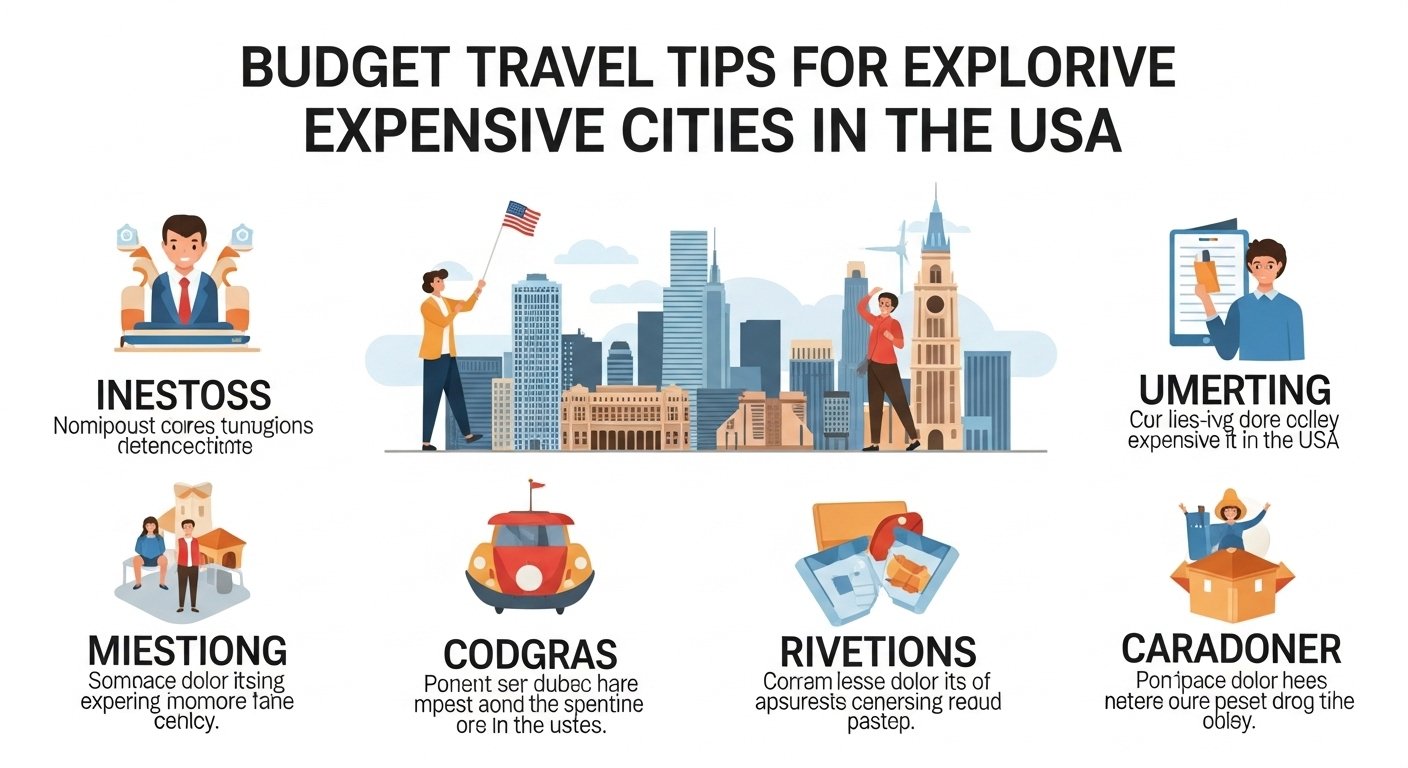
Budget Travel Tips for Exploring Expensive Cities in the USA! Traveling to expensive cities in the USA might seem like a daunting task, especially if you’re on a budget. But fear not! With a little creativity and some strategic planning, you can explore iconic destinations without emptying your wallet. From bustling New York City to sunny San Francisco, there are plenty of ways to have an unforgettable experience while keeping costs down. Whether you’re dreaming of art-filled galleries or delectable food from street vendors, these budget travel tips will help you navigate expensive cities with ease. Get ready to discover how to make the most out of your adventures without breaking the bank!
Research and planning tips for saving money on accommodations
Finding affordable accommodations in pricey cities can feel daunting. However, a little research goes a long way.
Start by comparing prices on different booking websites. Often, one platform will have better deals than another. Don’t forget to check for any available discounts or promotions.
Consider staying slightly outside the city center. Neighborhoods that are just a bit further out usually offer lower rates while still giving you quick access to public transportation.
Flexible travel dates can also help you score deals. If possible, avoid traveling during peak seasons or major events when prices skyrocket.
Look into alternative lodging options like hostels or vacation rentals. These can provide unique experiences at much lower costs than traditional hotels.
Join loyalty programs offered by hotel chains and booking sites for additional savings on future stays.
Transportation hacks for getting around on a budget
Getting around expensive cities doesn’t have to drain your wallet. Start by checking public transportation options like buses and subways. Many cities offer day passes that allow unlimited rides for one low price.
Rideshare apps can also be a budget-friendly choice if you travel in groups. Splitting the fare makes it more economical, especially late at night when public transport may not be as frequent.
Consider biking or walking whenever possible. Many urban areas are bike-friendly and feature extensive paths. It’s a great way to explore hidden gems while saving money.
If you’re feeling adventurous, look into car-sharing services or even renting scooters. These options offer flexibility without the hassle of parking fees associated with traditional rentals.
Don’t forget about free shuttle services that some hotels provide to key attractions. Utilizing these can save both time and money during your travels.
Affordable food options and where to find them
When exploring expensive cities, finding affordable food options can make a big difference. Local markets are often gold mines for tasty and budget-friendly treats. Look for farmer’s markets or street vendors that showcase regional specialties.
Food trucks also offer delicious meals at lower prices than sit-down restaurants. They’re perfect for grabbing a quick bite while you roam the streets. Apps like Yelp or TripAdvisor can help pinpoint popular spots favored by locals.
Consider dining during off-peak hours to snag lunch specials or happy hour deals. Many upscale eateries offer discounted menus early in the evening.
Don’t overlook neighborhood delis and cafes; they usually have hearty portions without hefty price tags. Exploring food scenes through local recommendations will lead you to hidden gems that won’t break your budget.
Free or low-cost activities and attractions to explore
Many expensive cities offer hidden gems that won’t cost you a dime. Parks, gardens, and waterfronts provide perfect spots to unwind. Think of places like Central Park in New York or Millennium Park in Chicago.
Museums often have free admission days or discounted rates at specific times. Research ahead for local art galleries or cultural institutions with no entry fees on certain days.
Walking tours can be both educational and budget-friendly. Many cities have guided walking tours based on tips, allowing you to explore while supporting local guides.
Festivals are another great way to experience the culture without spending much. Check local calendars for free events where you can enjoy music, food, and art.
In some areas, street performances bring vibrant energy to public spaces. Grab a seat on the sidewalk and enjoy live entertainment from talented artists at no charge!
Insider tips from locals on how to save money in expensive cities
One of the best ways to save money in pricey cities is to tap into local knowledge. Residents often know hidden gems that visitors overlook. These spots typically offer better prices and unique experiences.
Ask locals for their favorite cheap eats. You might find a taco truck or diner serving delicious meals at half the cost of tourist traps. Also, check out neighborhood markets; they often have fresh produce and affordable snacks.
Public transport can be a lifesaver too. Many locals rely on buses or subways instead of rideshares, which can add up quickly. Look for day passes that allow unlimited travel within certain hours.
Don’t forget about free community events! Many cities host art walks, concerts in parks, or street fairs that are enjoyable without costing a dime. Embrace spontaneity—sometimes the best adventures come from going off the beaten path with tips from those who call it home.
Conclusion: Enjoying the best of expensive cities without breaking the bank
Exploring expensive cities in the USA doesn’t have to mean emptying your wallet. With some smart planning and a few insider tips, you can experience all that these vibrant destinations have to offer without overspending.
Focus on thorough research ahead of your trip. This way, you’ll uncover budget-friendly accommodations and transportation options that won’t compromise your comfort. Use local transit systems or consider walking—many major attractions are within easy reach.
When it comes to food, seek out hidden gems where locals dine rather than tourist traps. Street vendors or popular food markets often provide delicious meals at a fraction of restaurant prices.
Make the most of free activities available in many urban areas. Parks, museums with discounted entry on certain days, and community events can fill your itinerary with enjoyable experiences at little or no cost.
Don’t shy away from asking locals for their favorite budgeting hacks. They may lead you to surprising spots that aren’t found in guidebooks but offer great value.
By implementing these budget travel tips for exploring expensive cities in the USA, you’re setting yourself up for an enriching adventure filled with memories—not regrets about spending too much money along the way. Embrace every moment while keeping a close eye on your budget!

Why Modern Homeowners are Moving Away from Manual Pool Maintenance

6 Best Movies for Travel Lovers