Travel
Fraser Island in a Day: Ultimate One-Day Itinerary and Travel Guide
If you think exploring Fraser Island in a day sounds impossible, think again. Known as the world’s largest sand island, Fraser Island is a UNESCO World Heritage site packed with natural wonders, from pristine freshwater lakes to ancient rainforests. While spending multiple days here is ideal, it’s entirely possible to experience its best attractions in just one day. With a well-planned itinerary and the right approach, you can make the most of your short visit. Let’s dive into the ultimate one-day adventure on Fraser Island.
Getting to Fraser Island: Start Your Day Early
To explore Fraser Island in a day, an early start is crucial. Located off the coast of Queensland, Australia, the island is accessible by ferry from Hervey Bay or Rainbow Beach. Most day trips begin at sunrise to maximize time on the island. Booking a guided tour or renting a 4WD vehicle is recommended, as Fraser Island’s sandy terrain requires a high-clearance, four-wheel-drive vehicle.
If you choose a guided tour, transportation, meals, and a well-organized schedule will be provided. On the other hand, a self-drive adventure offers flexibility and the thrill of navigating the island’s rugged trails. However, it requires a permit and some off-road driving experience. Either way, catching the first ferry will give you the head start needed to explore Fraser Island’s iconic attractions.
First Stop: Lake McKenzie – A Morning Swim in Paradise
No visit to Fraser Island in a day is complete without a stop at Lake McKenzie. Known for its crystal-clear, turquoise waters and pure white silica sand, Lake McKenzie is one of the island’s most famous landmarks. Its perched lake status means that it sits above the water table, filled only by rainwater and free from pollutants. Consequently, its waters are incredibly pure and refreshing.
Arriving early ensures a peaceful experience before the crowds arrive. Swimming in the cool, transparent waters is a must, followed by relaxing on the soft sands. The surrounding eucalyptus forest adds to the serene atmosphere, making it a perfect spot to start your day. Don’t forget your camera – the vibrant blue hues against the white sands create postcard-worthy photos.
Central Station and Rainforest Walk – Discover Fraser’s Unique Ecosystem
From Lake McKenzie, continue to Central Station, once a bustling logging settlement and now a peaceful picnic area surrounded by lush rainforest. It showcases Fraser Island’s unique ecosystem, where ancient trees grow from sand. Central Station is a testament to the island’s resilience and biodiversity.
Take a stroll along the Wanggoolba Creek boardwalk, where crystal-clear water flows over white sand. Towering satinay and kauri trees form a canopy above, while vibrant ferns and mosses thrive below. The tranquil setting is perfect for reconnecting with nature. The informative signs along the trail provide fascinating insights into the area’s history and flora, enhancing the educational value of your visit.
75 Mile Beach – A Scenic Drive Along the Sandy Highway
No trip to Fraser Island is complete without cruising down 75 Mile Beach, a stretch of sand that doubles as a highway and landing strip. It’s an exhilarating drive with panoramic views of the Pacific Ocean on one side and sand dunes on the other. Keep an eye out for wild dingoes, a protected species on Fraser Island, often seen patrolling the shoreline.
While driving along 75 Mile Beach, make a brief stop at Eli Creek, the largest freshwater stream on the eastern coast. It flows swiftly into the ocean, and visitors can float down its gentle current on inflatable tubes. The cool, clear water provides a refreshing break from the tropical sun.
Further along the beach lies the Maheno Shipwreck, a rusted relic that serves as a haunting reminder of the island’s maritime history. The Maheno, once a luxury cruise liner, was washed ashore during a cyclone in 1935. It now rests on the sandy shore, weathered by time and the elements, making it a fascinating spot for photography enthusiasts.
The Pinnacles – Explore Colorful Sand Formations
Continuing along 75 Mile Beach, The Pinnacles are a must-see attraction. These stunning cliffs display a spectrum of colors, ranging from vibrant reds and oranges to soft yellows and whites. Formed over thousands of years by wind and rain, the iron-rich sands create a mesmerizing tapestry of layered hues.
According to Aboriginal legend, The Pinnacles were created by a beautiful young woman who fled from an unwanted suitor. She prayed to the spirits, who transformed her into the cliffs, preserving her beauty forever. This cultural story adds depth to the visual spectacle, enriching the experience with a touch of mythology.
Indian Head – Panoramic Views and Wildlife Spotting
The next stop on your Fraser Island in a day adventure is Indian Head, the island’s most prominent rocky headland. A short climb to the summit rewards visitors with panoramic views of the coastline and the turquoise waters below. On a clear day, it’s possible to spot marine life, including dolphins, rays, and even migrating humpback whales.
Indian Head is a sacred site for the Butchulla people, the traditional owners of Fraser Island. It was named by Captain James Cook in 1770 after observing Aboriginal people standing on the headland. Visitors are asked to respect the cultural significance of the site by staying on designated paths and avoiding disturbance to the area.
Champagne Pools – A Natural Ocean Jacuzzi Experience
After descending from Indian Head, head to the Champagne Pools, the island’s only safe saltwater swimming location. Formed by volcanic rocks, these natural pools are filled with seawater as waves crash over the rocks, creating a fizzing, bubbly effect – hence the name “Champagne Pools.”
The pools are ideal for relaxing and cooling off while enjoying the spectacular coastal views. However, the rocks can be slippery, so caution is advised when entering the water. The nearby sandy platforms provide perfect spots for sunbathing and picnicking.
Practical Tips for Experiencing Fraser Island in a Day
To maximize your adventure, planning ahead is essential. Book the first ferry and ensure your 4WD vehicle is in excellent condition. Carry essentials like water, snacks, sunscreen, and insect repellent. It’s important to respect local regulations, including speed limits on 75 Mile Beach and guidelines for interacting with wildlife, especially dingoes.
If time allows, visit more scenic spots such as Lake Wabby or Pile Valley. However, the itinerary outlined above ensures a comprehensive and memorable experience within a single day. Ending your day with a sunset view on 75 Mile Beach provides the perfect conclusion to your Fraser Island adventure.
Exploring Fraser Island in a day provides a snapshot of the island’s natural beauty and cultural significance. From pristine lakes to ancient rainforests, colourful sand formations, and panoramic viewpoints, every moment is filled with awe and adventure. Whether you’re a thrill-seeker or a nature enthusiast, this one-day itinerary ensures an unforgettable experience on one of Australia’s most iconic islands.
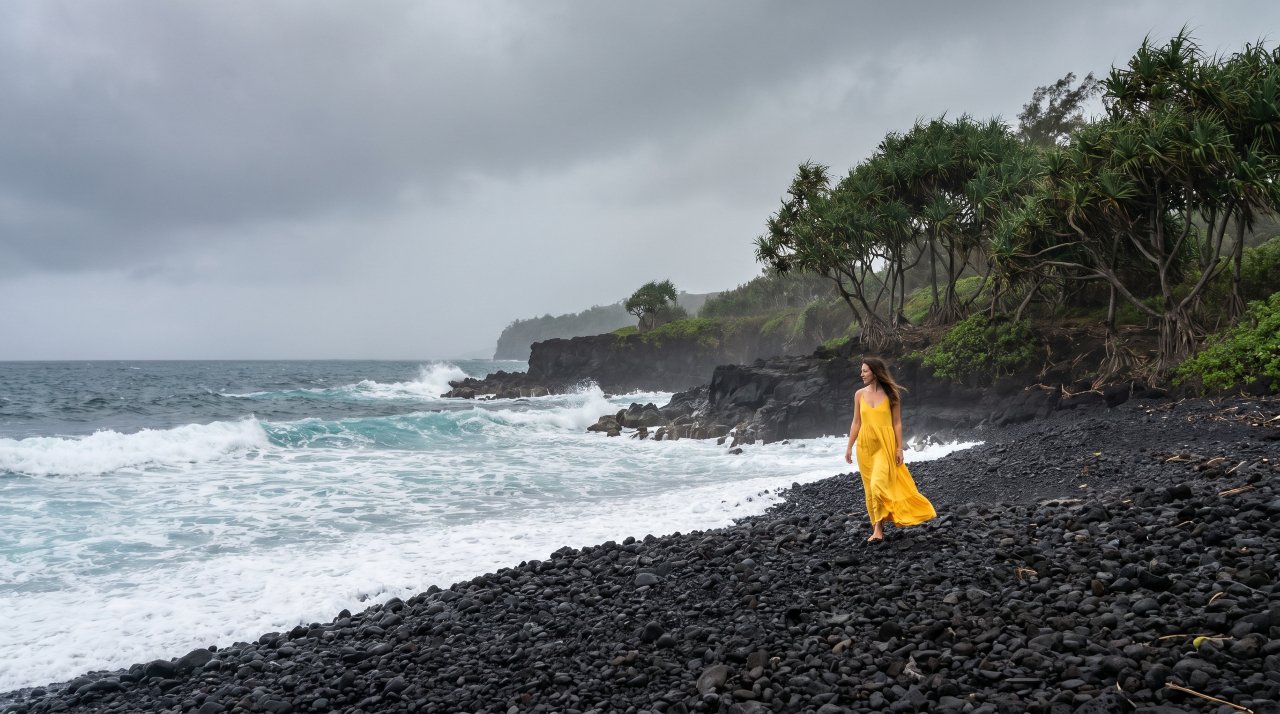
Maui Hawaii is one of the most breathtaking islands in the world. Whether you are planning your first visit or returning for the tenth time, Maui Hawaii never runs out of ways to surprise you. From volcanic landscapes to hidden waterfalls and world-class beaches, Maui Hawaii offers experiences that stay with you long after you leave. This list covers 20 of the best things to do so you can plan every day with confidence and make the most of your time on the island.
1. Watch the Sunrise from the Summit of Maui Hawaii’s Haleakala Volcano
Haleakala is one of the most iconic things to do in Maui. Standing at over 10,000 feet above sea level, the summit sits above the clouds and the sunrise from here looks like something out of another world. Colors shift from deep purple to fiery orange within minutes. You need a reservation to enter the park before 7 AM, so book well in advance. Sunrise tours depart from most resort areas around 3 AM and are worth every early morning.
2. Drive the Road to Hana Through Maui Hawaii’s Lush Rainforest

The Road to Hana is a 64-mile coastal highway with over 600 curves and 59 bridges. Each turn reveals a new waterfall, bamboo forest, or black sand beach. Stop at Twin Falls early to beat the crowds. Pull over at Wailua Falls for one of the most photographed views on the island. The drive takes a full day at minimum if you want to enjoy the stops along the way. Most travelers agree this is the single best road trip in all of Maui Hawaii.
3. Snorkel at Molokini Crater off the Coast of Maui Hawaii
Molokini is a crescent-shaped volcanic crater sitting about three miles off the southwest coast of Maui. The water inside the crater is some of the clearest in Hawaii with visibility stretching up to 150 feet on a good day. Over 250 species of fish call this reef home. Morning snorkel tours depart from Maalaea Harbor and typically last about four hours. The calm conditions inside the crater make it accessible even for beginner snorkelers.
4. Relax on Ka’anapali Beach, One of Maui Hawaii’s Most Famous Shores

Ka’anapali Beach stretches three miles along the western coast of Maui and consistently ranks among the best beaches in the United States. The sand is soft and white, the water is calm enough for swimming, and the snorkeling near Black Rock at the northern end is excellent. Sunset here draws a crowd every evening. Cliff divers leap from Black Rock in a traditional Hawaiian ceremony at dusk. Several major resorts line the beach and non-guests are always welcome on the shore.
5. Hike to the Twin Falls Waterfall in Maui Hawaii’s East Side
Twin Falls is the most accessible waterfall hike in Maui and a great first stop on the Road to Hana. The trail starts just past the small farm stand near mile marker 2 and reaches the falls in about 20 minutes. Two separate waterfalls feed into natural pools that are safe to swim in. Go before 9 AM to have the pools nearly to yourself. The path winds through dense tropical vegetation with mango trees and wild ginger lining the trail.
6. Explore the Iao Valley State Monument in Central Maui Hawaii
Iao Valley is one of the most historically significant sites in all of Maui Hawaii. The Iao Needle, a 1,200-foot green rock spire, rises dramatically from the valley floor and is sacred to Native Hawaiians. A short paved path leads to the best viewpoints and takes about 20 minutes to walk. The valley receives over 400 inches of rain per year, which keeps it a vivid, almost unreal green. Entry is free and the park is open daily from sunrise to sunset.
7. Take a Whale Watching Tour off the Waters of Maui Hawaii
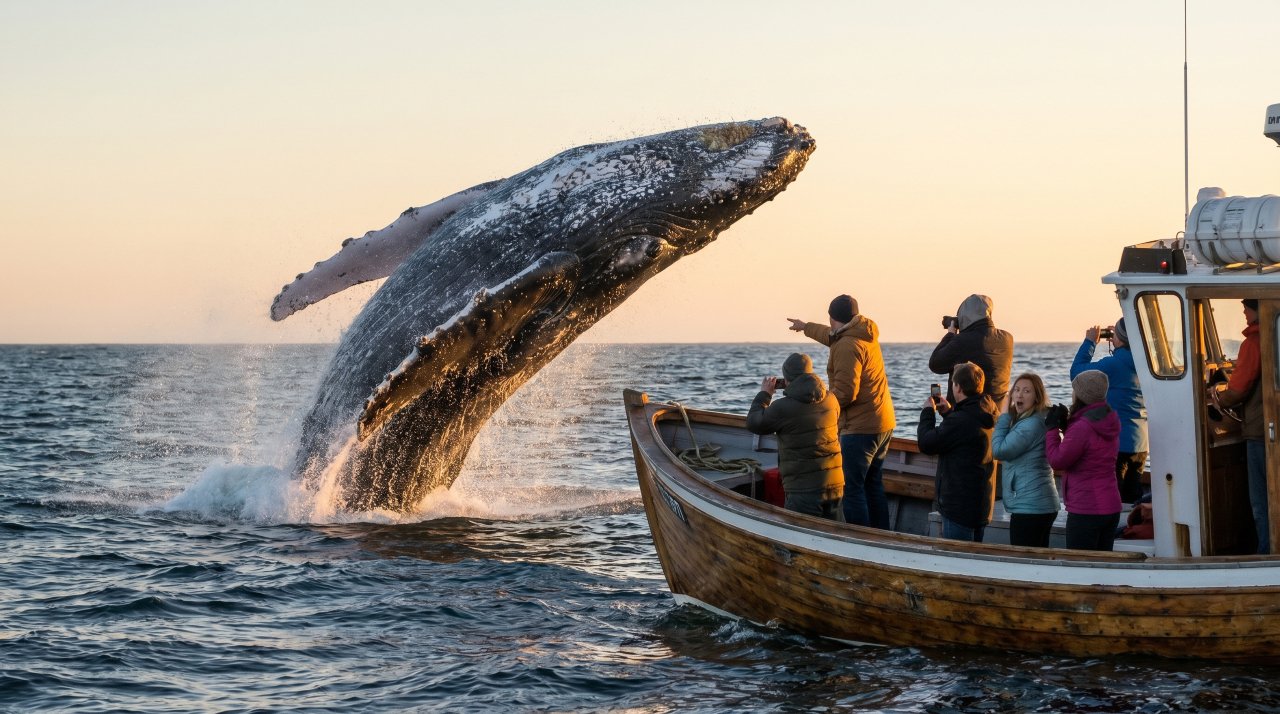
From December through April, humpback whales migrate to the warm waters around Maui Hawaii to breed and give birth. This is one of the highest concentrations of humpback whales on Earth during peak season. Tours depart daily from Lahaina and Maalaea Harbor. A two-hour tour gives you a strong chance of seeing multiple whales breach within feet of the boat. Pacific Whale Foundation runs eco-friendly tours that also provide narration from marine naturalists.
8. Kayak to Sea Turtles Along the South Shore of Maui Hawaii
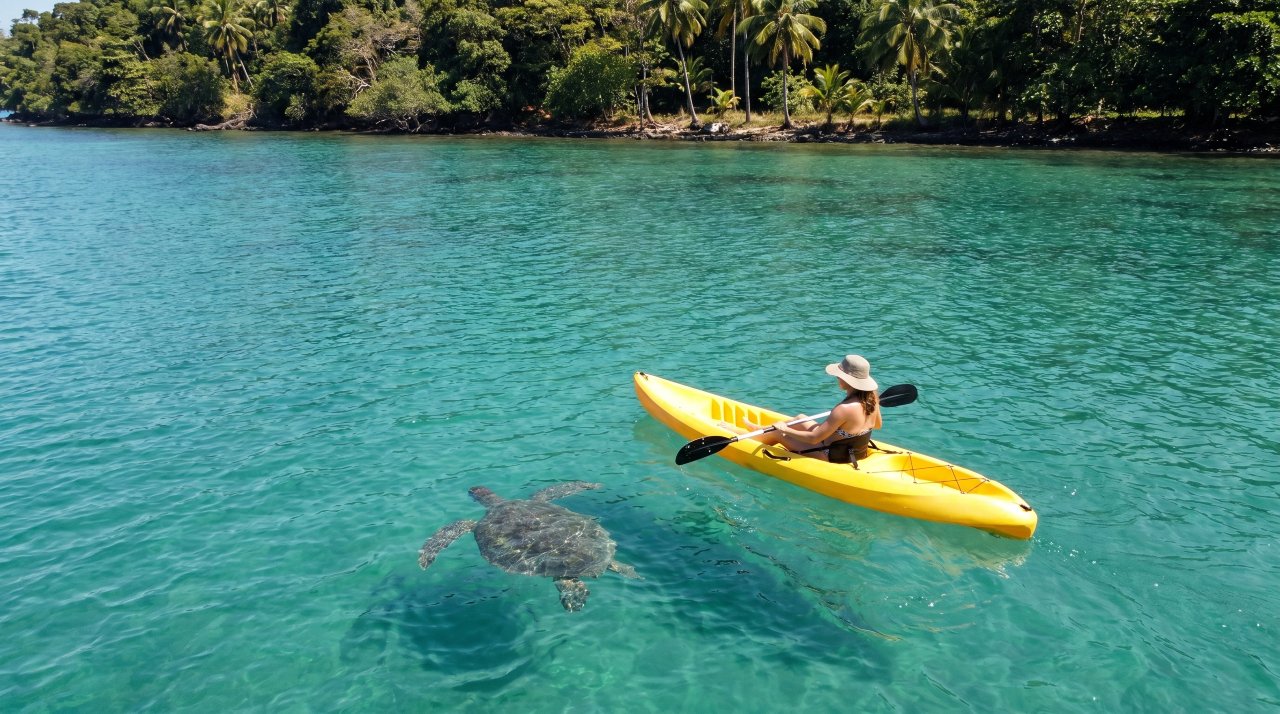
The south shore of Maui has some of the best kayaking conditions on the island. Calm morning waters make paddling easy, and green sea turtles regularly surface alongside kayakers near Makena and Turtle Town. Guided tours include snorkel gear and stop at reef locations not accessible from shore. Turtles in Hawaii are protected, so you must stay at least 10 feet away, but they often swim close on their own. Morning departures between 7 and 9 AM offer the flattest water.
9. Visit the Lavender Farm in Upcountry Maui Hawaii

Alii Kula Lavender Farm sits at 4,000 feet elevation on the slopes of Haleakala and offers one of the most unexpected experiences in Maui Hawaii. Rows of lavender bloom against sweeping views of the island and ocean below. The farm sells lavender scones, oils, and handmade soaps in the gift shop. Walking tours run on weekends and last about 45 minutes. The cool upcountry air feels like a completely different climate compared to the coast, making it a refreshing afternoon stop.
10. Watch Cliff Divers at Black Rock on Maui Hawaii’s Ka’anapali Shore
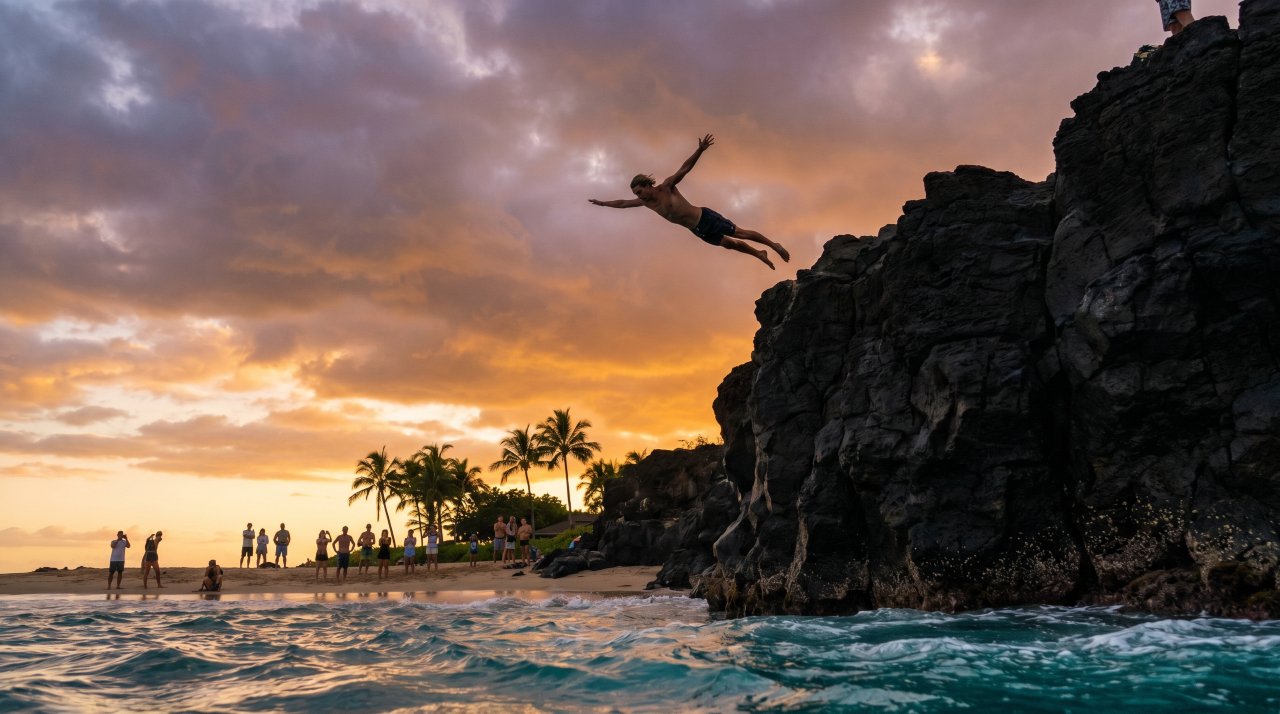
Every evening at sunset, a hotel staff member in traditional Hawaiian dress lights torches along Ka’anapali Beach and dives from Black Rock into the ocean below. This ceremony honors a legend in which the spirit of Maui’s King Kahekili leapt from the rock as a final act of courage. It draws a large crowd and is completely free to watch. Snorkeling around Black Rock during the day reveals sea turtles, reef fish, and lava formations. This is a rare mix of cultural experience and natural beauty in one location.
11. Take a Helicopter Tour Over Maui Hawaii’s Waterfalls and Coastline
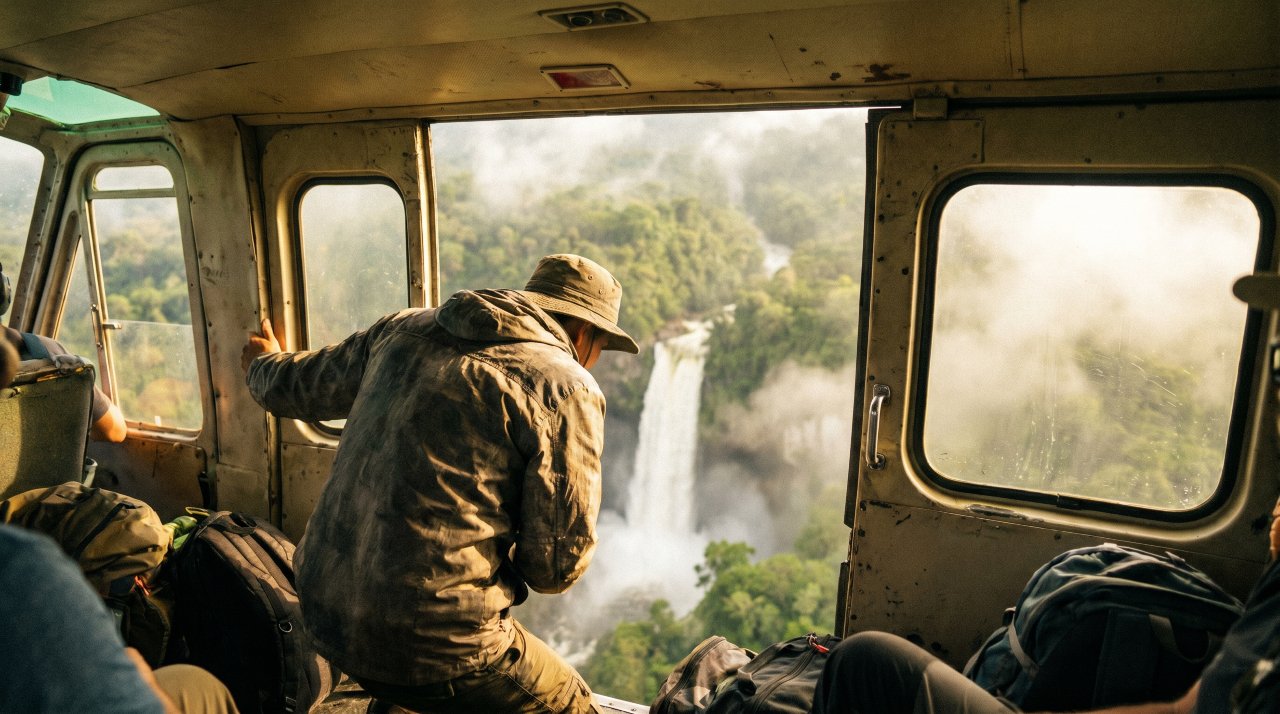
Seeing Maui Hawaii from the air reveals parts of the island that are completely unreachable by road. The remote waterfalls of the East Maui watershed, the sheer sea cliffs of the north shore, and the black lava fields of Haleakala all look entirely different from above. Most helicopter tours last 45 to 65 minutes and fly over multiple landscapes in a single flight. Blue Hawaiian Helicopters and Maverick Helicopters both offer doors-off options for photographers. Book morning flights for clearer visibility before clouds build up.
12. Visit the Maui Ocean Center to Learn About Maui Hawaii Marine Life
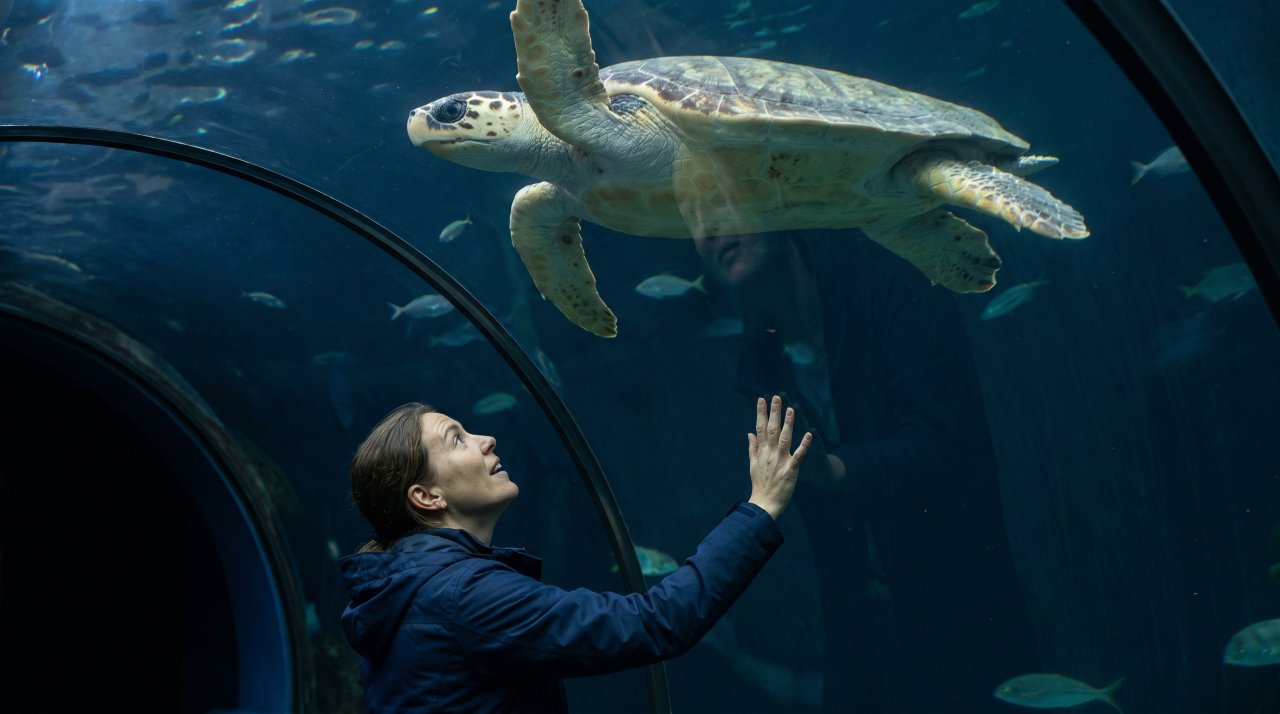
The Maui Ocean Center in Maalaea is the largest tropical aquarium in the Western Hemisphere. It focuses entirely on Hawaiian marine species, from spinner dolphins to hammerhead sharks and manta rays. The glass tunnel walkway lets you watch sharks and rays swim directly overhead. It is a great rainy day option and works well for families. A visit takes about two to three hours. The center also runs a coral restoration program you can learn about during your visit.
13. Surf at Ho’okipa Beach, One of Maui Hawaii’s Most Iconic Surf Spots
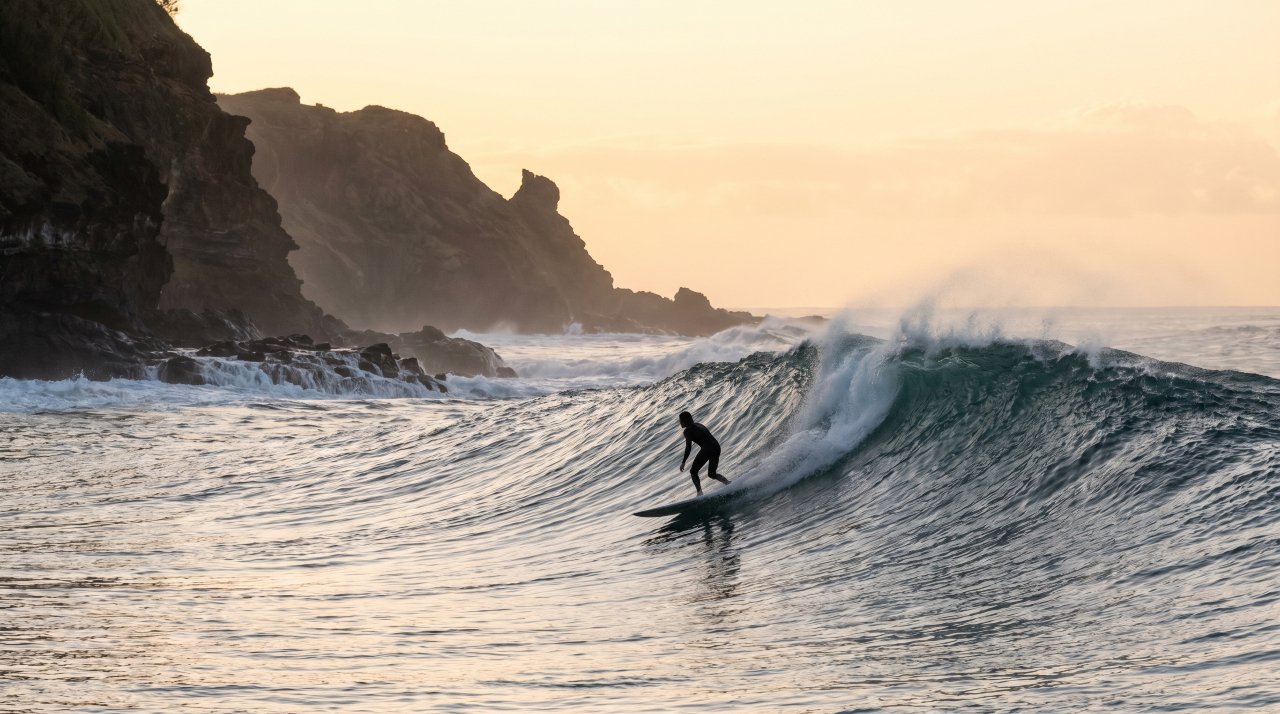
Ho’okipa Beach on the north shore of Maui is world-famous among windsurfers and surfers alike. It hosts international competitions and the waves here can reach over 20 feet in winter. Watching from the cliffside overlook above the beach gives you a full view of the action without getting wet. Beginners should head to Launiupoko Beach Park instead, where gentle waves and a flat inside break make learning easier. Ho’okipa also has a large resident green sea turtle population that hauls out on the sand most afternoons.
14. Shop and Eat in Paia Town on the North Shore of Maui Hawaii

Paia is a small surf town on Maui’s north shore that feels entirely different from the resort areas. Independent boutiques sell handmade jewelry, vintage aloha shirts, and local art. Charley’s Restaurant has been a local institution for decades. Mama’s Fish House nearby is one of the most acclaimed restaurants in all of Maui Hawaii, with a reservation list that sometimes stretches months. The town is also the last stop before the Road to Hana, making it a natural place to grab food and fuel for the drive.
15. Stargazing at the Summit of Maui Hawaii’s Haleakala After Dark
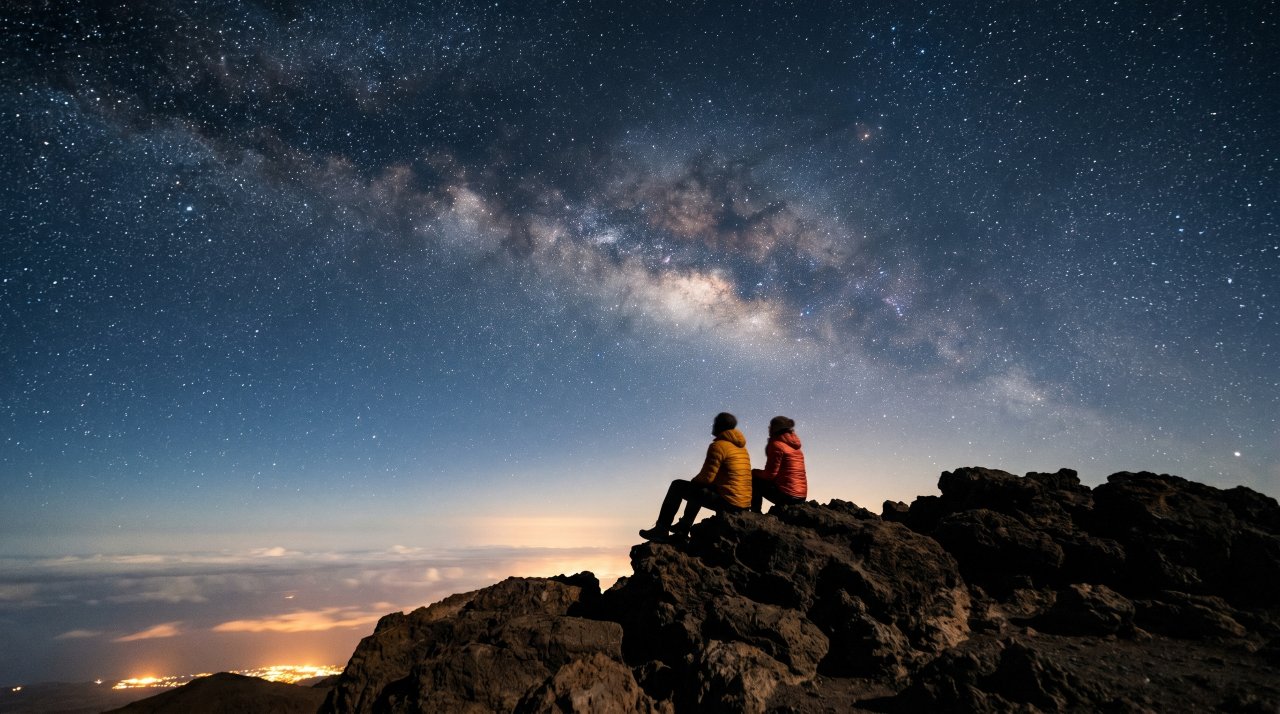
Haleakala Summit is one of the best stargazing locations in the Northern Hemisphere. The high altitude and lack of light pollution create conditions that reveal thousands of stars, the Milky Way band, and meteor showers with no equipment needed. The Park Service runs a free ranger-led stargazing program on select evenings. Temperatures at the summit drop to near freezing even in summer, so bring layers. Reservations for the summit road after dark must be made through the park website in advance.
16. Take a Sunrise Bike Ride Down Maui Hawaii’s Haleakala Volcano
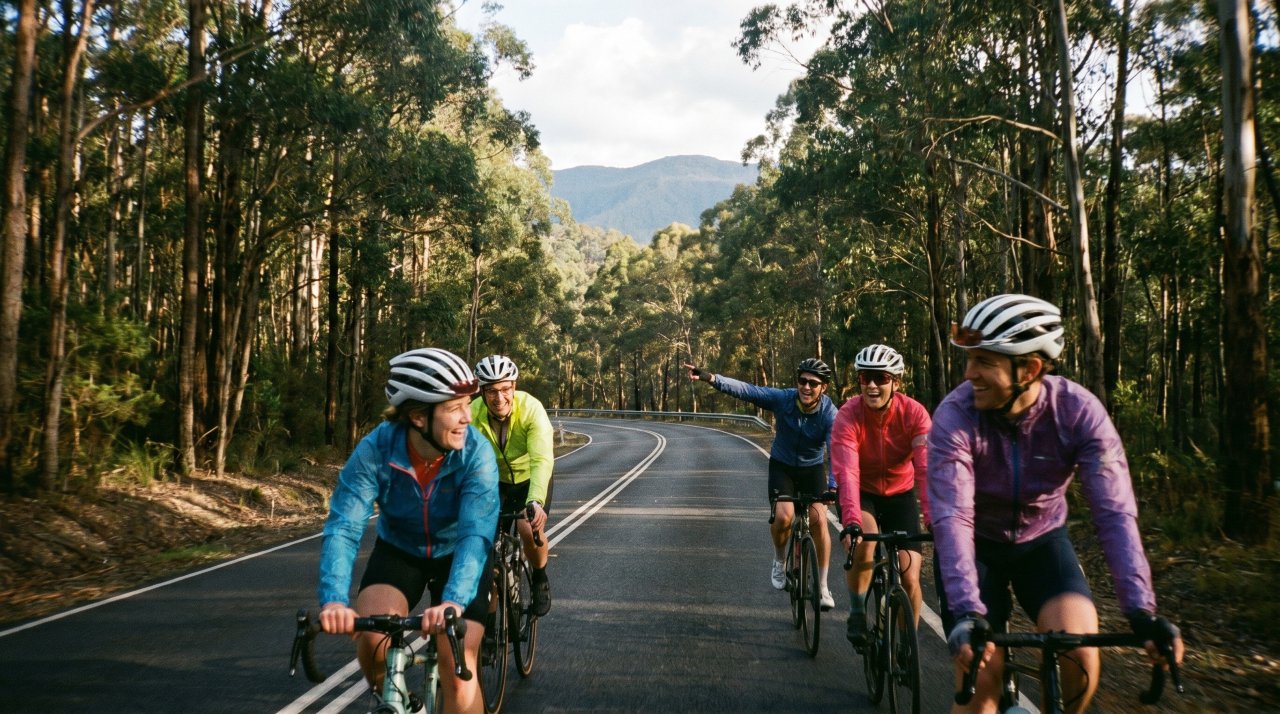
After watching the summit sunrise, many visitors join guided bike tours that roll 26 miles down the mountain on paved roads. The descent covers dramatic landscapes as the terrain shifts from volcanic rock to eucalyptus forest to green farmland. Most tours include breakfast at the bottom and hotel pickup. You do not need to be an experienced cyclist since the route is almost entirely downhill. The combination of the sunrise and the bike ride makes for one of the most memorable single days possible in Maui Hawaii.
17. Visit Waianapanapa State Park and Its Black Sand Beach in Maui Hawaii
Waianapanapa is one of the most dramatic beaches in Maui Hawaii and the entire Hawaiian island chain. The beach is made of black volcanic pebbles and sand, flanked by sea arches, lava caves, and blowhole formations. The contrast between the jet-black shore, turquoise water, and green hala trees is unlike anything else in Hawaii. The park requires reservations for both day visits and parking. Swim with caution as currents can be strong, but the coastal trail surrounding the park is safe and spectacular.
18. Attend a Traditional Luau in Maui Hawaii for an Evening of Culture
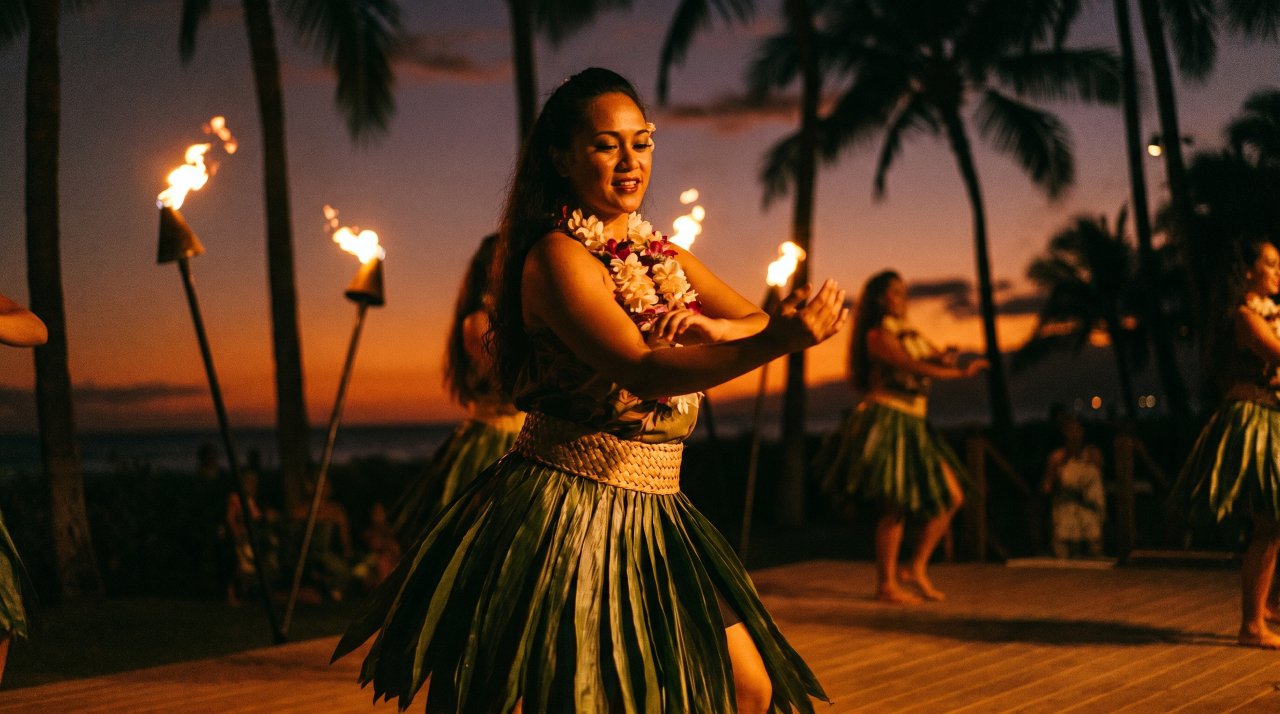
A luau is one of the most classic experiences in Maui Hawaii and still one of the best. Old Lahaina Luau is considered the most authentic option on the island, with traditional hula performances, fire knife dancing, and a Hawaiian feast cooked in an imu underground oven. Tables are set directly on the beach as the sun sets over the ocean. Book at least three to four weeks in advance since it sells out consistently. The performance includes storytelling about Hawaiian history and the migration of Polynesian peoples.
19. Snorkel at Turtle Town Near Makena in Maui Hawaii
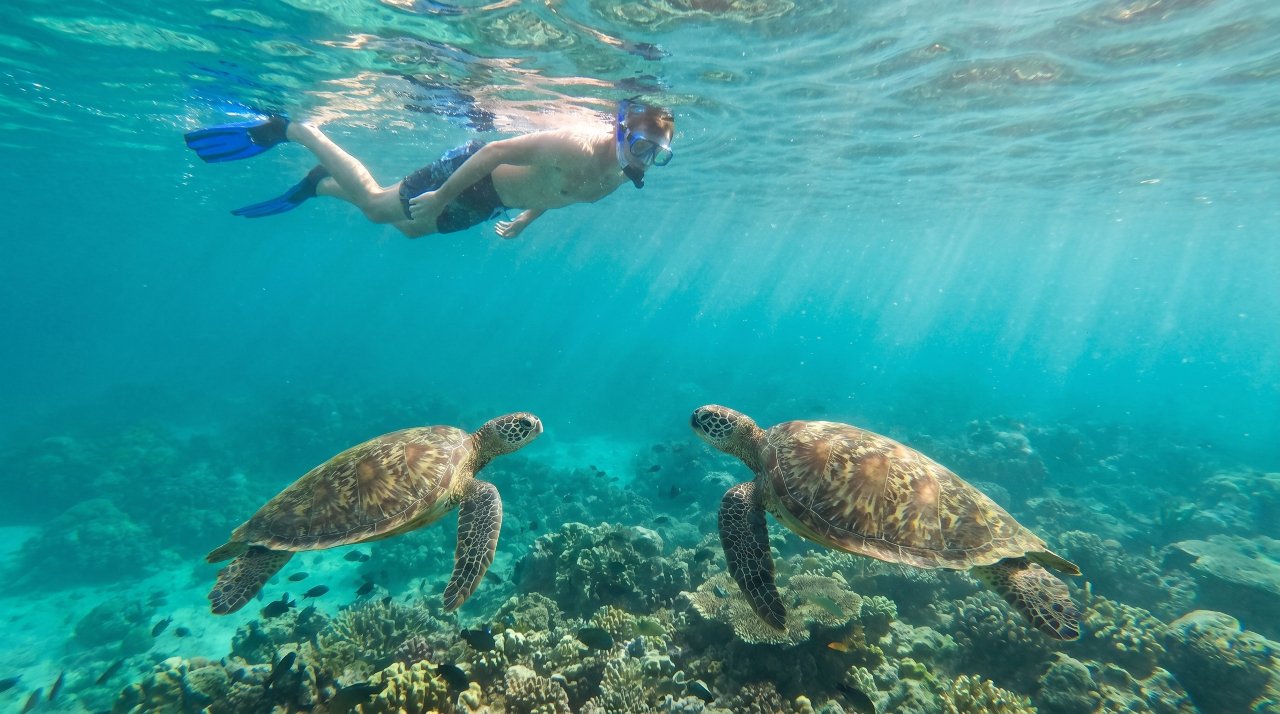
Turtle Town is a collection of reef systems near Makena on the south coast of Maui Hawaii where green sea turtles gather in high numbers to feed and rest on the coral. The turtles are accustomed to snorkelers and often swim within arm’s reach, though touching them is illegal. The reef also holds moray eels, octopus, and dozens of reef fish species. Shore access is possible from Maluaka Beach. Tour boats from Maalaea also stop here as part of longer snorkel trips. Morning visits offer the clearest water.
20. Catch the Sunset at Mallory Square in Maui Hawaii’s Lahaina Town

Lahaina on the west coast of Maui was once the capital of the Hawaiian kingdom and remains one of the most vibrant towns on the island. Front Street runs along the waterfront and is lined with galleries, restaurants, and old plantation-era buildings. The banyan tree in the town center is over 150 years old and covers nearly an acre. Sunset from the seawall draws locals and visitors alike every evening. The West Maui Mountains turn deep purple behind the town as the sky shifts from gold to pink.
Maui Hawaii earns its reputation as one of the best islands on Earth. From volcanic summits and rainforest waterfalls to sacred cultural sites and world-class reefs, this island packs more variety into a small space than almost anywhere else on the planet. Save this guide before your trip and share it with anyone who needs help planning their Maui Hawaii adventure.
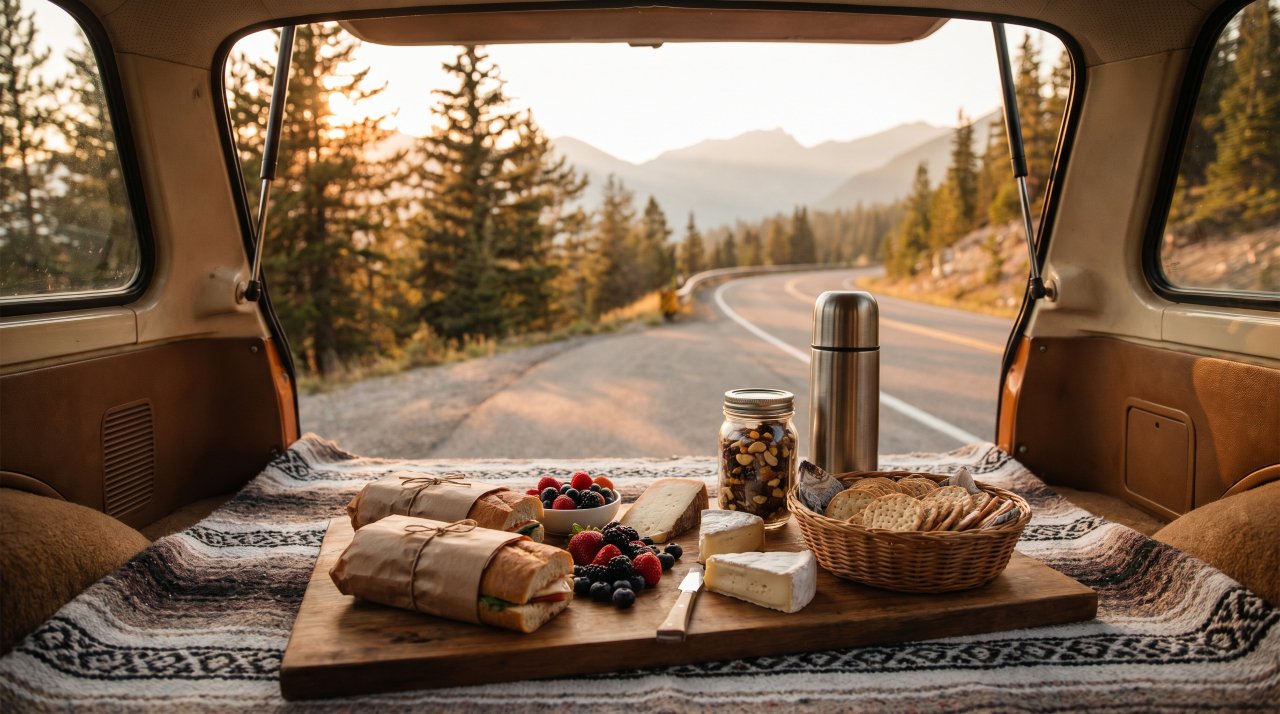
A long drive with the wrong food is a miserable experience. Gas station chips and lukewarm fast food leave everyone feeling sluggish, irritable, and stopping more than necessary. The right road trip snacks and meals change the entire tone of the journey. Good car food is easy to eat without making a mess, requires no refrigeration where possible, keeps energy levels stable between stops, and actually tastes like something worth looking forward to. These 18 options cover every situation from a three-hour solo commute to a multi-day family road trip across state lines.
1. Classic Wrap Road Trip Snacks and Meals
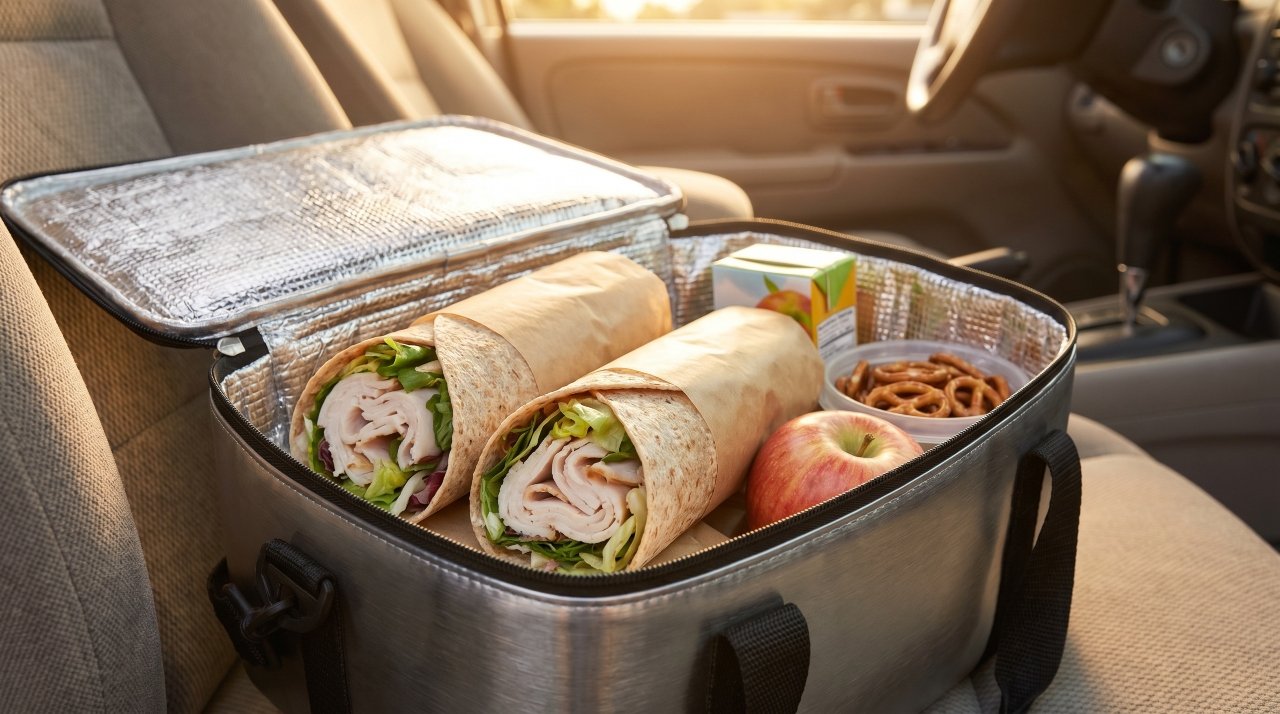
Wraps are the most practical road trip meal that exists. They hold together without falling apart, require no utensils, and can be customized for every person in the car. A simple combination of turkey, cheddar, lettuce, and mustard on a whole wheat tortilla wraps tightly and stays fresh for six hours in a cooler.
Prepare wraps at home the morning of departure and wrap each one tightly in parchment paper before sliding into a zip bag. Label them if different people have different fillings. The parchment acts as a holder while eating, keeping hands clean and preventing the wrap from unraveling.
Avoid wet ingredients like tomatoes or too much sauce as they make the tortilla soggy by lunchtime. Pack the sauce separately in a small squeeze bottle and add at the rest stop. This one extra step makes a significant difference in texture and prevents disappointment when you finally reach for lunch three hours in.
2. Cheese and Crackers Road Trip Snacks
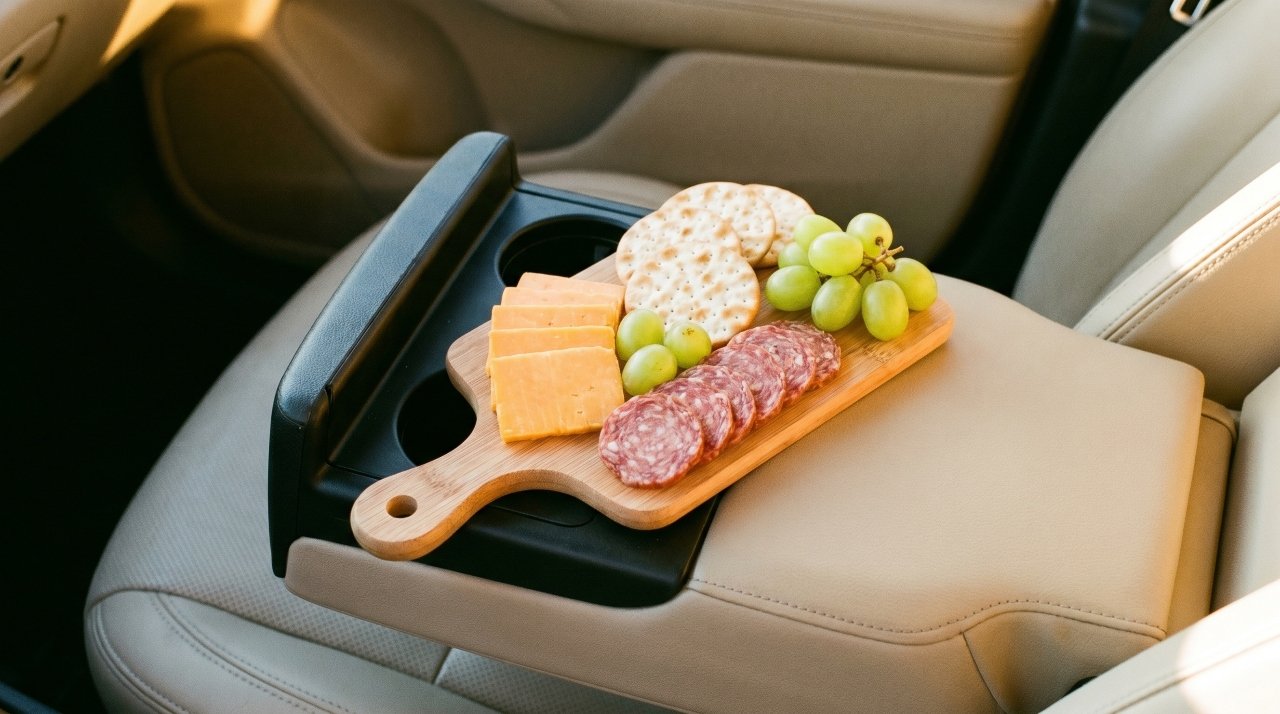
Cheese and crackers are arguably the most satisfying road trip snack combination in existence. Hard cheeses like aged cheddar, gouda, or parmesan travel well without refrigeration for two to three hours. Keep them in a small insulated bag with an ice pack for longer journeys.
The key is pre-slicing everything at home. Pulling out a block of cheese and a knife while driving is impractical at best. Pre-slice the cheese and layer between parchment squares in a small container. Pair with sturdy crackers like water crackers, Ritz, or whole grain options that do not crumble at the slightest pressure.
Add some sliced charcuterie like salami or prosciutto and you have a legitimate charcuterie box for the car. Keep it in the back seat within arm’s reach of the passengers. The driver should only reach for food at a safe stop, but passengers can graze on this setup for hours without any drama.
3. Hard-Boiled Eggs Road Trip Snacks and Meals
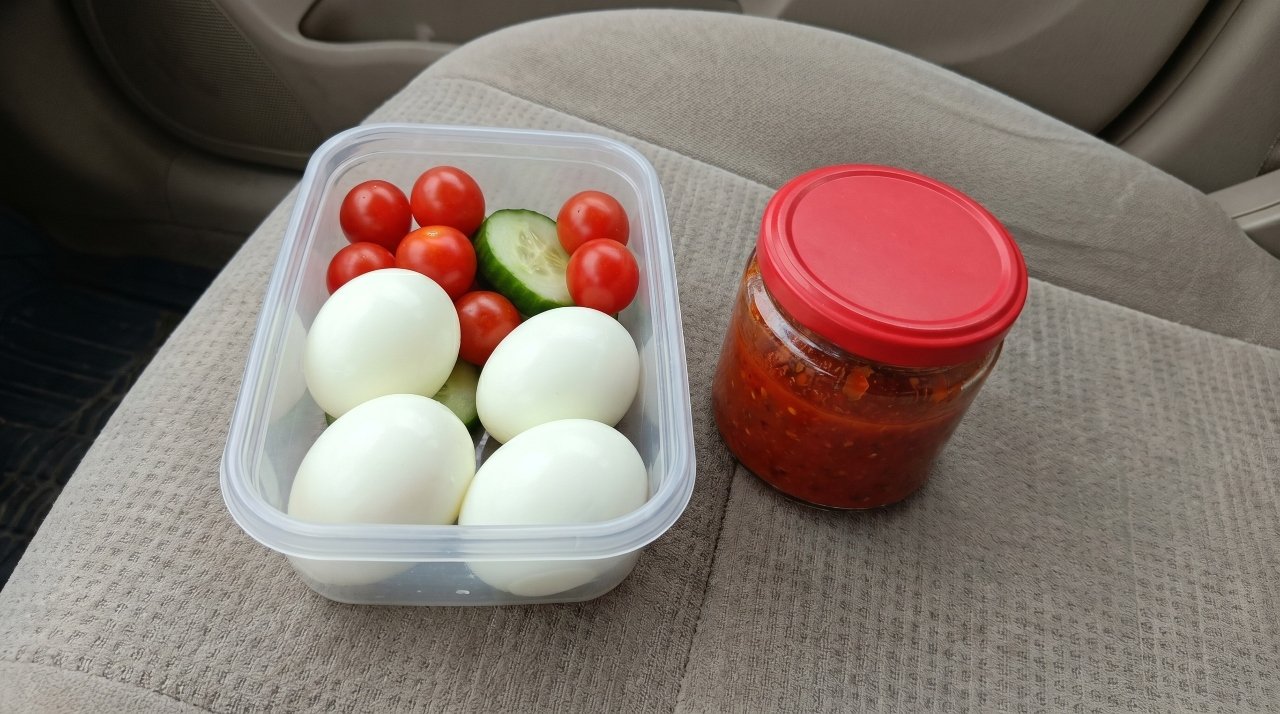
Hard-boiled eggs are one of the best protein sources you can bring on a road trip. They are filling, compact, and require no preparation beyond peeling them before departure. Six eggs take about two minutes to peel in advance and store in a small container with a lid for mess-free access.
Season with salt and pepper in a small zip bag on the side. Add a few packets of hot sauce for those who prefer their eggs with heat. Hard-boiled eggs keep at room temperature safely for about two hours and in a cooler for up to a week.
Pair eggs with sliced cucumber and cherry tomatoes in the same container for a complete mini-meal that takes less than five minutes to prepare at home. The protein and fat from the eggs keep hunger away for hours. This combination works particularly well for early morning departure drives when no one wants to stop for breakfast.
4. Apple Slices with Peanut Butter Road Trip Snacks
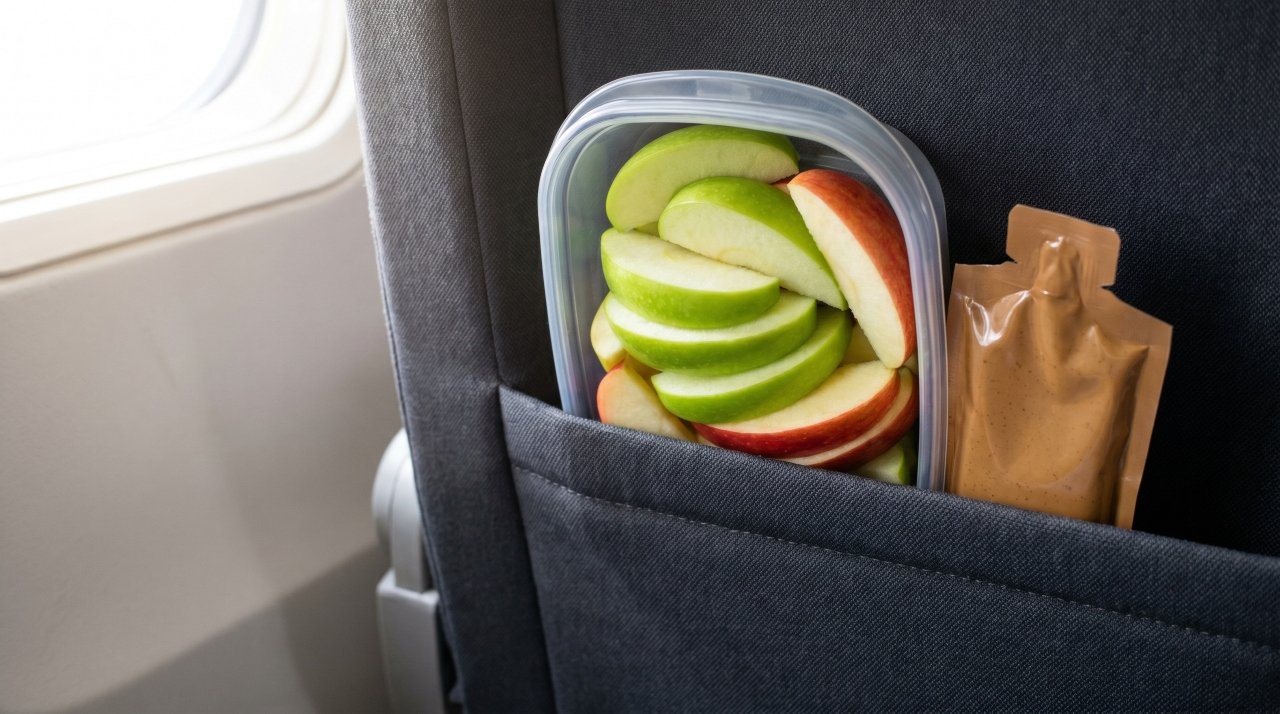
Apple slices with peanut butter is one of those combinations that works for a six-year-old and a forty-year-old simultaneously. The crunch of the apple against the creaminess of the peanut butter is satisfying in a way that neither ingredient achieves alone. It also balances simple sugar from the apple with fat and protein from the peanut butter to create sustained energy.
Pack the apple slices in a zip bag with a small squeeze of lemon juice to prevent browning. Use individual peanut butter portion packets rather than a full jar to keep things tidy. Justin’s and Trader Joe’s both make small squeeze packets that are ideal for car snacking.
This snack requires both hands for the first dip but after that passengers can manage it on their own. Prep a small stack of slices in advance and pack them in a flat container. Kids love having their own individual pack and the ritual of dipping keeps them occupied for longer than you would expect.
5. Homemade Energy Balls Road Trip Snacks

Energy balls are the road trip snack that looks impressive but takes about 15 minutes to make. The base formula is simple: oats, peanut butter, honey, chocolate chips, and ground flaxseed rolled into small balls and chilled until firm. Each ball delivers around 100 to 120 calories of slow-release energy.
Make a batch of 20 to 24 the night before departure. Store them in a container in the cooler or fridge overnight and pull them out for the drive. They hold their shape at room temperature for three to four hours before becoming too soft to handle without sticking.
Variations are endless. Add dried cranberries and white chocolate chips for a festive version. Roll the finished balls in coconut flakes for a tropical take. The chocolate chip original is always the most popular but rotating flavors keeps the road trip food from feeling repetitive on longer multi-day drives.
6. Veggie Sticks and Hummus Road Trip Snacks and Meals
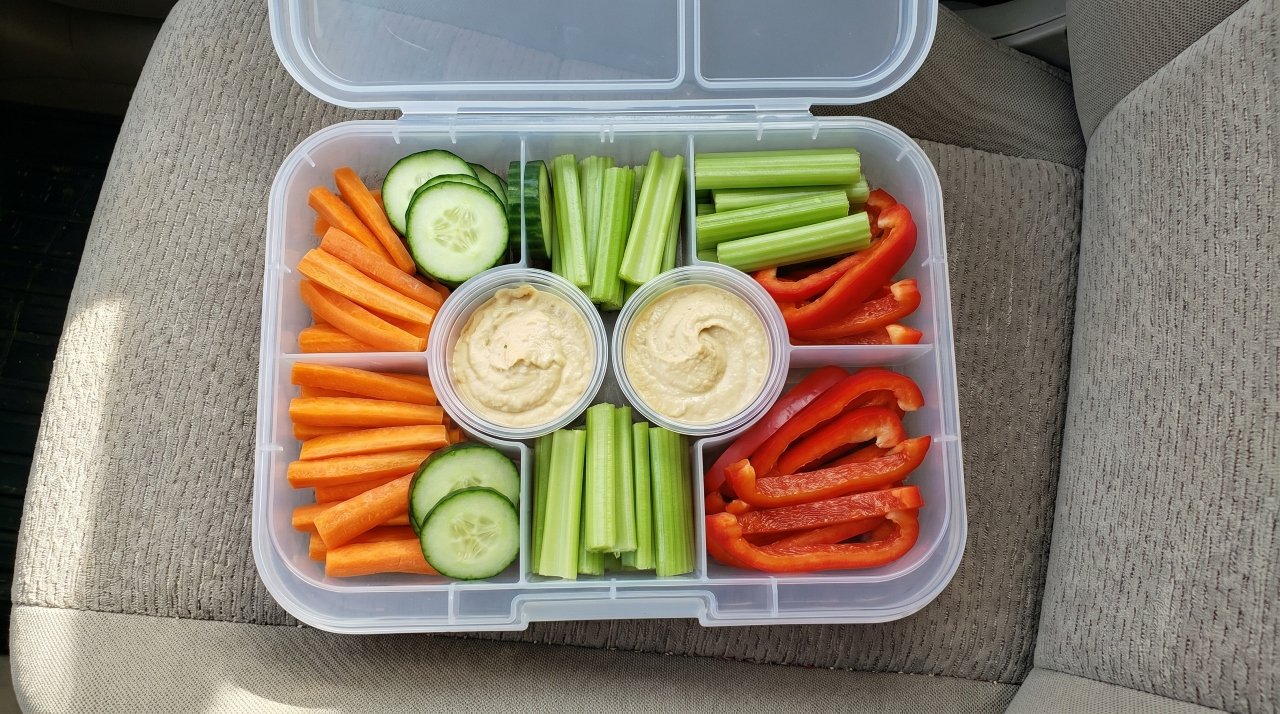
Sliced vegetables with individual hummus cups are one of the most refreshing road trip snacks for warm weather drives. Carrot sticks, celery, cucumber slices, and bell pepper strips stay crisp for hours in a cooler. Individual 2-ounce hummus cups eliminate the mess and double-dipping issues of a shared container.
Cut all the vegetables at home and store them in a large zip bag with a damp paper towel to maintain crispness. Pull them out along with the hummus cups when hunger strikes and pass the bag around the car. The fiber and water content of the vegetables makes this one of the most hydrating snack options on the list.
This combination works particularly well as a mid-afternoon snack on long drives when energy dips but a full meal is not needed. The protein in the hummus prevents the hunger from returning immediately. Pack a lemon wedge on the side to squeeze over the vegetables at rest stops for extra freshness.
7. Overnight Oats Road Trip Snacks and Meals
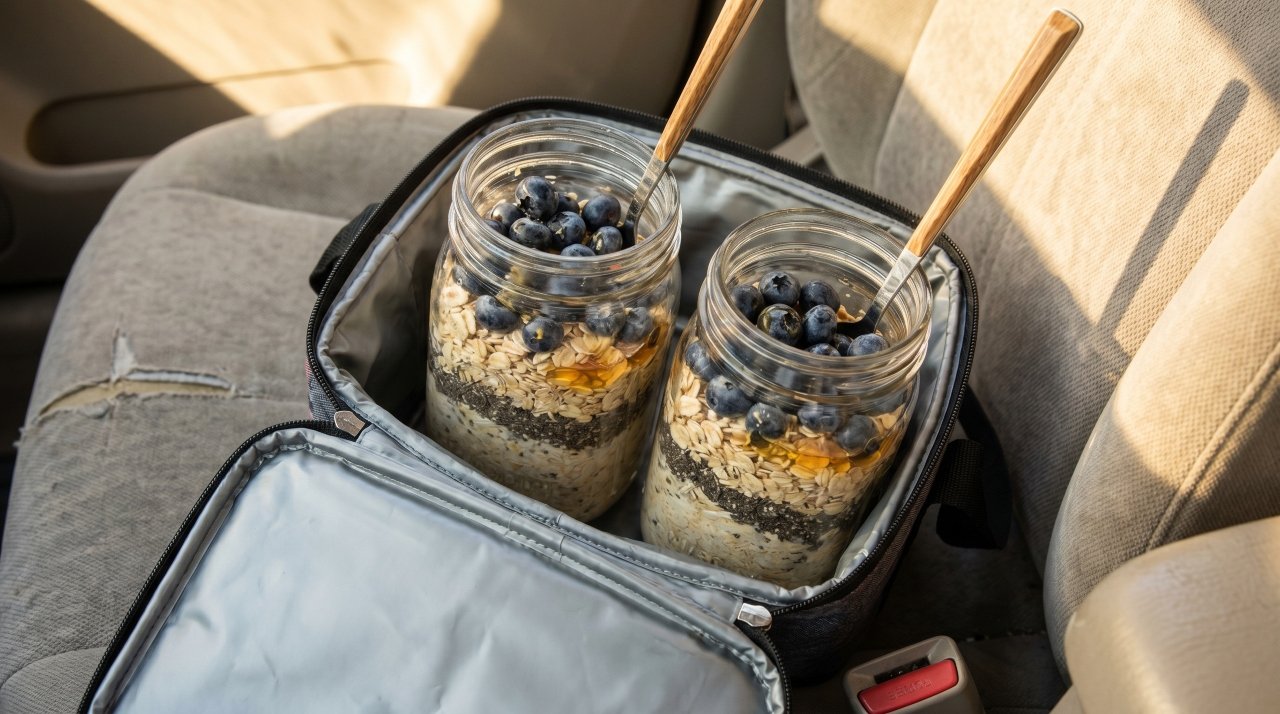
Overnight oats are the smartest road trip breakfast option for early departures. Prepare them the night before in individual mason jars or to-go cups: rolled oats soaked in milk or almond milk with chia seeds, a drizzle of honey, and your choice of fruit on top. By morning they are thick, creamy, and ready to eat cold directly from the jar.
The beauty of overnight oats for road trips is that they require no heating and create minimal mess when eaten with a long-handled spoon directly from the jar. Top with sliced banana, berries, or a spoonful of almond butter before serving. One jar keeps an adult full for three to four hours.
Use a wide-mouth mason jar for easiest access. Prep one jar per person the night before. Store in the cooler and pull them out as soon as you hit the road. Eating breakfast in the car rather than stopping saves significant time on long driving days.
8. Homemade Popcorn Road Trip Snacks

Homemade popcorn is vastly better than the bagged microwave variety and takes less than five minutes to make on the stove. Pop it in coconut oil with sea salt for a classic salty version. Toss with nutritional yeast and garlic powder for a savory cheesy version without any actual cheese.
The advantage of making your own is controlling the volume and fat content. Store-bought popcorn is often heavily oiled and oversalted. Homemade popcorn in a large paper bag costs a fraction of the price and fills the car with a much more appealing aroma.
Pack it in large brown paper lunch bags which absorb excess moisture and prevent the popcorn from becoming soggy. One large bag shared between four people lasts about an hour of highway driving before it disappears. Make two batches if the drive is longer than three hours.
9. Nut Butter and Banana Sandwich Road Trip Snacks and Meals
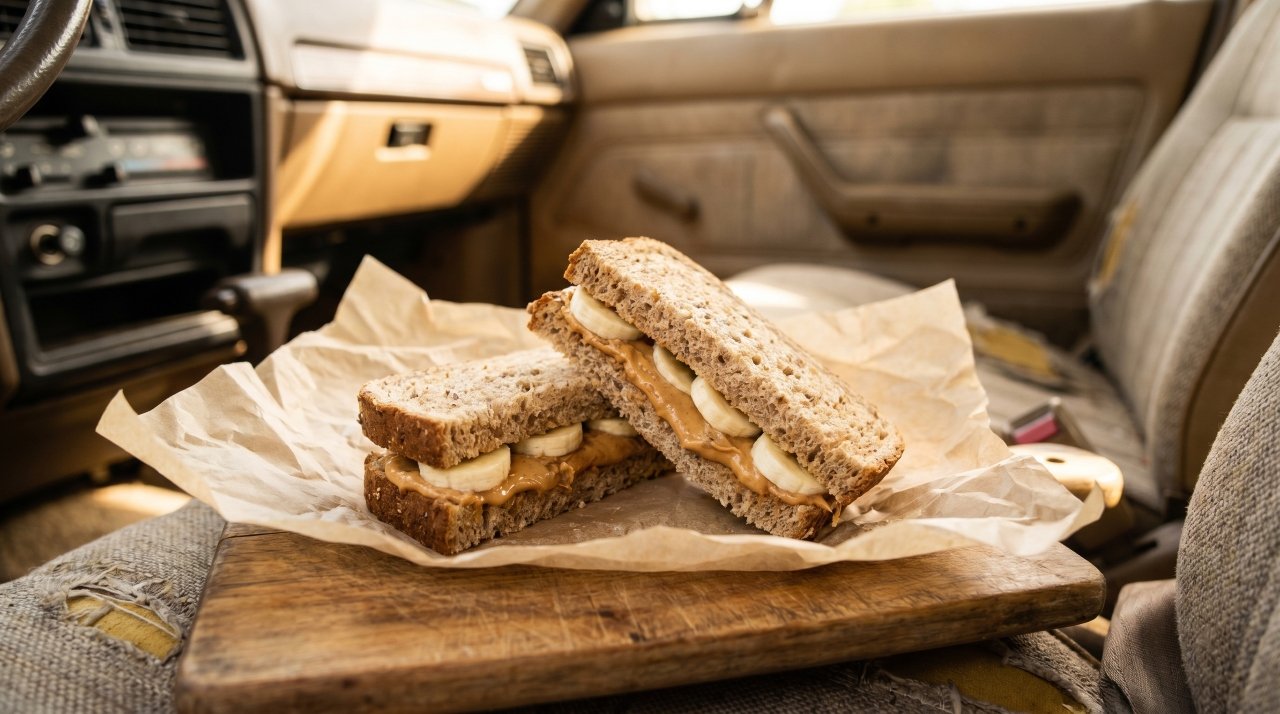
A peanut butter and banana sandwich on whole grain bread is one of the most complete single-item road trip meals you can make. It delivers carbohydrates, protein, healthy fat, potassium, and fiber in a package that keeps together without refrigeration for four to six hours. Elvis was onto something.
Use a thick-cut whole grain or sourdough bread that holds up to the moisture of the banana without going soggy. Slice the banana thinly so it distributes evenly and does not slip out with every bite. Wrap each sandwich in a square of parchment and store in the cooler.
Add a drizzle of honey and a sprinkle of cinnamon before assembling for extra flavor. Almond butter or cashew butter works equally well as a variation. This sandwich hits differently after three hours on the highway than it does sitting at home, which is one of the unexplained joys of road trip eating.
10. Beef Jerky and Dried Fruit Road Trip Snacks
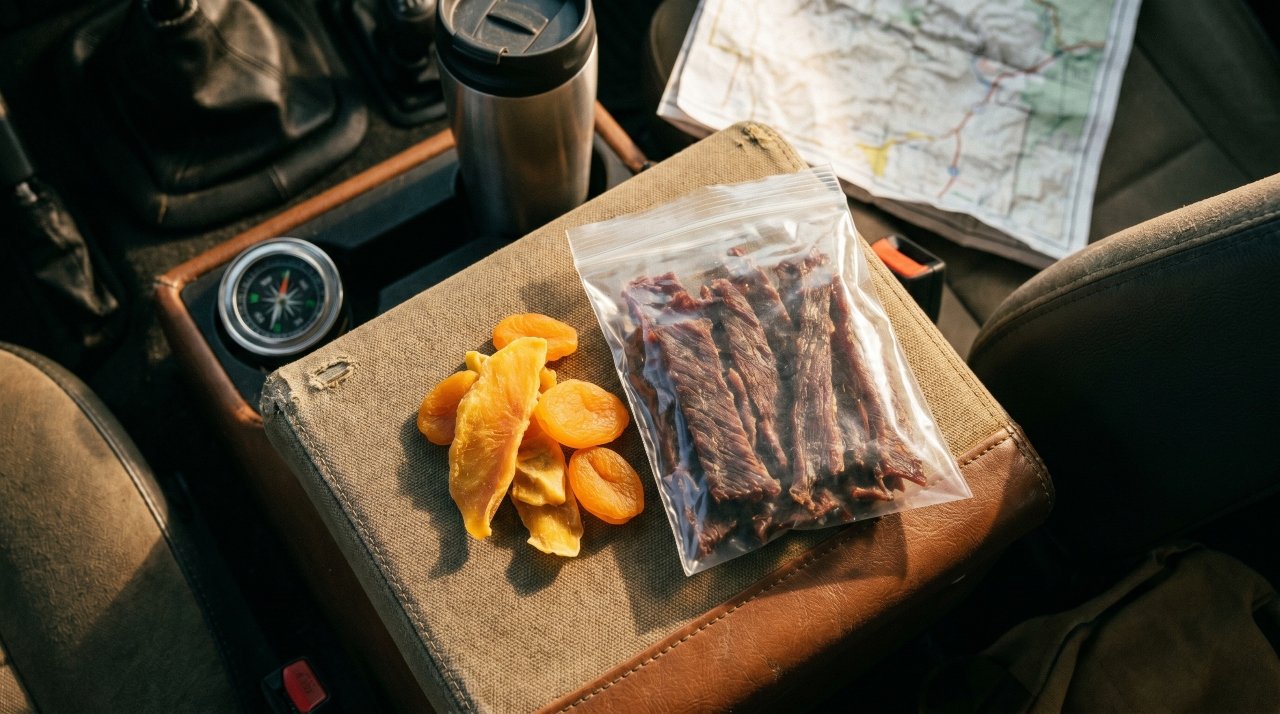
Beef jerky and dried fruit are the combination that requires zero preparation, no cooler, and no utensils. It is pure road trip convenience with real nutritional value. The protein from the jerky and the natural sugars from the dried fruit create a snack that holds hunger off for a minimum of two hours.
Choose jerky without excessive nitrates or artificial ingredients when possible. Country Archer and Epic are two widely available brands that use cleaner ingredient lists than most mainstream options. Pair with dried mango, apricots, or cranberries rather than raisins for a more interesting flavor combination.
Pack individual portions in small zip bags before the trip to prevent everyone from reaching into the same large bag repeatedly. The portion control also prevents the inevitable situation where the entire supply disappears in the first two hours and there is nothing left for the second half of the drive.
11. Frozen Grapes Road Trip Snacks
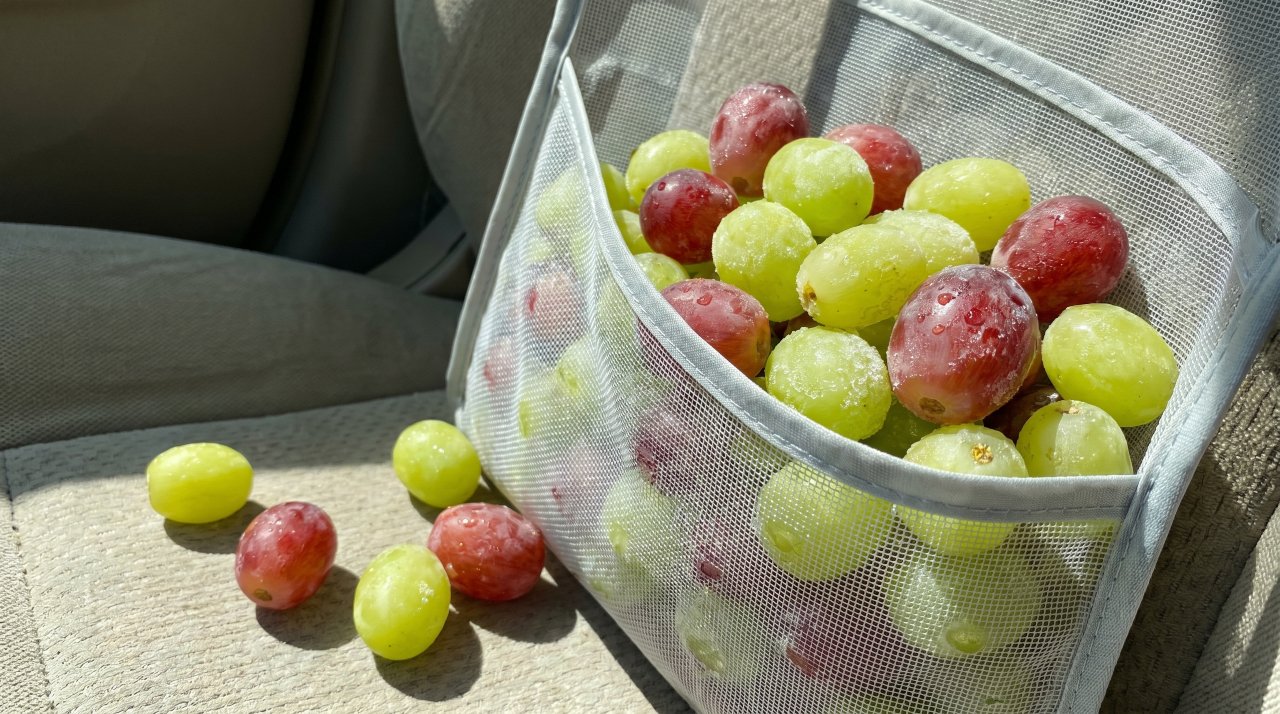
Frozen grapes are one of the most refreshing road trip snacks for summer driving and one of the most overlooked. Wash and dry green or red grapes, freeze them overnight on a flat tray, then transfer to a zip bag for the road. They thaw slowly in the car and are at their best slightly slushy rather than fully frozen.
The texture of a partially thawed frozen grape is unlike anything else. It is cold, firm, and bursting with concentrated sweet juice. On a hot summer drive with no air conditioning or inconsistent AC, a bag of frozen grapes in the back seat is genuinely crowd-pleasing.
They also function as a passive cooler for nearby snacks. Pack them in a zip bag and place alongside cheese or other items that benefit from staying cool. The moisture as they thaw can be managed by placing a paper towel under the bag. This is one of those road trip snacks and meals ideas that impresses every passenger who has never tried it before.
12. Avocado Toast Cups Road Trip Meals
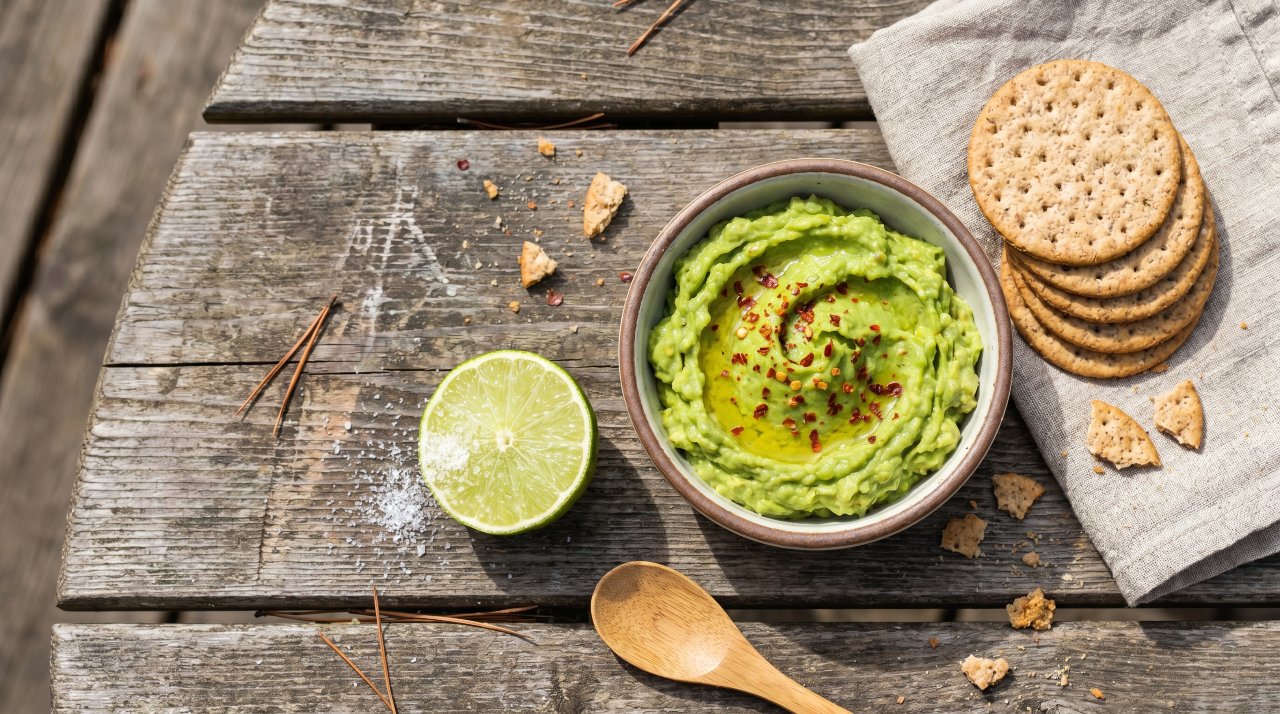
Avocado toast cups are a slightly more effort meal option that pays off significantly in satisfaction. Mash ripe avocado with lime juice, salt, and red pepper flakes at home. Store in individual small containers with plastic wrap pressed directly on the surface to prevent browning. Pack sturdy crackers or small toasted bread rounds separately.
At the rest stop, open the avocado cup and use the crackers as the vehicle. It functions as an avocado toast experience without the toast infrastructure. Add a hard-boiled egg on the side and the meal is genuinely filling enough to carry you through two to three more hours of driving.
Use Hass avocados that are ripe but not overripe. An avocado that is too soft will turn grey faster regardless of the lime juice. The lime juice slows oxidation significantly but works best when the avocado is prepared close to departure time. Morning prep for same-day consumption is the ideal approach.
13. Protein Bar Selection Road Trip Snacks

A curated selection of protein bars is the zero-effort road trip snack option that everyone reaches for eventually. The key is choosing bars that are actually good rather than chalky, overprocessed, or tasting like flavored cardboard. RXBAR, Larabar, and Kind bars are three widely available options that use short ingredient lists and genuine flavors.
RXBARs are egg white and date-based with bold flavors like chocolate sea salt and blueberry. They have a chewy dense texture that takes time to eat, which is actually a feature in a car environment. Larabars are date and nut-based, vegan, and have a natural sweetness that feels less processed than most bars.
Pack a selection of three to four different varieties per person so no one gets bored. Store them at the front of the cooler bag for easy access. A protein bar is the ideal 10-minute stop-gap between real meals and prevents the impulsive fast-food decision that everyone regrets 20 minutes later.
14. Caprese Skewers Road Trip Snacks and Meals
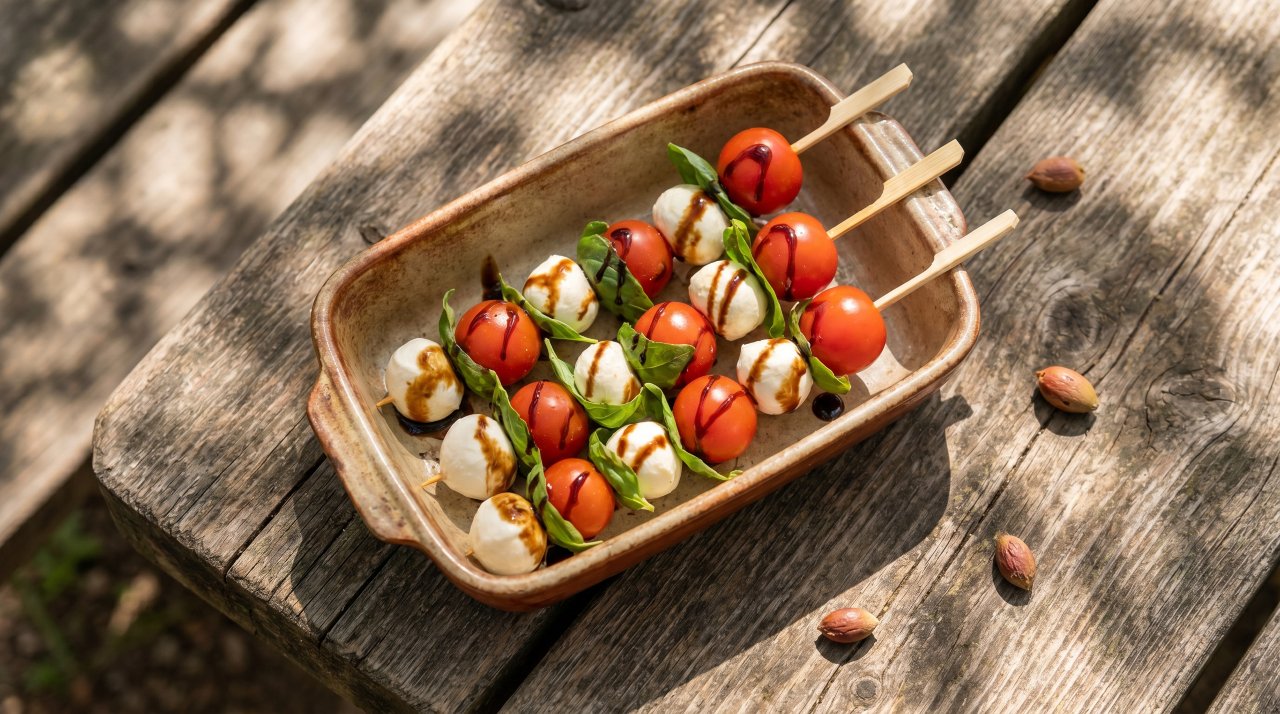
Caprese skewers bring restaurant-level food quality to the car without requiring any cooking. Thread fresh mozzarella balls, cherry tomatoes, and fresh basil leaves alternately onto wooden skewers or cocktail picks. Drizzle with olive oil and balsamic glaze at home, seal in a flat container, and refrigerate until departure.
The skewer format eliminates the mess problem that makes full caprese salad impractical in a car. Each skewer is self-contained and requires only one hand to eat. Pack five to six skewers per person for a proper serving. Keep in the cooler and consume within four hours of preparation.
This is one of those road trip snacks and meals ideas that feels luxurious for the effort involved. Fresh mozzarella is available at most grocery stores and the total ingredient cost for four servings is under ten dollars. The reaction when you pull these out at a rest stop is always positive, especially after hours of gas station food options.
15. Sunflower Seed Butter Rice Cakes Road Trip Snacks
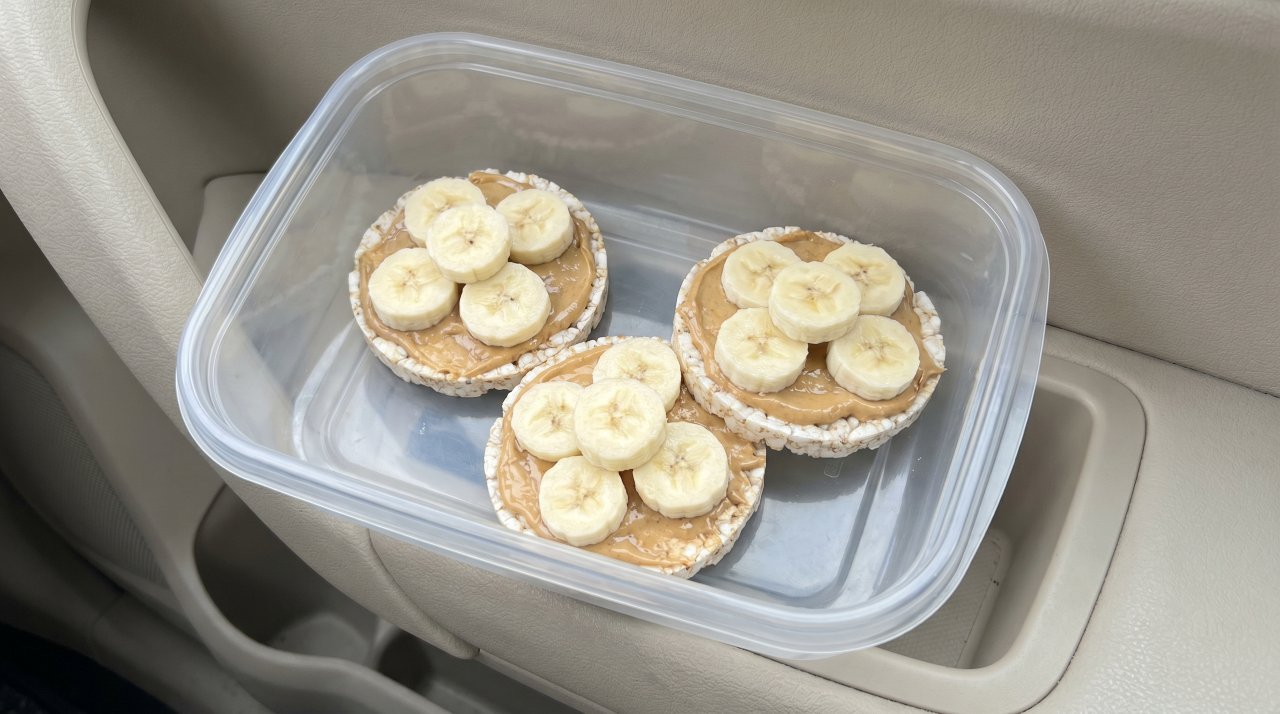
Rice cakes with sunflower seed butter are the lightest road trip snack option on this list and the best choice for anyone managing a sensitive stomach on long drives. Rice cakes are easily digestible, low in fat, and satisfying in a very gentle way. Sunflower seed butter is nut-free, creamy, and has a mild nutty flavor that pairs well with sliced banana or honey.
Pre-spread the sunflower seed butter on rice cakes at home and store each one in a flat container with parchment between layers. Top with sliced strawberry or banana when ready to eat. The rice cakes will soften slightly over time but remain enjoyable for several hours.
This snack works well for children prone to car sickness since it is bland enough not to trigger nausea and light enough to eat without feeling heavy. Adults with a preference for lighter eating over long drives will also appreciate having a non-dense option available alongside heavier snacks.
16. Mini Charcuterie Box Road Trip Meals
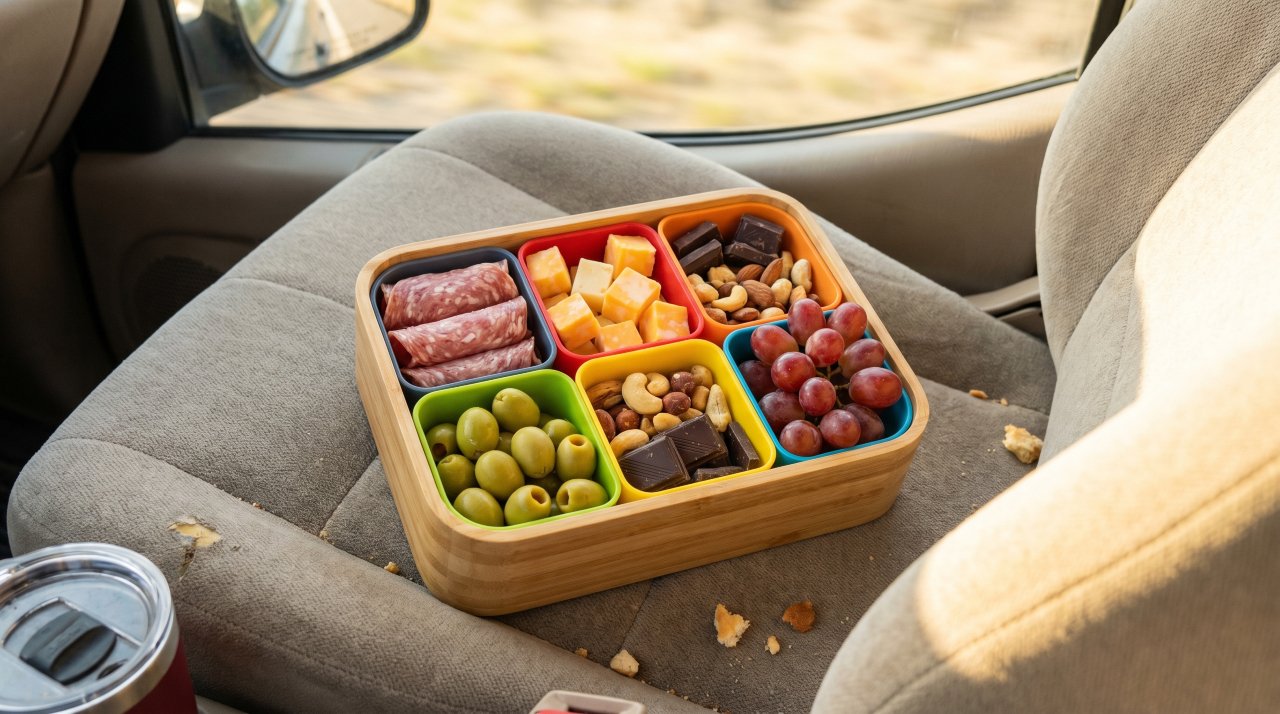
A mini charcuterie box takes the cheese and crackers concept to its logical conclusion. Use a divided food storage container to organize salami, hard cheese cubes, olives, grapes, nuts, and dark chocolate squares into neat compartments. Each section is accessible individually so there is no mixing and no mess.
This is the most visually impressive road trip meal option and takes about 10 minutes to assemble the night before. Use a bento-style box with a secure locking lid. The variety means every person in the car can graze at their own pace and find something they enjoy.
Cold cuts like salami and prosciutto keep safely at room temperature for two hours. With an ice pack in the cooler they keep for six to eight hours. The dark chocolate in the final compartment serves as a satisfying end to the meal that feels like a dessert course without requiring anything additional.
17. Smoothie Pouches Road Trip Snacks and Meals
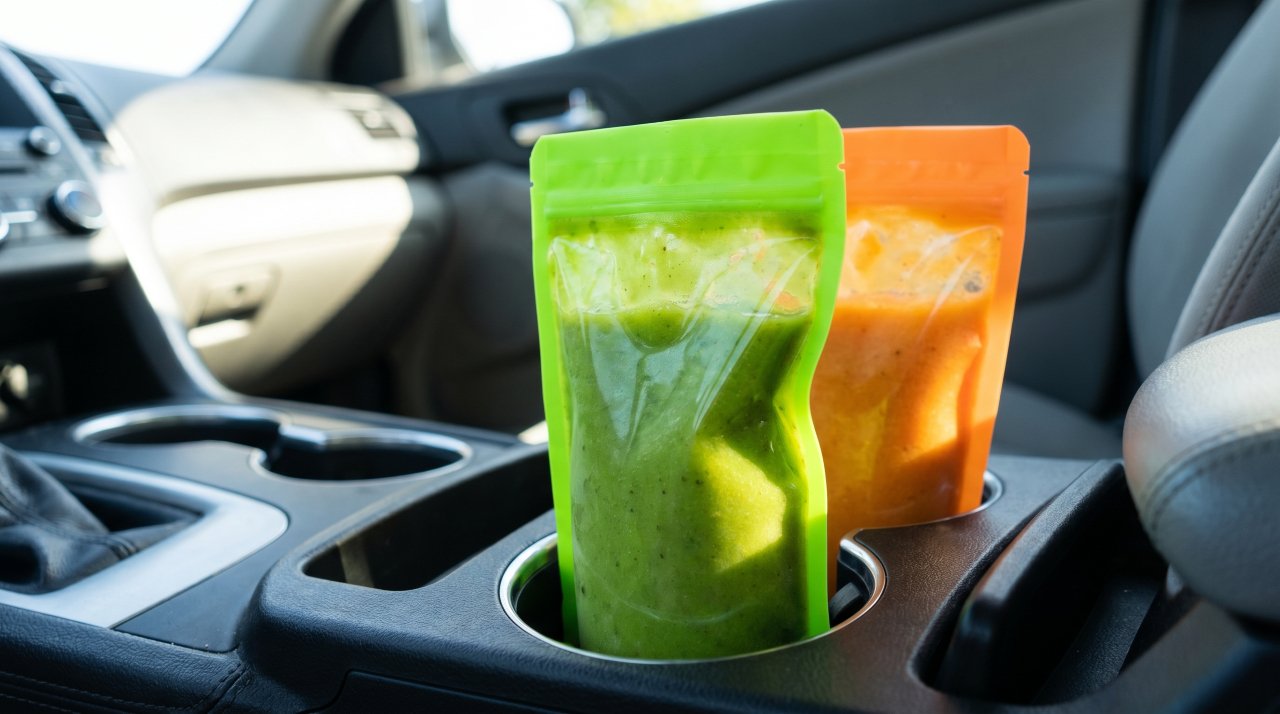
Squeezable smoothie pouches are not just for toddlers. The resealable pouches from brands like Munk Pack, Bumble Bee, or Koia deliver a full serving of fruit and protein in a spill-proof package that requires no cup, spoon, or preparation. Keep them cold in the cooler and pull one out when fruit cravings hit mid-drive.
Koia makes protein-enhanced versions with added plant protein that turn a standard fruit pouch into a functional meal replacement. Munk Pack oatmeal pouches are a thicker option that function more like a meal. Both are available at most Walmart, Target, and natural food stores.
These are the most practical road trip snacks and meals option for solo drivers who need to eat without taking their attention off the road. The squeezable pouch requires one hand and zero looking down. The sealed format means spills are nearly impossible even on bumpy roads or sudden stops.
18. DIY Snack Box Road Trip Snacks
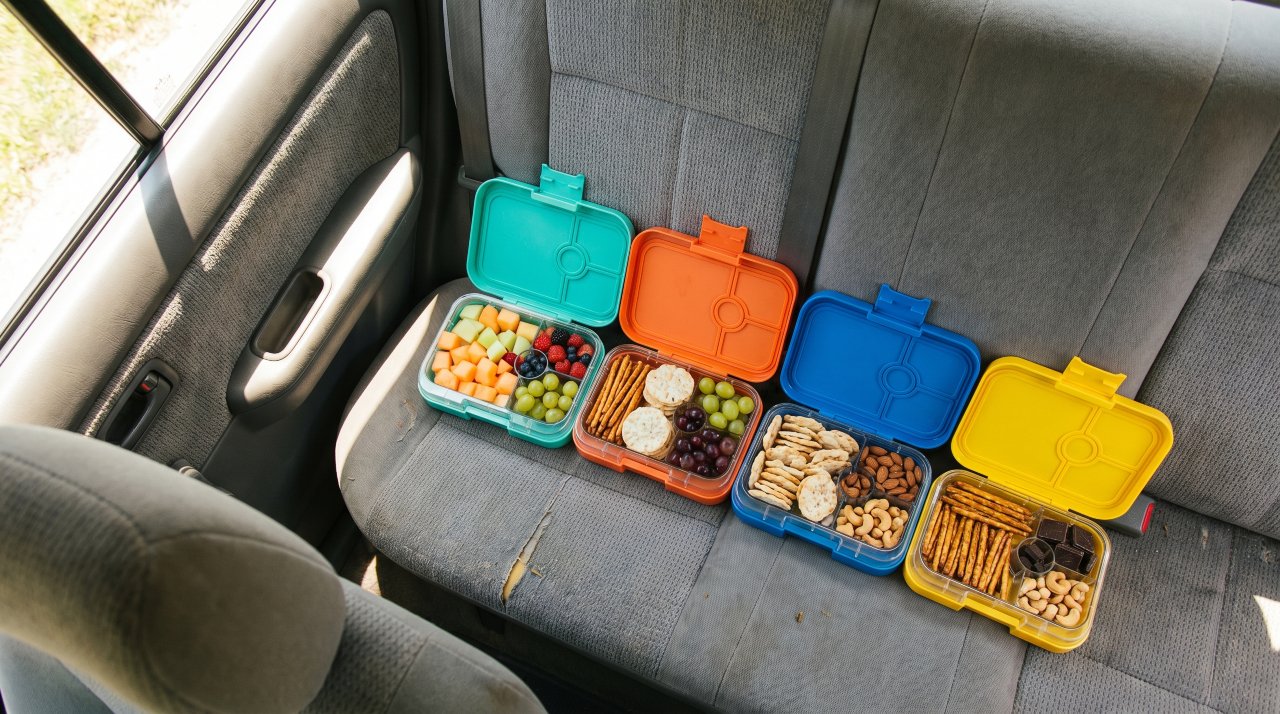
The DIY snack box is the ultimate customizable road trip food strategy. Assign each person their own divided container and let them fill it with their preferred combination of snacks before departure. One section gets trail mix, one gets fruit, one gets crackers, one gets chocolate. Each person is responsible for their own container.
The psychological ownership of having your own snack box changes road trip eating dynamics completely. Children stop asking for everyone else’s food because they have their own selection. Adults stop grazing mindlessly because the portion is defined. The snack box signals that each item needs to last the full drive, not just the first hour.
Use containers with four to six divided compartments. Fill them the night before and refrigerate any items that need it. Pull all boxes out at the same time when the drive begins. The ritual of opening your snack box in the first hour of a long road trip is one of those small pleasures that makes the whole journey feel organized, intentional, and genuinely fun.
Road Trip Snacks and Meals Make the Drive Part of the Adventure
The difference between a great road trip and a miserable one often comes down to food. These 18 road trip snacks and meals ideas cover every distance, every appetite, and every level of preparation effort. Pack a cooler, prep the night before, and treat the food planning as part of the adventure rather than an afterthought. The best road trips are the ones where the food is as good as the destination waiting at the end.
Japan is not a country that eases you in gently. It hits hard from the first morning. The trains run to the second. The food stops you mid-bite. The temples sit surrounded by cedar forests that have been growing for a thousand years. First-time visitors often say they need a second trip before they have even finished the first one. This guide covers 18 of the most unforgettable things to do in japan, chosen for how far they sit from ordinary. Some are famous landmarks. Some are the kinds of places that take minutes to reach but months to forget.
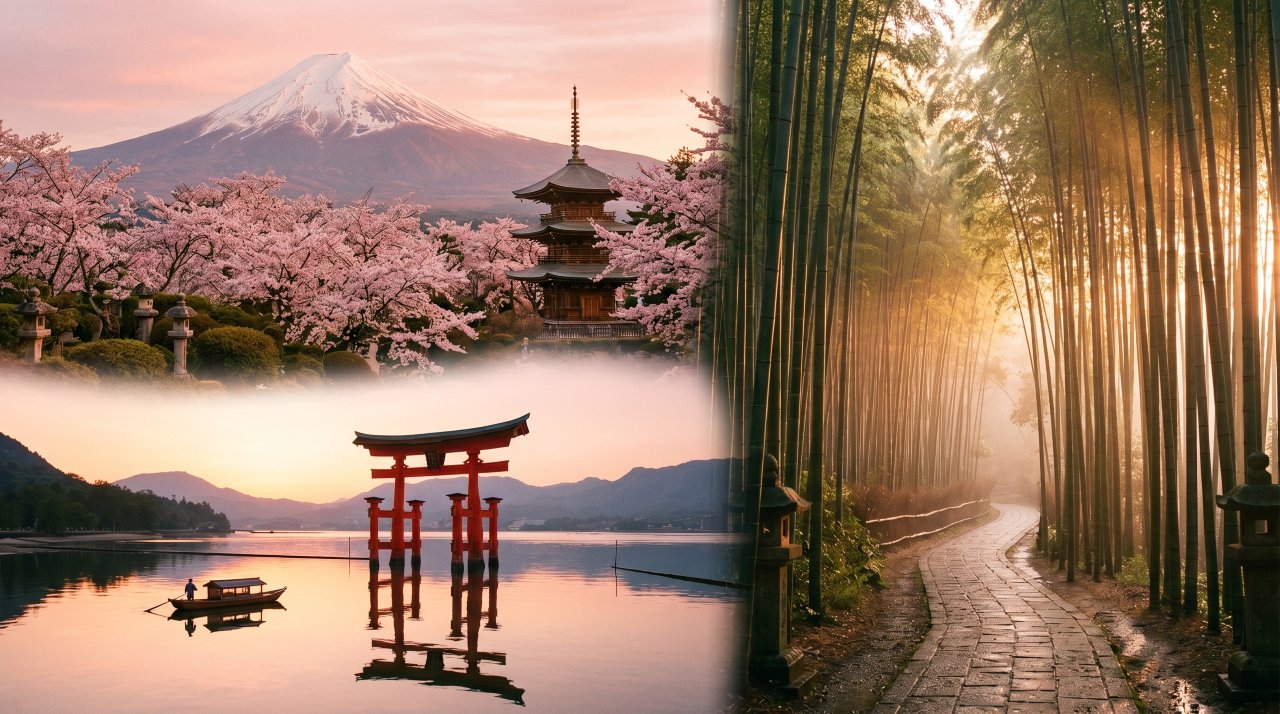
1. See Mount Fuji at Sunrise in Japan
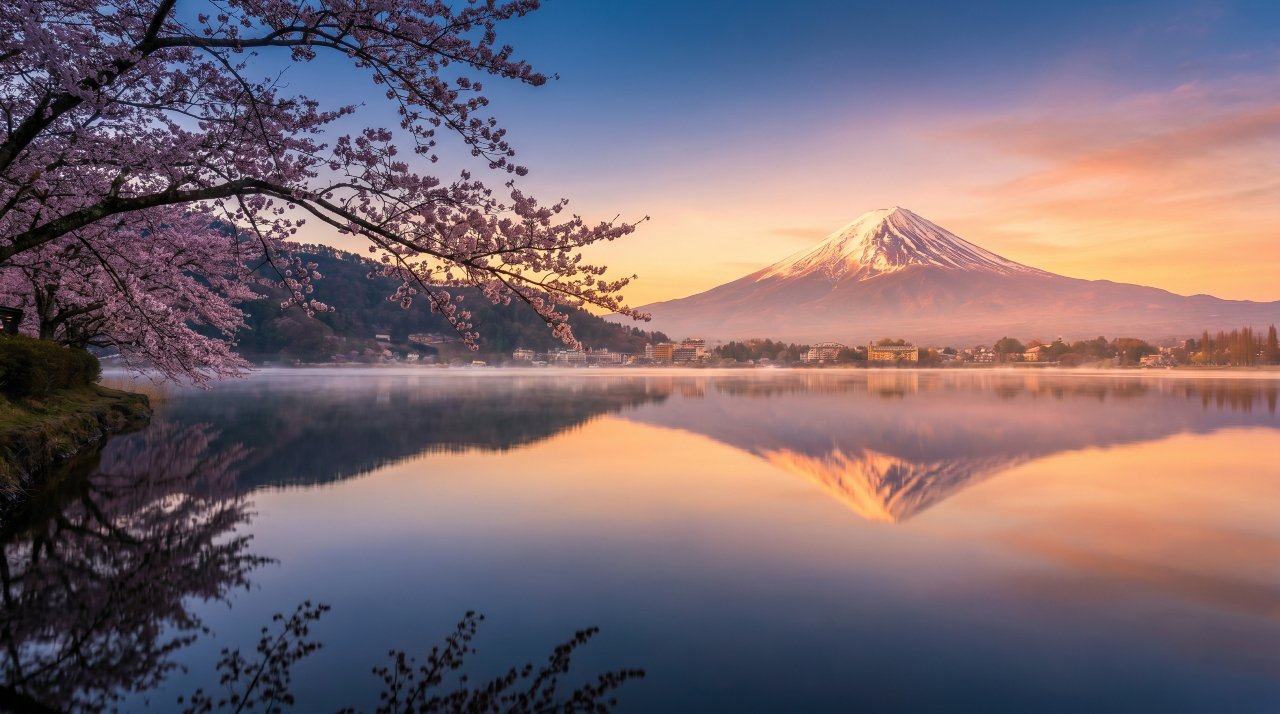
Mount Fuji is the highest mountain in Japan at 3,776 meters. It is a stratovolcano and has not erupted since 1707. The mountain is visible on clear days from Tokyo, over 100 kilometers away.
The classic view from Lake Kawaguchiko on the north side puts the mountain above the water and the town of Fujikawaguchiko below. Arrive before dawn. The sky transitions from deep indigo to orange to pale gold as the sun crests the horizon behind you and hits the snow cap.
Climbing season runs from July to September. The summit view at dawn from inside the crater rim is one of the most demanding and most rewarded things to do in japan.
2. Walk Through Arashiyama Bamboo Grove in Japan
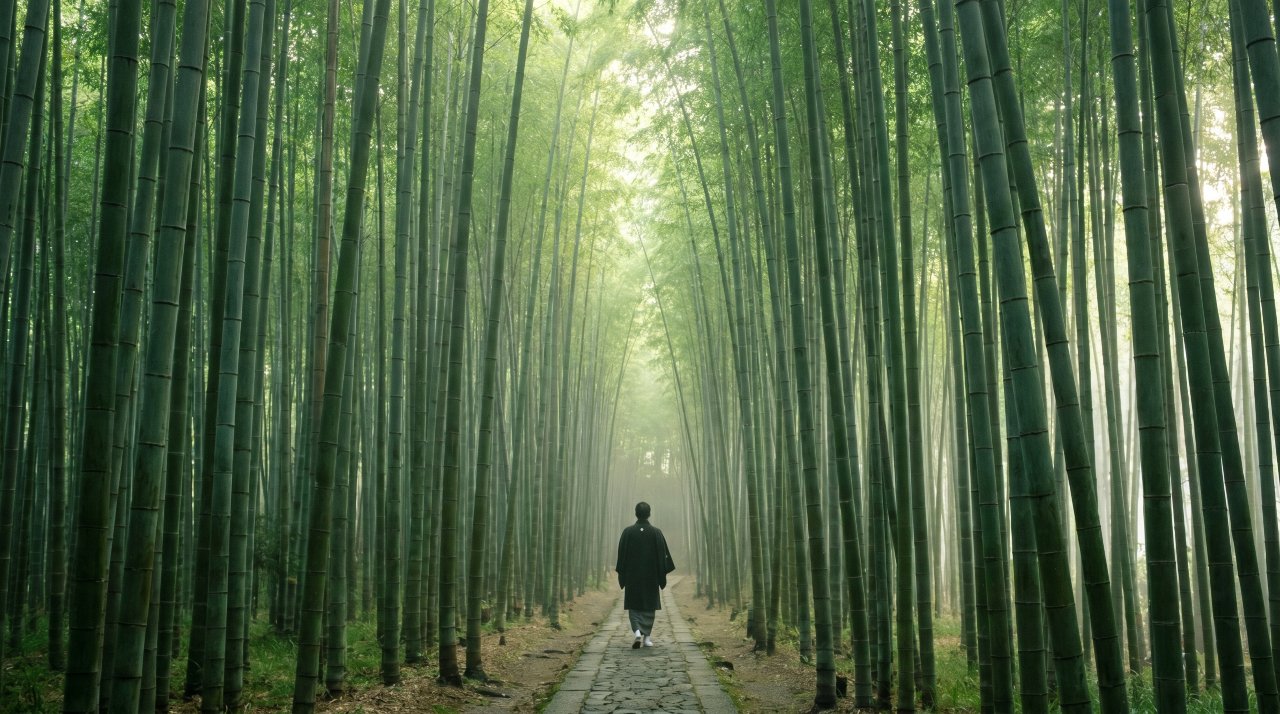
The Arashiyama bamboo grove sits on the western edge of Kyoto. Towering stalks rise 15 to 20 meters on both sides of a narrow stone path. The canopy filters the light into a diffused green glow.
Go before 7am. Tour groups arrive by 9am and the grove becomes a traffic jam. In the early morning, the sound of bamboo moving in the wind is the only noise.
The grove connects to the Tenryu-ji garden at one end and the Okochi Sanso villa at the other. Both are worth walking into after the grove itself. This is one of the most visually distinctive things to do in japan.
3. Visit Fushimi Inari Shrine in Kyoto, Japan
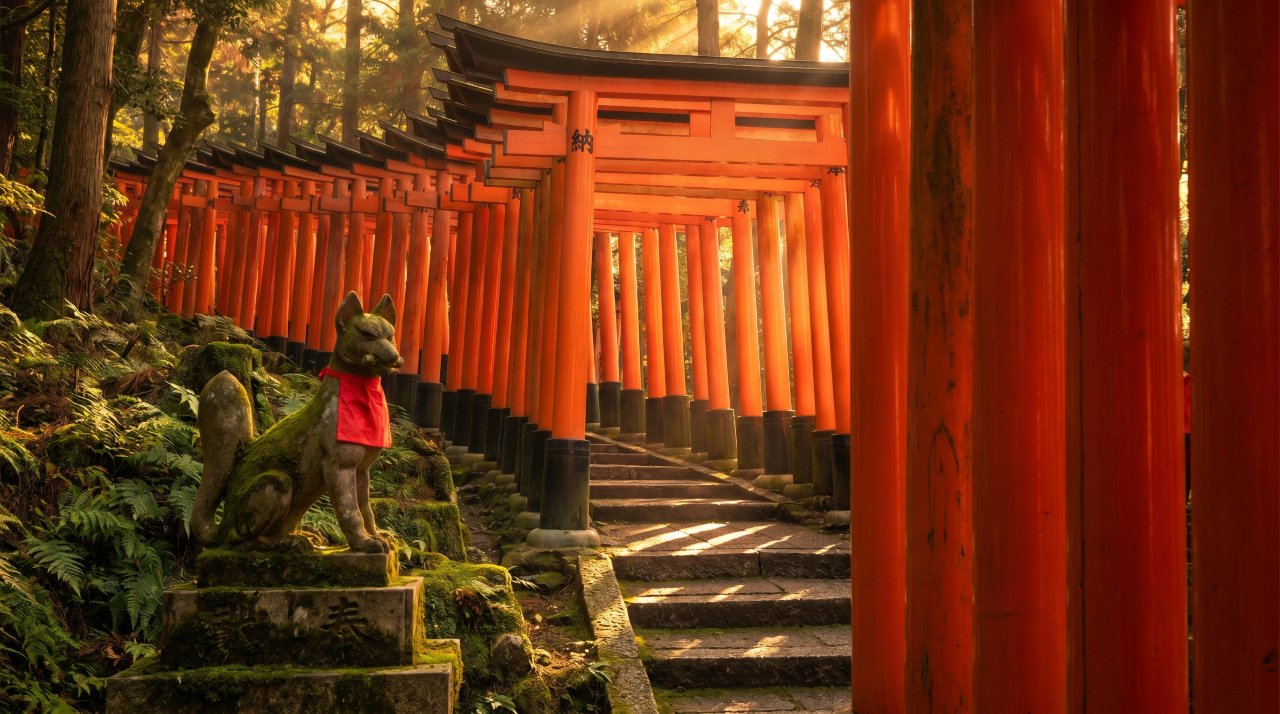
Fushimi Inari is the main shrine of the god Inari in Japan. It sits at the base of Inari Mountain in southern Kyoto. The trail up the mountain passes through thousands of bright vermillion torii gates donated by businesses and individuals over the centuries.
The full hike to the summit and back takes about two hours. Most visitors only walk the lower gates and turn back. The upper sections are quieter, older, and more atmospheric.
Start before 7am. The early light through the gates turns everything gold. The fox statues that guard the shrine are the messengers of Inari. Fushimi Inari is one of the most photographed things to do in japan and the photographs do not exaggerate it.
4. Experience a Traditional Tea Ceremony in Japan
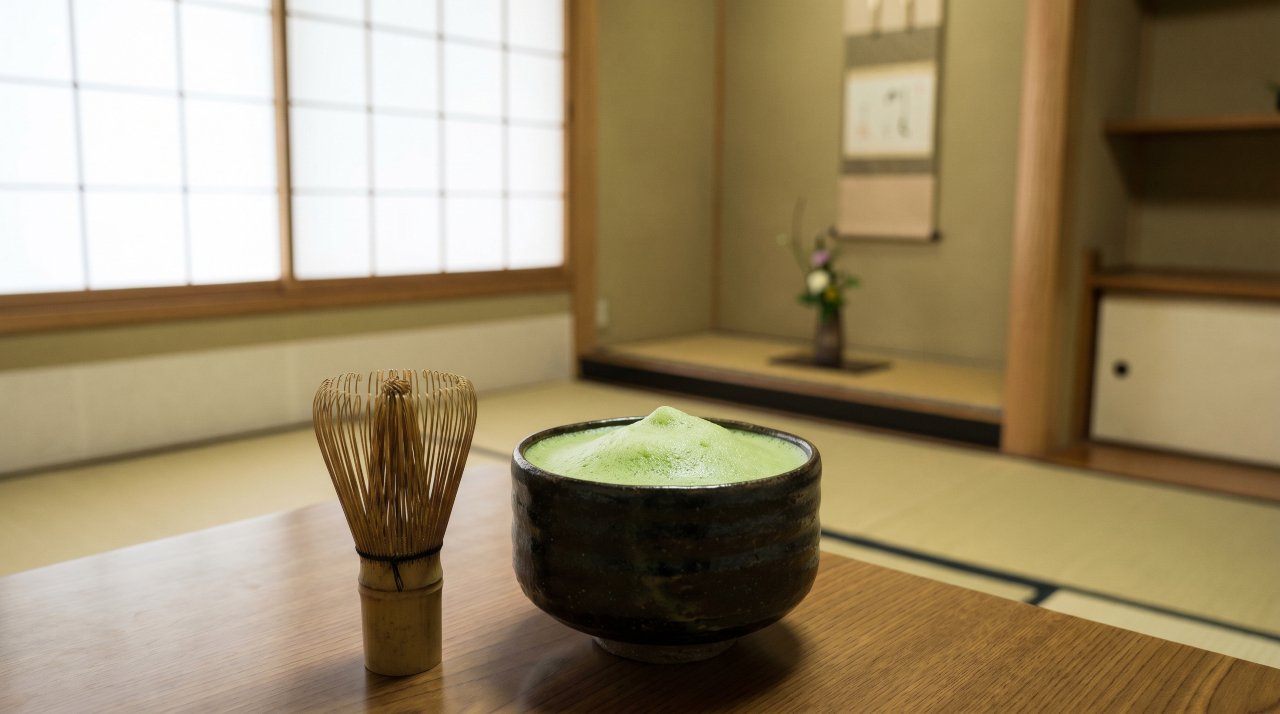
The Japanese tea ceremony is called Chado, the way of tea. It is a choreographed ritual for preparing and drinking matcha green tea in a specific room designed for the purpose. Every gesture has meaning.
Participating rather than watching changes everything. The bowl is heavy and warm. The matcha is thick and slightly bitter. The silence in the room is deliberate. Time slows down in a way that is hard to explain and easy to feel.
Kyoto and Nara have the most authentic options. Look for ceremonies in actual tea houses attached to temple gardens rather than tourist centres. This is one of the most culturally rich things to do in japan for first-time visitors.
5. Explore Kyoto’s Gion District in Japan
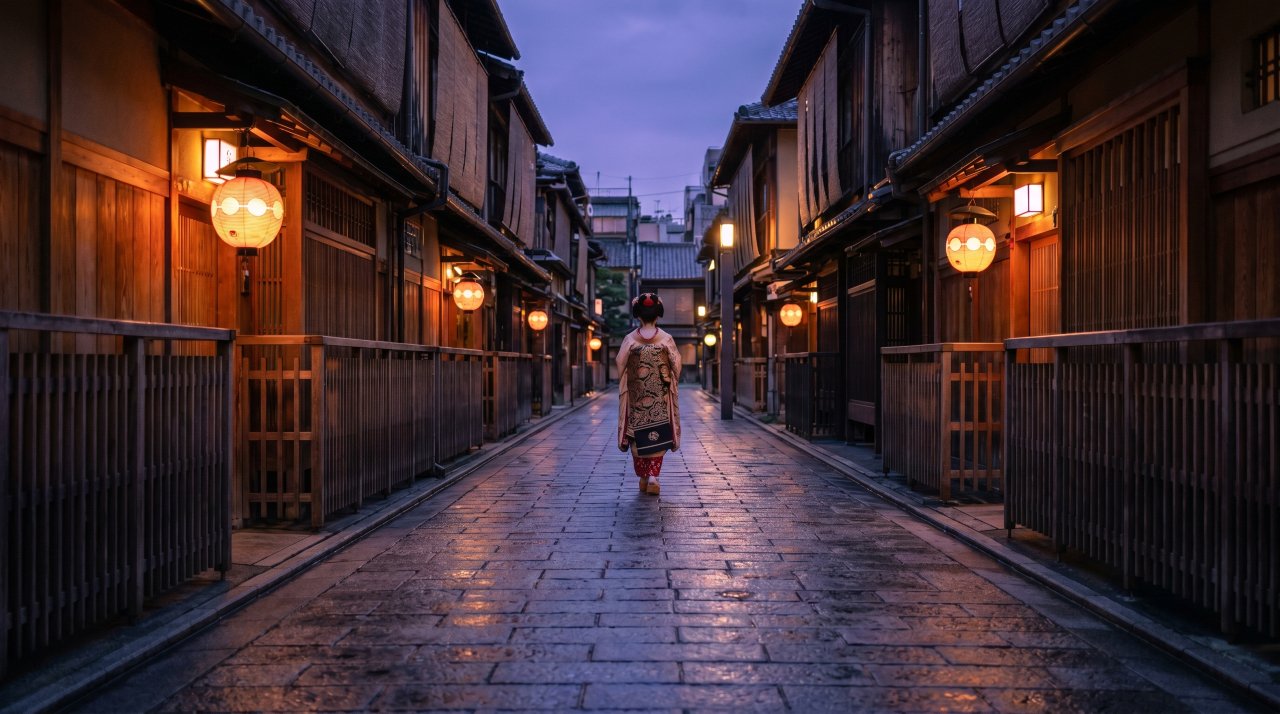
Gion is Kyoto’s most famous geisha district. The streets here look like Japan as imagined before you arrive. Wooden machiya townhouses line narrow lanes. Stone-paved Hanamikoji Street runs through the center of the district.
Spotting a geiko or maiko in full dress is possible but not guaranteed. They move quickly between appointments in the late afternoon. The best chance is standing quietly near the tea house entrances between 5pm and 7pm.
Gion is also home to Yasaka Shrine at its eastern end. The shrine stays open all night and is especially atmospheric during the Gion Matsuri festival in July. Walking Gion is one of the most memorable things to do in japan after dark.
6. Ride the Shinkansen Bullet Train Across Japan
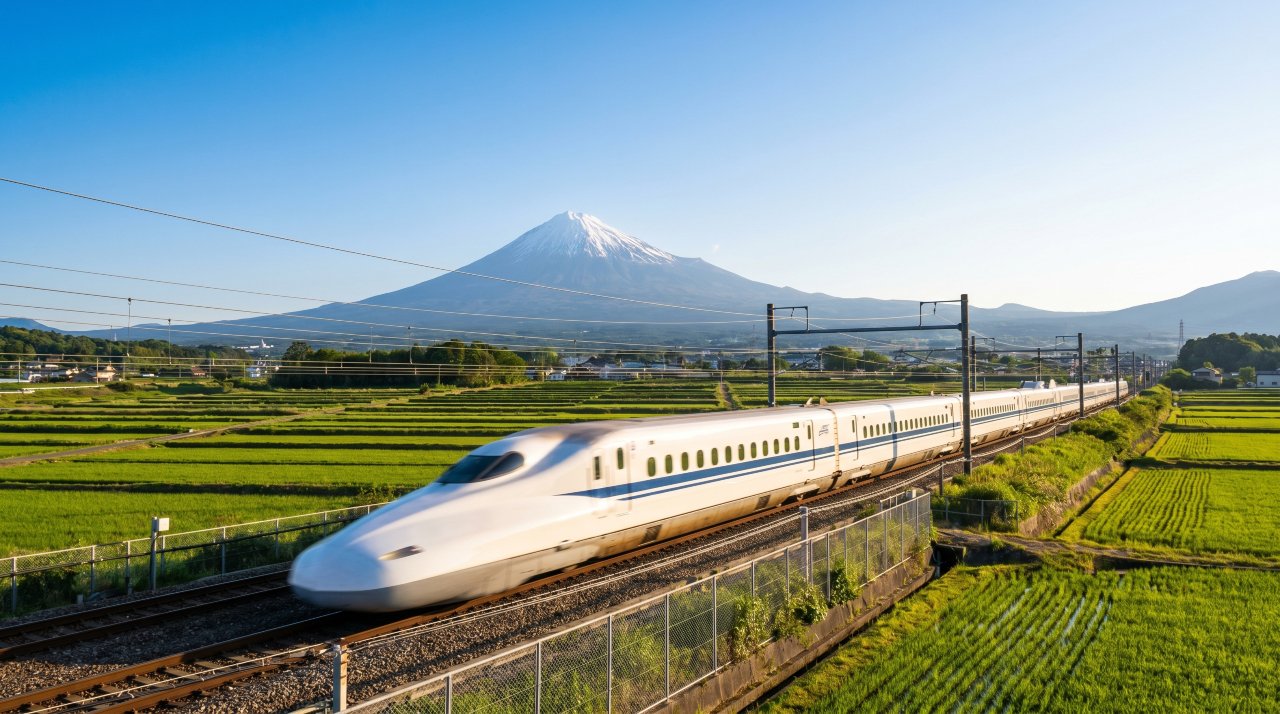
The Shinkansen network connects most of Japan’s major cities at speeds between 240 and 320 kilometers per hour. The Tokaido Shinkansen between Tokyo and Osaka is the busiest high-speed rail line in the world.
Riding it is one of the most effortlessly enjoyable things to do in japan. The trains arrive and depart to the second. The seats are wide and clean. Mount Fuji appears on the left side heading west from Tokyo, between Shin-Fuji and Shin-Kobe stations, on clear mornings.
Buy an ekiben bento box from the station before boarding. Eating your bento at 300km/h while watching rice fields pass in a blur is a specifically Japanese pleasure that nothing else replicates.
7. Wander Nara and Feed the Sacred Deer in Japan
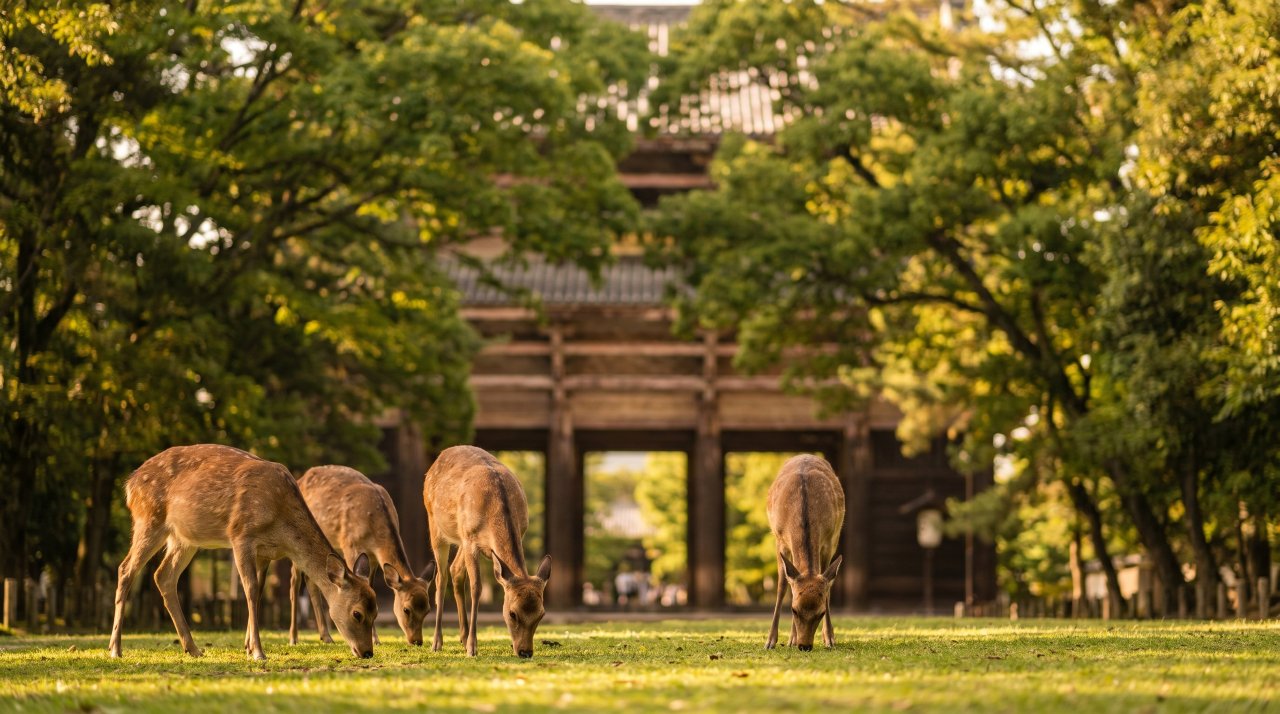
Nara was Japan’s first permanent capital. Today it is most famous for its approximately 1,300 wild sika deer that roam freely through Nara Park. The deer are considered messengers of the gods in the Shinto tradition and are designated national treasures.
They bow back when you bow at them. Deer crackers sold at park stalls give you immediate and enthusiastic attention. Todai-ji Temple at the top of the park houses the largest bronze Buddha statue in Japan inside the world’s largest wooden building.
Nara works as a day trip from Kyoto or Osaka. Arriving early gives you the deer without the school groups. Feeding deer in a thousand-year-old park is among the most unexpectedly joyful things to do in japan.
8. Eat Your Way Through Dotonbori in Osaka, Japan
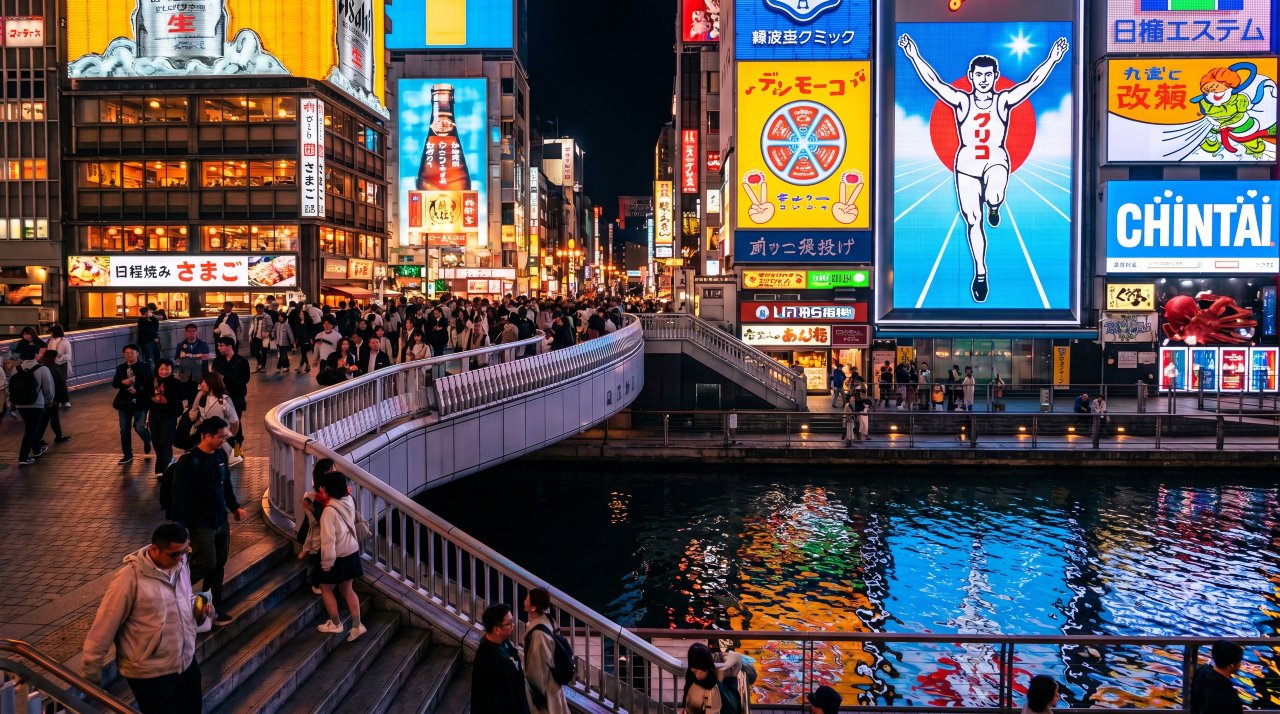
Dotonbori is the food and entertainment canal district of Osaka. The street runs along the Dotonbori canal and is lined with neon signs, giant mechanical crabs, and restaurants serving the food that Osaka is famous for throughout japan.
Takoyaki is the essential start. The octopus balls are made fresh in front of you on a gridded iron plate. Okonomiyaki, ramen from one of the basement restaurants, and kushikatsu deep-fried skewers follow logically.
Go at night when the neon reflects in the canal and the street is at its most alive. Osaka’s food culture is the strongest argument that Osaka should be on every Japan itinerary regardless of how many days you have.
9. Stay in a Traditional Ryokan in Japan
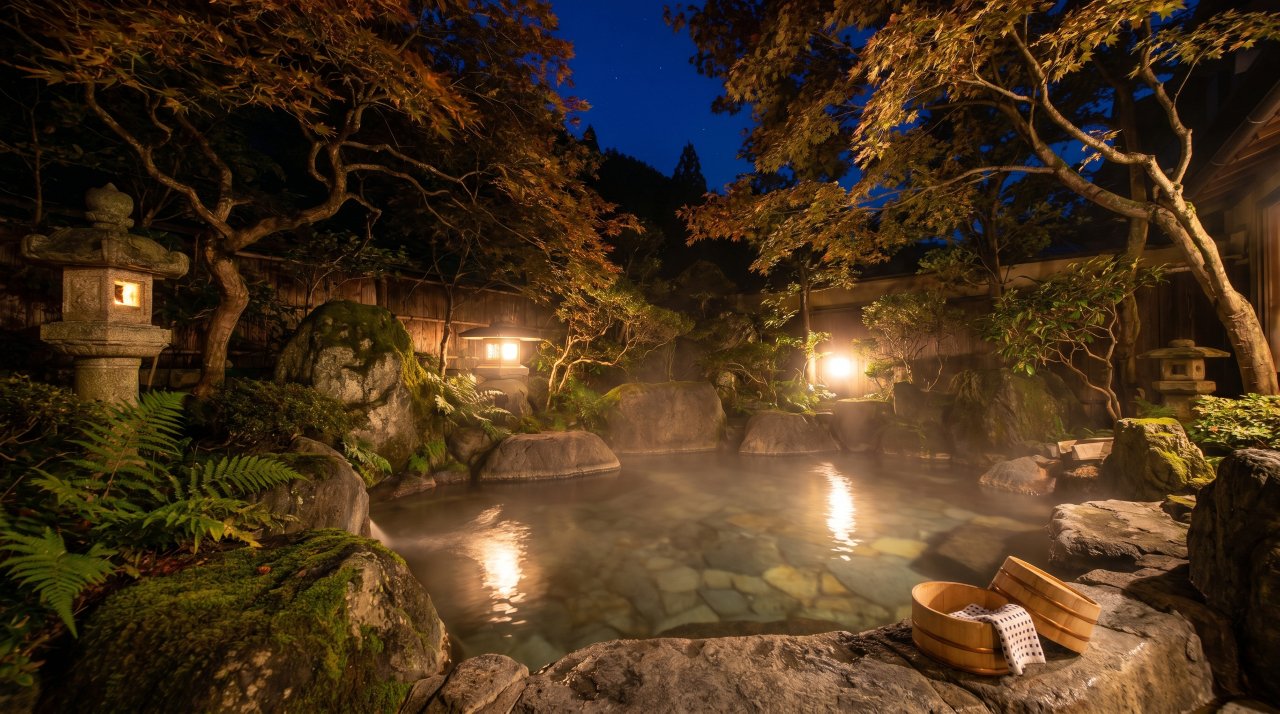
A ryokan is a traditional Japanese inn. Rooms have tatami mat floors, futon bedding rolled out at night, and shoji screen windows. The evening meal, kaiseki, is served in the room or a communal dining area in multiple courses of seasonal Japanese cuisine.
The onsen, hot spring bath, is central to the ryokan experience. Bathing in a rotenburo, outdoor hot spring, surrounded by a Japanese garden at night is one of the most distinctly japanese things to do that no hotel replicates.
Hakone, Kinosaki Onsen, and Kurokawa Onsen are the most accessible ryokan destinations from Tokyo and Osaka. One night in a good ryokan changes how you think about hospitality.
10. See Cherry Blossoms in Full Bloom in Japan
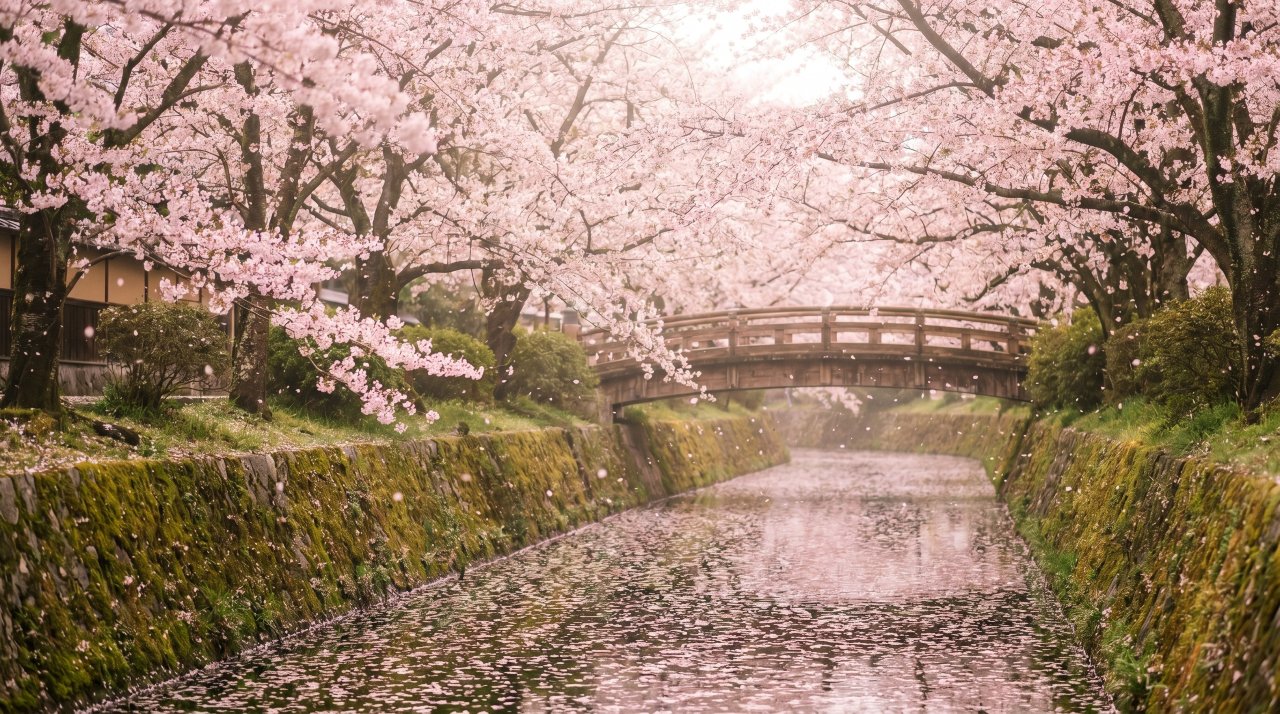
Sakura, cherry blossom season, is the most celebrated event in the Japanese calendar. Hanami, flower viewing, brings everyone outside to parks and riverbanks to sit under the trees with food and drinks. The blossoms typically peak in late March to early April in Tokyo and Kyoto.
The Philosopher’s Path in Kyoto follows a canal for two kilometers under a canopy of cherry trees. Maruyama Park in Kyoto has a famous weeping cherry tree that is lit at night. Tokyo’s Shinjuku Gyoen and Chidorigafuchi are among the best spots in the capital.
Peak bloom lasts about one week per location. Timing your japan trip around sakura season requires booking six months in advance.
11. Visit Hiroshima and Miyajima Island in Japan
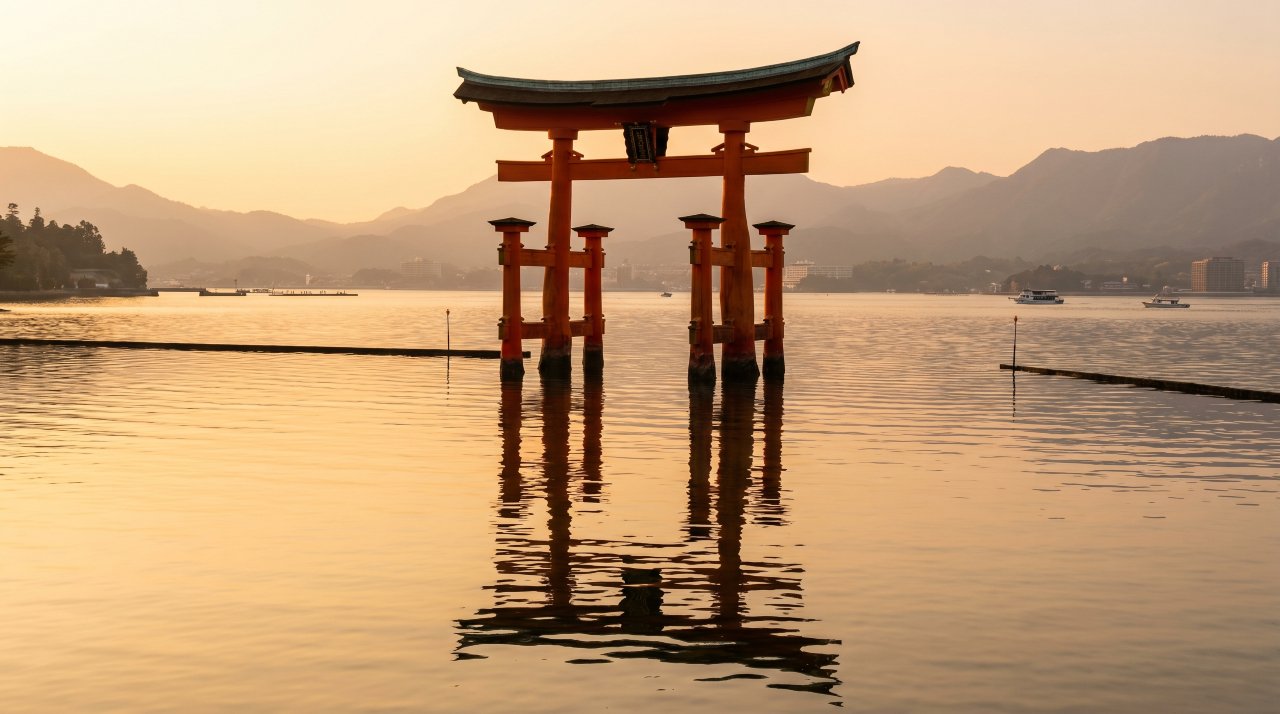
Hiroshima carries its history with honesty and without bitterness. The Peace Memorial Park and Museum provide one of the most important historical experiences in japan. The A-Bomb Dome, the only structure left standing near the hypocenter, stands preserved exactly as it was on August 6, 1945.
Miyajima Island sits 30 minutes by ferry from Hiroshima. The Itsukushima Shrine’s floating torii gate appears to stand in the sea at high tide. The gate is one of Japan’s most iconic images.
Deer roam freely on the island as they do in Nara. Mount Misen above the shrine offers a cable car ride and a summit view over the Seto Inland Sea on clear days.
12. Explore Tokyo’s Shibuya Crossing in Japan
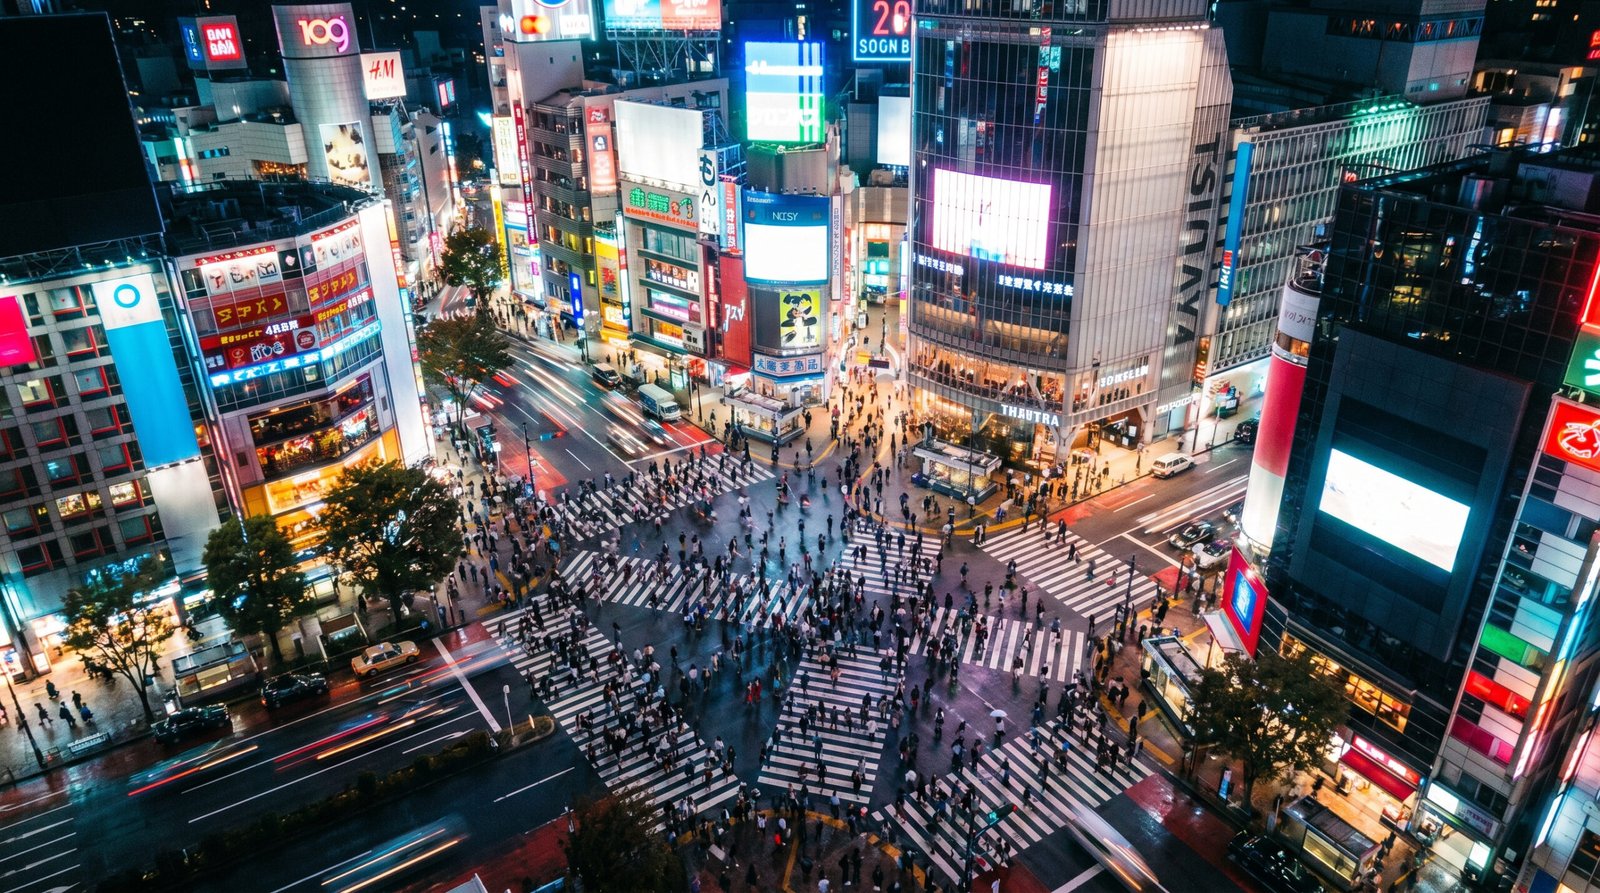
Shibuya Crossing is the busiest pedestrian crossing in the world. When the lights change, up to 3,000 people cross simultaneously from all directions. The choreography is complete order made to look like controlled chaos.
Watch from the Starbucks on the second floor of the Shibuya Scramble Square building. Better views come from the Mag’s Park roof of the 109 building and from the Shibuya Sky observation deck on the 46th floor of Scramble Square.
Crossing it yourself is a different experience from watching it. Both are essential things to do in japan for anyone visiting Tokyo. At night, the neon and the crowd create an energy that represents the city better than any single image.
13. Hike the Kumano Kodo Pilgrimage Trail in Japan
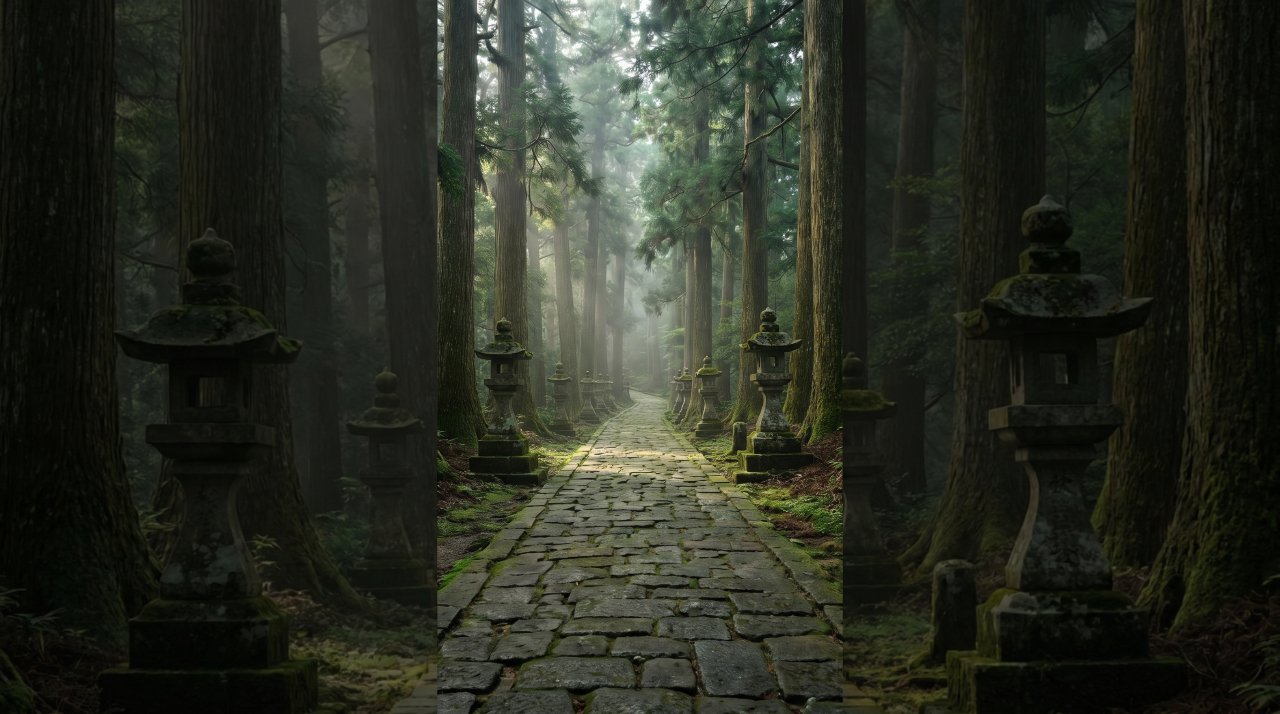
The Kumano Kodo is a network of ancient pilgrimage routes in the Kii Peninsula of Japan. They have been walked for over 1,000 years by everyone from commoners to emperors. The routes connect three Grand Shrines deep in forested mountains.
The Nakahechi route from Tanabe to Kumano Hongu Taisha is the most accessible section for visitors. Two to three days of walking through cedar forest, past stone lanterns and small wayside shrines, gives you a side of japan that the Shinkansen never shows.
Onsens are positioned along the route for nightly recovery. This is one of the most rewarding and underrated things to do in japan for those willing to walk for it.
14. Attend a Sumo Tournament in Japan
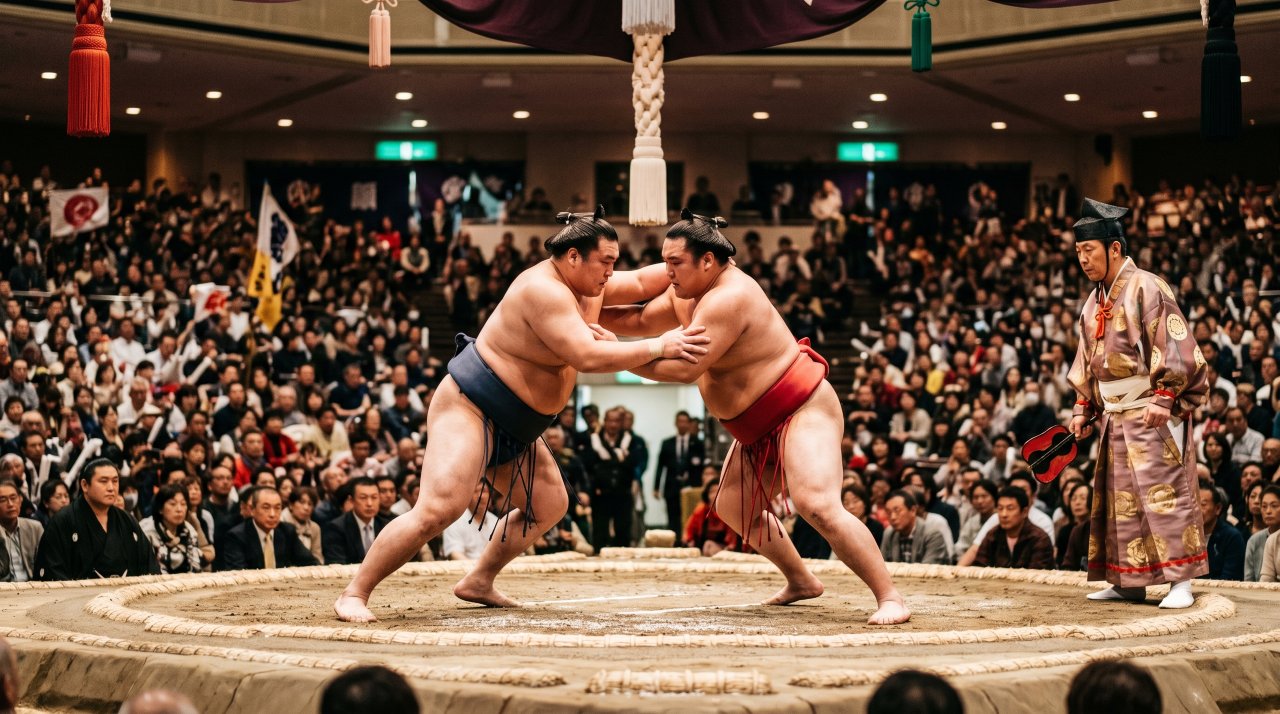
Sumo is Japan’s national sport. Six grand tournaments take place each year in Tokyo, Osaka, Nagoya, and Fukuoka. Each tournament runs for 15 days. The first and last days have the best atmosphere.
The matches happen fast. Each bout is decided in seconds. The ceremony and ritual surrounding each match, the salt throwing, the stamping, the referee’s calls, takes far longer than the fight itself.
Tokyo hosts three of the six annual tournaments at Ryogoku Kokugikan. Attending a full day of matches from the cheap upper seats gives you the full arc of the event from junior wrestlers in the morning to yokozuna in the final hours. This is one of the most culturally specific things to do in japan.
15. Explore the Deer Island of Itsukushima in Japan
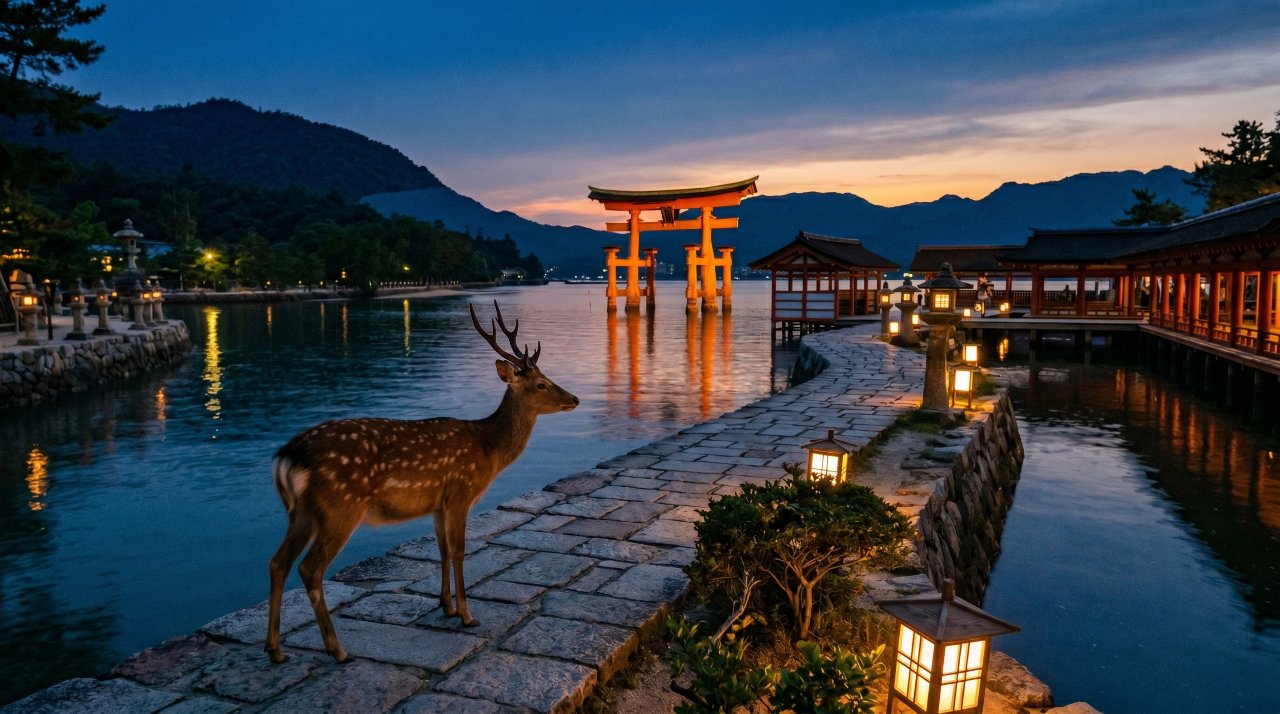
Miyajima Island operates on the belief that no births or deaths are permitted on the island. Pregnant women and the seriously ill are taken to the mainland. The island’s sacred status shapes everything about how it feels to be there.
Beyond the floating torii gate and the Itsukushima Shrine, the island has a five-story pagoda, a Noh stage, and forested hiking trails to the summit of Mount Misen. Momiji manju, small maple-shaped cakes filled with red bean paste, are the island’s specialty food.
Staying overnight on the island after the day tourists leave is one of the most peaceful experiences available in japan. The deer wander the empty shrine paths at dusk and the gate glows in the dark water.
16. Visit the Snow Monkeys at Jigokudani in Japan
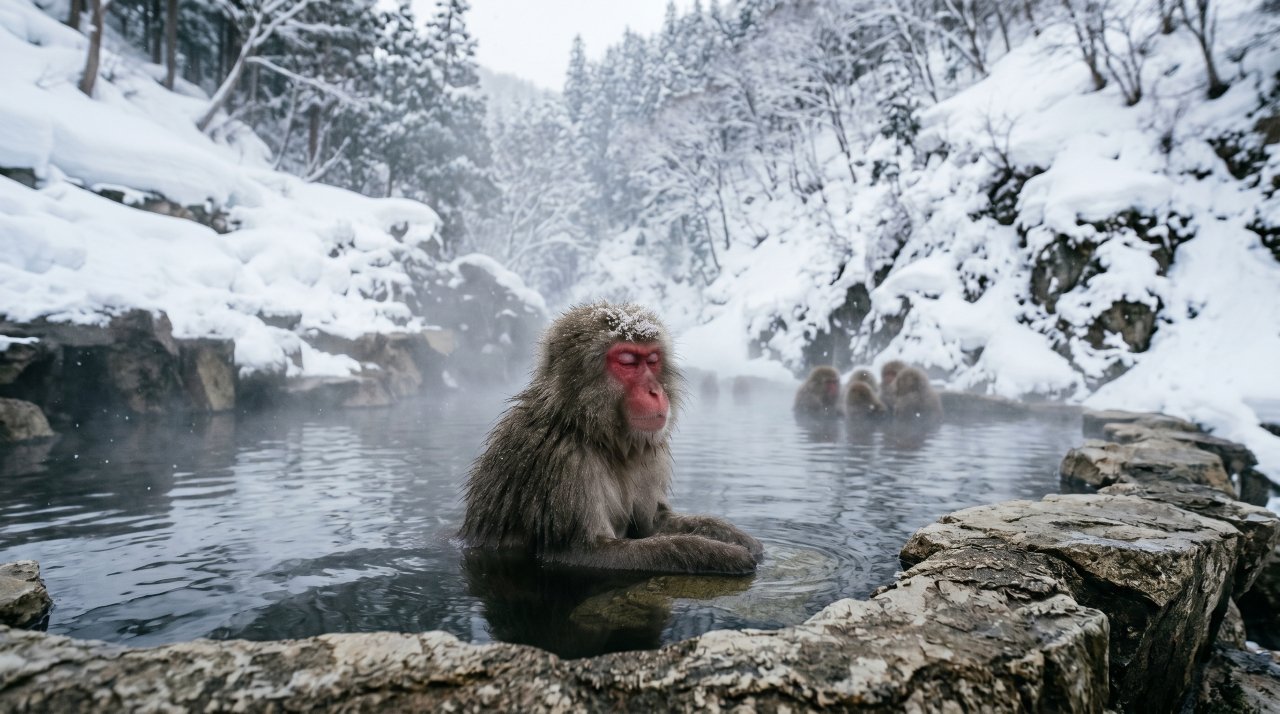
The Japanese macaques at Jigokudani Monkey Park in Nagano sit in natural hot spring pools through the winter months. The park sits at 850 meters elevation in a snow-covered valley. The walk in from the car park takes 30 minutes through forest.
The monkeys ignore humans completely. They sit in the steaming water with expressions of total contentment. Babies cling to their mothers’ backs. Adults groom each other on the rocks surrounding the pool.
This is one of the most inherently photogenic things to do in japan. February is the best month. Snow covers everything and the contrast between the white surroundings and the red-faced monkeys in the steaming blue water is exceptional.
17. Walk Through the Streets of Old Kyoto in Japan
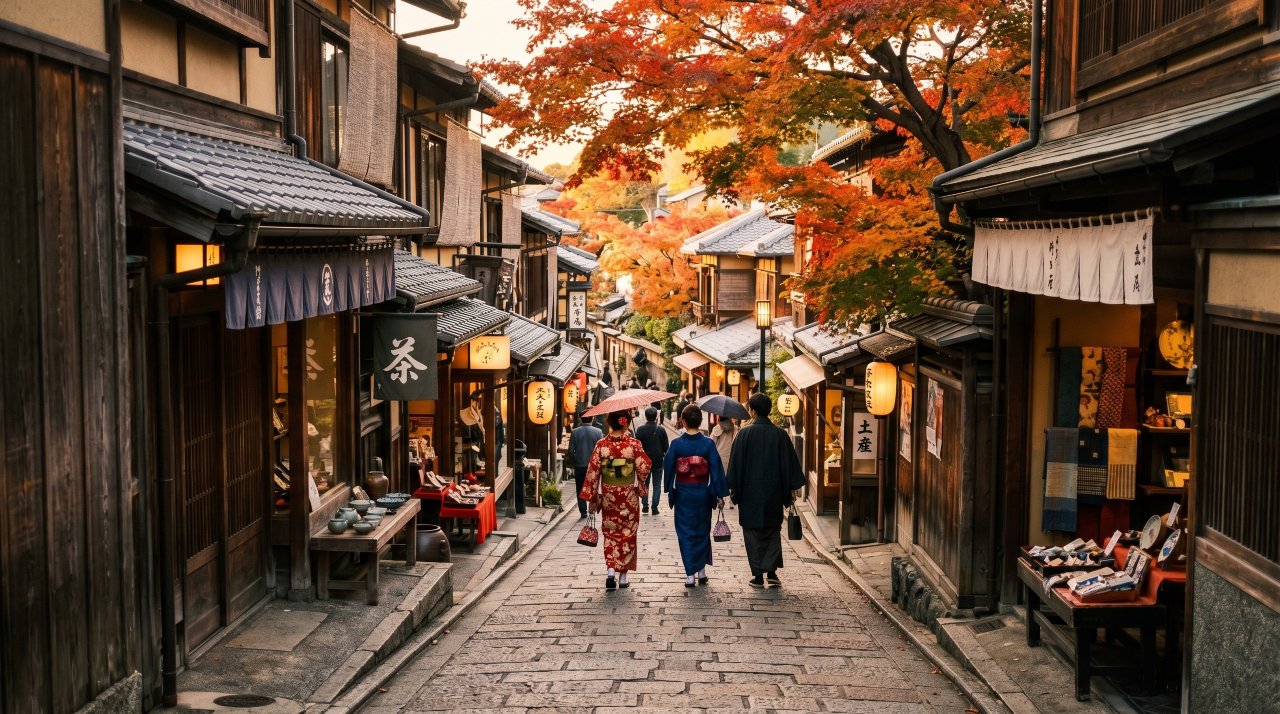
Kyoto has more UNESCO World Heritage sites than any other city in japan. The old city areas of Higashiyama, Gion, and Nishiki Market still run along streets that have not changed their basic pattern in centuries.
Higashiyama’s stone-paved lane, Ninenzaka and Sannenzaka, connects Kiyomizudera Temple at the top to the lower city through a slope of traditional wooden buildings and tea houses. In autumn, maple trees turn deep red and orange along every stone wall.
Visiting Kyoto slowly is the only way to experience it properly. One week in Kyoto touches the surface. People return to Kyoto for the same reason they return to the best books.
18. Watch a Fireworks Festival in Japan
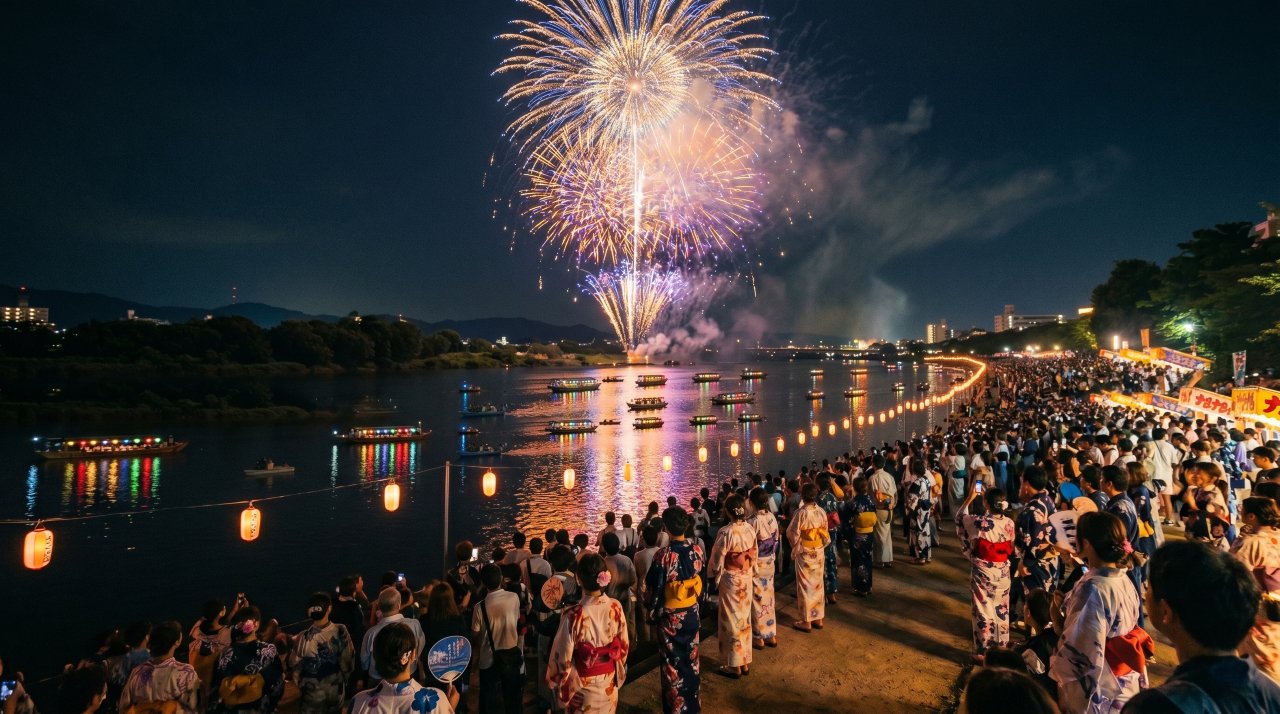
Hanabi, fireworks festivals, are one of the great summer events in japan. The summer season runs from late July through August. Major festivals in Tokyo, Osaka, and Niigata launch tens of thousands of shells over rivers and harbours.
The Sumida River Fireworks Festival in Tokyo is one of the oldest, running since 1733. The Nagaoka Festival in Niigata is considered by many to be the most technically impressive. Crowds reach into the hundreds of thousands at the largest festivals.
Wearing a yukata, a lightweight summer kimono, to a hanabi festival is the local approach. The combination of the yukata, the food stalls, the heat, and 20,000 shells overhead makes for a specifically japanese experience that has no equivalent anywhere else.
Japan does not reveal itself all at once. Every trip ends with a longer list than the one you arrived with. The 18 things in this guide are starting points, not a complete picture. Each one connects to ten more. The snow monkeys lead to Nagano and the Alps. The Kumano Kodo leads to villages that have no English signage and no reason to have any. The cherry blossoms lead to the same places, in a different light, and make them unrecognisable. Go to japan once and you will understand why people keep going back.

The Uecht: Home to Switzerland’s Largest Public Telescope and Planetarium

Studiae: Redefining Modern Student Engagement System